Easy Irish Soda Bread
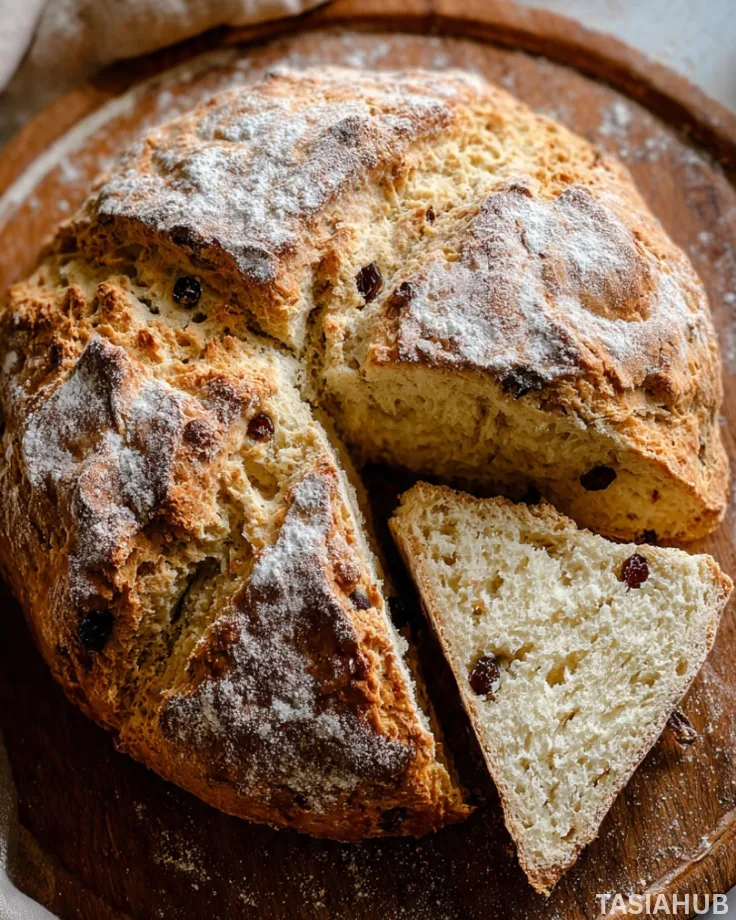
Irish soda bread has a comforting charm that makes it a beloved staple in homes around the world. Unlike yeasted breads that require hours of rising and kneading, this bread comes together quickly, thanks to the magic of baking soda. With a crisp crust and tender interior, it’s the kind of bread that pairs beautifully with butter, jam, or a hearty bowl of soup.
This easy Irish soda bread recipe delivers a loaf that is both traditional and reliably delicious. By sticking to simple ingredients you likely already have in your pantry—flour, baking soda, buttermilk, and a touch of salt—you can create bread that tastes like it came straight from a cozy Irish kitchen. It’s perfect for anyone who wants to enjoy authentic Irish bread without spending hours in the kitchen.
What makes this recipe truly special is the texture. Every bite offers a soft, moist interior contrasted by a golden crust. Unlike some soda breads that can feel dry or crumbly, this loaf stays tender while still maintaining the classic rustic feel. It’s satisfying both on its own and as a complement to meals, making it versatile for breakfast, lunch, or dinner.
Whether you’re baking for St. Patrick’s Day, a family gathering, or simply to enjoy fresh homemade bread, this loaf is a go-to. It’s considered by many the best Irish soda bread you can make at home, combining authenticity, ease, and a comforting, hearty flavor that keeps everyone coming back for more.
Why You’ll Love It
- Quick and fuss-free: Unlike yeasted breads that take hours to rise, this Irish soda bread comes together in just minutes. You can have a warm, homemade loaf ready while your coffee brews.
- Tender, moist interior: Every slice has a soft, moist texture that makes it irresistible. It’s the kind of bread that’s perfect for buttering straight from the oven without falling apart.
- Classic flavor with a rustic touch: This bread stays true to traditional Irish soda bread—simple, hearty, and comforting. The subtle tang from the buttermilk gives it that authentic Irish charm.
- Versatile with meals: From breakfast with jam, to afternoon tea with cheese, or alongside a rich stew, this bread fits seamlessly into any part of your day.
- Perfect for any skill level: Whether you’re a seasoned baker or just starting out, this recipe is forgiving and easy, making it ideal for anyone who wants to enjoy homemade Irish bread without stress.
Ingredient List
For the Bread:
- 4 cups all-purpose flour
- 1 teaspoon baking soda
- 1 teaspoon salt
- 1 ¾ cups buttermilk
Optional Add-Ins (for a little extra flavor):
- 2 tablespoons sugar (if you like a slightly sweet touch)
- 2 tablespoons melted butter (for brushing the top)
- ½ cup raisins or currants
Ingredient Notes
- Flour: I always use all-purpose flour for this—it gives the perfect structure without being too heavy.
- Buttermilk: Don’t skip the buttermilk! It reacts with the baking soda to give that tender, moist Irish soda bread we love.
- Baking soda: Make sure it’s fresh. Old baking soda can make your loaf dense instead of light and airy.
- Optional add-ins: Raisins or currants add a subtle sweetness, but leave them out if you want a classic loaf.
- Butter: Brushing a little melted butter on top gives a beautiful golden crust and a richer flavor—you’ll notice the difference immediately.
Kitchen Equipment Needed
- Large mixing bowl: For combining all your ingredients—my favorite is a sturdy glass bowl that makes stirring easy.
- Measuring cups and spoons: Accurate measurements are key to getting that perfect rise.
- Wooden spoon or spatula: For mixing the dough gently without overworking it.
- Baking sheet or cast-iron skillet: To bake the loaf evenly; I love using a cast-iron skillet for a rustic crust.
- Sharp knife or bench scraper: To score the top of the bread so it rises beautifully.
- Cooling rack: To let the bread cool slightly and keep the bottom from getting soggy.
Instructions
Step 1: Preheat and Prepare
- Preheat your oven to 425°F (220°C).
- Line a baking sheet with parchment paper or lightly grease a cast-iron skillet.
- Pro Tip: Preheating ensures the bread gets a nice rise and a golden crust—don’t skip this step!
Step 2: Mix the Dry Ingredients
- In a large mixing bowl, combine 4 cups of all-purpose flour, 1 teaspoon of baking soda, and 1 teaspoon of salt.
- If you like a slightly sweet bread, add 2 tablespoons of sugar here.
- Whisk together until evenly distributed.
- Pro Tip: Give the baking soda a quick check—fresh soda gives a better rise, so make sure it’s not clumpy or old.
Step 3: Add the Buttermilk
- Make a well in the center of the dry ingredients.
- Pour in 1 ¾ cups of buttermilk.
- Use a wooden spoon or spatula to gently mix the dough until it comes together.
- Pro Tip: Don’t overmix! The dough should be slightly sticky but manageable. Overmixing can make the bread dense.
Step 4: Add Optional Ingredients
- If using raisins or currants, fold them gently into the dough.
- You can also add a little extra butter here if you like a richer loaf.
Step 5: Shape the Loaf
- Turn the dough out onto a lightly floured surface.
- Gently shape it into a round loaf about 7–8 inches in diameter.
- Place the loaf on your prepared baking sheet or skillet.
- Use a sharp knife to score a deep “X” on top of the loaf.
- Pro Tip: Scoring helps the bread expand properly and gives it that classic rustic look.
Step 6: Bake the Bread
- Place the loaf in the preheated oven.
- Bake for 30–35 minutes, until the crust is golden and a skewer inserted in the center comes out clean.
- Optional: Brush the top with melted butter for extra shine and flavor.
Step 7: Cool and Serve
- Remove the bread from the oven and let it cool on a wire rack for at least 15 minutes.
- Slice with a serrated knife for the best results.
- Serve warm with butter, jam, or alongside your favorite stew.
Tips and Tricks for Success
- Measure carefully: Too much flour can make the bread dense, too little can make it sticky. Use a light hand and level off your cups.
- Use fresh baking soda: This is key for a good rise and tender texture.
- Don’t overmix: Stir until the dough just comes together. Overworking it makes the bread heavy.
- Score the top: That “X” not only looks classic but allows steam to escape and the bread to rise evenly.
- Cool slightly before slicing: Letting it rest for at least 15 minutes prevents the bread from crumbling when cut.
Ingredient Substitutions and Variations
- Buttermilk substitute: Use 1 ¾ cups milk plus 1 tablespoon lemon juice or vinegar. Let it sit for 5 minutes to thicken.
- Whole wheat flour: Swap up to half the all-purpose flour for a nuttier, heartier loaf.
- Sweet variations: Add up to ½ cup dried fruit, like raisins, currants, or chopped apricots.
- Savory variations: Mix in 1 cup shredded cheddar, 1 teaspoon herbs like rosemary or thyme, or even chopped green onions.
- Gluten-free option: Use a 1:1 gluten-free flour blend and check baking soda freshness for proper rise.
Serving Suggestions
- I love slicing this Irish soda bread thick, slathering it with butter, and enjoying it alongside a warm cup of tea—it’s pure comfort in every bite.
- Serve toasted slices with jam or honey for a simple breakfast that feels special.
- Pair it with a hearty bowl of stew or soup; the crust is perfect for dipping and soaking up all those flavors.
- Make open-faced sandwiches with cheese, smoked salmon, or avocado for a quick, satisfying lunch.
- For a cozy snack, warm a slice in the oven, spread a little butter, and sprinkle a pinch of cinnamon sugar—it’s a treat everyone will ask for.
Storage and Reheating Instructions
- Room temperature: Store in an airtight container or wrapped in a clean kitchen towel for up to 2 days.
- Freezing: Wrap tightly in foil or plastic wrap and freeze for up to 3 months. Slice before freezing for easier use.
- Reheating slices: Toast or warm in a preheated oven at 350°F (175°C) for 5–10 minutes.
- Refreshing frozen bread: Thaw at room temperature, then lightly toast or warm to restore that fresh-baked texture.
- Avoid the fridge: Refrigeration can dry out the bread faster, so stick to room temperature or freezer storage.
Frequently Asked Questions
What makes Irish soda bread different from regular bread?
Irish soda bread uses baking soda instead of yeast, which means no rising time is needed. It’s quick, easy, and has a tender, slightly tangy texture thanks to the buttermilk.
Can I make this bread without buttermilk?
Yes! You can use regular milk with 1 tablespoon of lemon juice or vinegar per cup. Let it sit for 5 minutes to thicken before mixing it into the dough.
How do I know when the bread is done?
The loaf should be golden brown on top, and a skewer or toothpick inserted in the center should come out clean. It should also sound hollow when tapped on the bottom.
Can I add other flavors or mix-ins?
Absolutely! Try raisins, currants, shredded cheese, or fresh herbs. Just fold them in gently so you don’t overwork the dough.
How should I store leftover bread?
Keep it wrapped at room temperature for up to 2 days, or freeze for up to 3 months. Toast slices to refresh the texture when ready to eat.
Can I make this bread gluten-free?
Yes! Use a 1:1 gluten-free flour blend and follow the same instructions. Fresh baking soda is especially important for proper rise in gluten-free versions.
Did you try this recipe? Let me know in the comments how it turned out!
Easy Irish Soda Bread
Equipment
- Large mixing bowl
- Measuring cups and spoons
- Wooden spoon or spatula
- Baking sheet or cast-iron skillet
- Sharp knife or bench scraper
- Cooling Rack
Ingredients
For the Bread:
- 4 cups all-purpose flour
- 1 teaspoon baking soda
- 1 teaspoon salt
- 1 ¾ cups buttermilk
Optional Add-Ins (for a little extra flavor):
- 2 tablespoons sugar if you like a slightly sweet touch
- 2 tablespoons melted butter for brushing the top
- ½ cup raisins or currants
Instructions
Step 1: Preheat and Prepare
- Preheat your oven to 425°F (220°C).
- Line a baking sheet with parchment paper or lightly grease a cast-iron skillet.
- Pro Tip: Preheating ensures the bread gets a nice rise and a golden crust—don’t skip this step!
Step 2: Mix the Dry Ingredients
- In a large mixing bowl, combine 4 cups of all-purpose flour, 1 teaspoon of baking soda, and 1 teaspoon of salt.
- If you like a slightly sweet bread, add 2 tablespoons of sugar here.
- Whisk together until evenly distributed.
- Pro Tip: Give the baking soda a quick check—fresh soda gives a better rise, so make sure it’s not clumpy or old.
Step 3: Add the Buttermilk
- Make a well in the center of the dry ingredients.
- Pour in 1 ¾ cups of buttermilk.
- Use a wooden spoon or spatula to gently mix the dough until it comes together.
- Pro Tip: Don’t overmix! The dough should be slightly sticky but manageable. Overmixing can make the bread dense.
Step 4: Add Optional Ingredients
- If using raisins or currants, fold them gently into the dough.
- You can also add a little extra butter here if you like a richer loaf.
Step 5: Shape the Loaf
- Turn the dough out onto a lightly floured surface.
- Gently shape it into a round loaf about 7–8 inches in diameter.
- Place the loaf on your prepared baking sheet or skillet.
- Use a sharp knife to score a deep “X” on top of the loaf.
- Pro Tip: Scoring helps the bread expand properly and gives it that classic rustic look.
Step 6: Bake the Bread
- Place the loaf in the preheated oven.
- Bake for 30–35 minutes, until the crust is golden and a skewer inserted in the center comes out clean.
- Optional: Brush the top with melted butter for extra shine and flavor.
Step 7: Cool and Serve
- Remove the bread from the oven and let it cool on a wire rack for at least 15 minutes.
- Slice with a serrated knife for the best results.
- Serve warm with butter, jam, or alongside your favorite stew.
Notes
Nutritional Value (Per Serving – Approximate)
- Calories: 210 kcal
- Carbohydrates: 38 g
- Protein: 6 g
- Fat: 3 g
- Saturated Fat: 1 g
- Fiber: 2 g
- Sugar: 3 g
- Sodium: 380 mg