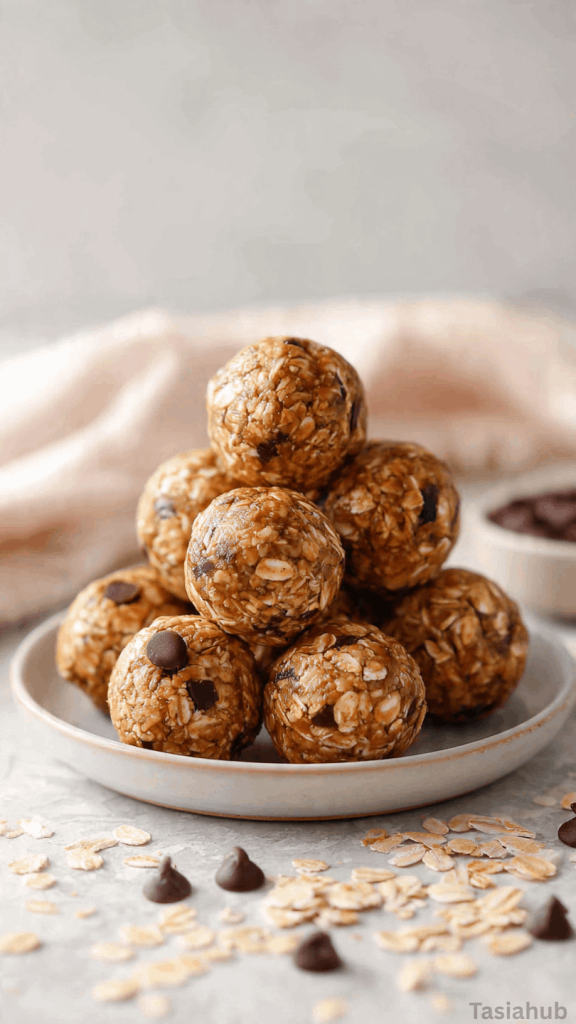
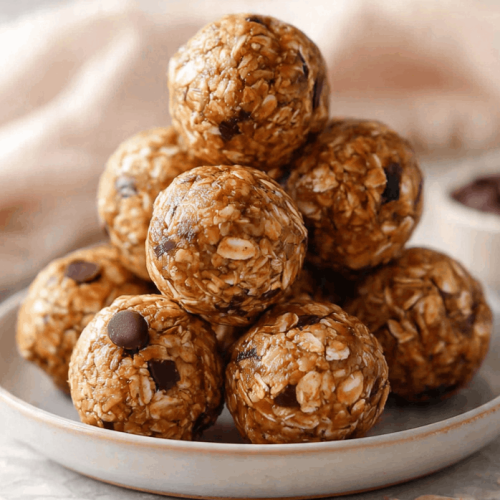
High Protein Energy Balls
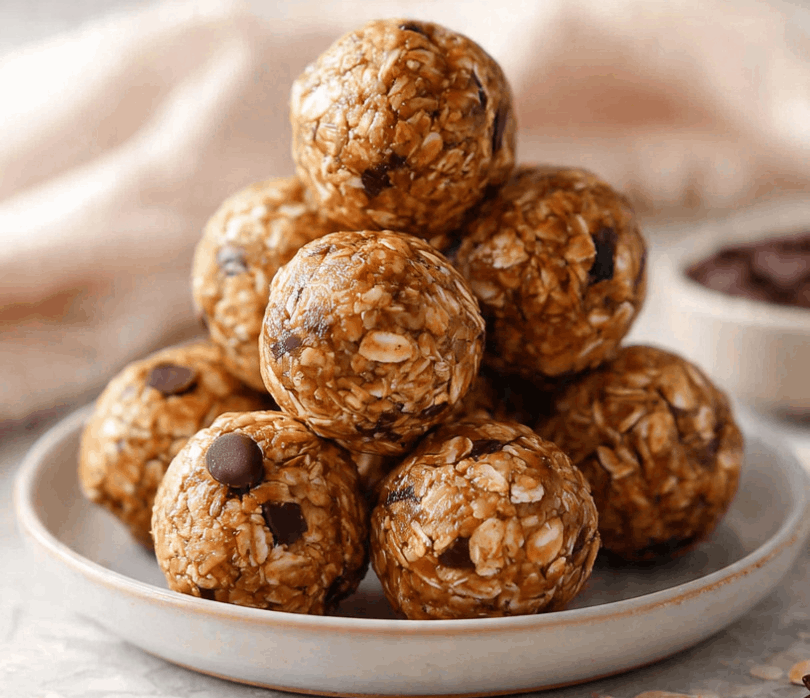
Busy mornings, mid-afternoon slumps, or long workouts call for a snack that’s both satisfying and energizing. High protein energy balls are the perfect solution—they pack a punch of nutrition in a small, bite-sized package that’s easy to grab on the go. These little treats aren’t just convenient; they’re also incredibly versatile, making them a favorite for anyone who wants to keep their energy levels steady throughout the day.
What makes no bake protein energy balls so appealing is that they come together in just a few minutes. You don’t need an oven, complicated techniques, or a long list of ingredients. With simple staples like oats, nut butter, and protein powder, you can whip up a batch of protein power balls that taste indulgent but are genuinely good for you.
For those who love homemade snacks, making your own protein balls has its perks. You control exactly what goes in, so you can skip the added sugars and artificial flavors that often sneak into store-bought options. Plus, these healthy protein balls store beautifully in the fridge or freezer, making them perfect for meal prep or quick grabs between errands.
Beyond their convenience, energy snacks like these are a great way to fuel your body naturally. Whether you need a boost before a workout, a midday pick-me-up at work, or a satisfying treat after school or practice, these healthy protein snacks hit the sweet spot. They’re simple, delicious, and a guilt-free way to stay energized and satisfied throughout the day.
Why You’ll Love It
- Quick and fuss-free – These no bake protein energy balls come together in minutes, so you can have a batch ready without spending hours in the kitchen. Perfect for busy mornings or last-minute snack cravings.
- Customizable flavor combos – Whether you love chocolate, peanut butter, or a hint of coconut, homemade protein balls let you mix and match ingredients to suit your taste perfectly.
- Fuel your day naturally – Packed with protein, healthy fats, and fiber, these protein power balls give you steady energy and help curb cravings without the sugar crash.
- Portable and mess-free – Individually portioned, these healthy protein snacks are ideal for tossing in your bag, lunchbox, or gym kit. Snack smart, anywhere, anytime.
- Guilt-free indulgence – Satisfy your sweet tooth while nourishing your body. These energy snacks feel like a treat but are genuinely good for you.
Ingredient List
Energy Balls Base:
- 1 cup rolled oats
- ½ cup natural peanut butter (or almond butter)
- ¼ cup honey or maple syrup
- ½ cup vanilla protein powder
Mix-Ins:
- ¼ cup mini chocolate chips (optional, but highly recommended!)
- 2 tbsp chia seeds or flaxseeds
- ½ tsp cinnamon
- Pinch of salt
Ingredient Notes
- I always use natural peanut butter for this—it adds so much flavor and keeps the balls creamy without being too sweet.
- Don’t skip the protein powder! It’s what makes these true protein power balls and keeps you full longer.
- Honey or maple syrup not only sweetens naturally but also helps bind the balls together perfectly.
- A sprinkle of chia or flax seeds gives a subtle crunch and a boost of fiber.
- Mini chocolate chips are optional, but honestly, they make these healthy protein balls feel like a treat.
Kitchen Equipment Needed
- Mixing bowl – Big enough to hold all your ingredients; I love using my glass Pyrex bowl because it’s easy to stir and scrape.
- Measuring cups and spoons – For accurate measurements; nothing fancy needed, just reliable ones.
- Spatula or wooden spoon – For mixing everything evenly; my silicone spatula is perfect for scraping every bit from the bowl.
- Baking sheet or plate – To place the balls on while they set; I like using a parchment-lined sheet to prevent sticking.
- Refrigerator or freezer – Not equipment exactly, but essential to firm up your energy snacks!
Instructions
Step 1: Prep Your Ingredients
- Measure out all your ingredients so everything is ready to go.
- If your peanut butter is too thick, microwave it for 10–15 seconds to make mixing easier.
- Pro Tip: Sifting the protein powder can help prevent clumps and make your balls smoother.
Step 2: Mix the Base
- In a large mixing bowl, combine the oats, protein powder, cinnamon, chia or flax seeds, and salt.
- Stir until evenly distributed.
Step 3: Add Wet Ingredients
- Add the peanut butter and honey (or maple syrup) to the dry mix.
- Use a spatula or wooden spoon to fold everything together until it forms a sticky, cohesive mixture.
- Pro Tip: If the mixture feels too dry, add an extra teaspoon of honey or a splash of milk until it sticks together.
Step 4: Incorporate Mix-Ins
- Gently fold in chocolate chips or any other mix-ins you like.
- Make sure they are evenly spread but don’t overmix, or the mixture can get too soft.
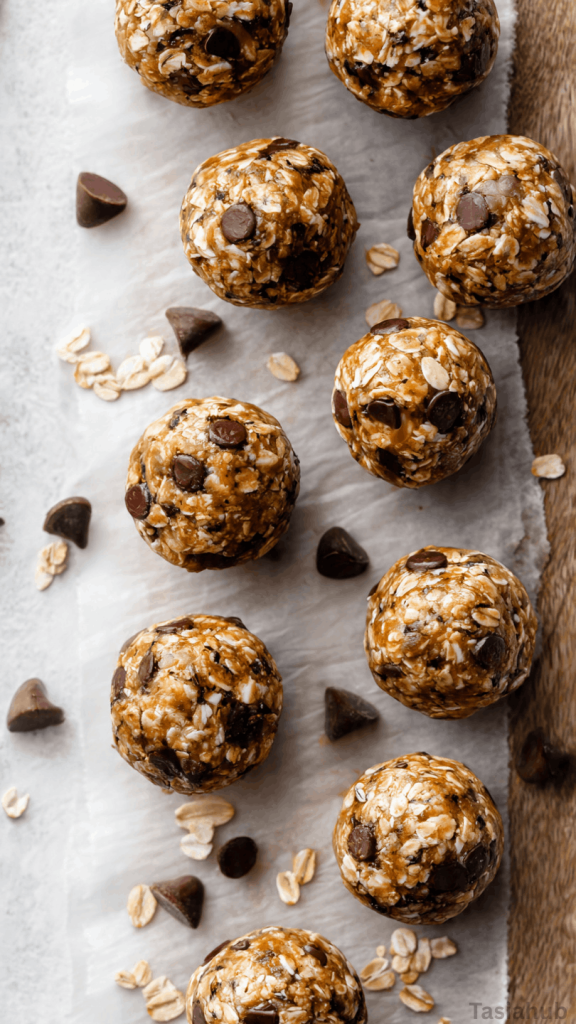
Step 5: Form the Balls
- Scoop out small portions (about 1–2 tablespoons each) and roll them into balls using your hands.
- Place them on a parchment-lined baking sheet or plate.
- Pro Tip: Lightly wetting your hands with water helps prevent sticking while rolling.
Step 6: Chill and Set
- Place the tray in the refrigerator for at least 30 minutes to firm up.
- For faster setting, pop them in the freezer for 10–15 minutes.
- Once set, transfer to an airtight container for storage.
Tips and Tricks for Success
- Use room temperature peanut butter – It mixes more easily and keeps your balls smooth.
- Adjust sweetness gradually – Taste as you go; you can always add more honey or maple syrup if needed.
- Keep the mixture chilled slightly – If it feels too sticky to roll, refrigerate for 10 minutes before shaping.
- Store properly – Keep in an airtight container in the fridge for up to a week, or freeze for longer storage.
- Don’t overmix – Fold in your mix-ins gently to maintain texture and prevent a dense ball.
Ingredient Substitutions and Variations
- Nut butter swaps – Almond, cashew, or sunflower seed butter all work great.
- Sweetener alternatives – Agave syrup, brown rice syrup, or date syrup can replace honey or maple syrup.
- Protein powder options – Whey, plant-based, or collagen protein powders all work; just adjust sweetness if needed.
- Mix-in creativity – Dried fruit, coconut flakes, crushed nuts, or cacao nibs can add extra flavor and texture.
- Spice it up – Try adding a dash of ginger, nutmeg, or pumpkin spice for a seasonal twist.
Serving Suggestions
- I love grabbing a couple of these protein energy balls before my morning workout—they give me steady energy without weighing me down.
- Pair them with a cup of coffee or green tea in the afternoon for a perfect healthy protein snack break.
- Pack them in a small container for school or work lunches; they make a portable, guilt-free treat.
- Serve them alongside fresh fruit for a balanced post-workout snack that hits all the right macros.
- Keep a few on your desk for those unexpected mid-day slumps—they’re a lifesaver when you need an energy boost fast.
Storage and Reheating Instructions
- Refrigerator: Store in an airtight container for up to one week.
- Freezer: Keep in a freezer-safe container for up to 3 months; thaw for 10–15 minutes before eating.
- No reheating needed: These protein power balls are delicious cold and ready to eat straight from the fridge.
- Portioning tip: Pre-portion into snack-sized bags for grab-and-go convenience.
- Travel-friendly: Keep them in a small insulated bag if you’re taking them on the road—they stay firm and tasty.
Frequently Asked Questions
Can I make these energy balls vegan?
Yes! Use a plant-based protein powder and swap honey for maple syrup or agave. They’ll still be just as delicious and satisfying.
How long do protein energy balls last?
Stored in an airtight container, they last about a week in the fridge or up to 3 months in the freezer.
Can I use different nut butters?
Absolutely! Almond, cashew, or sunflower seed butter all work beautifully and give a slightly different flavor twist.
Are these suitable for pre-workout snacks?
Definitely! They’re packed with protein and healthy carbs to give you sustained energy before exercise.
Can I add other mix-ins?
Yes! Dried fruits, cacao nibs, shredded coconut, or nuts are all great additions—get creative with your favorite flavors.
Do I have to bake them?
Nope! These are no bake protein energy balls, so you just mix, roll, and chill. Quick and easy every time.
Did you try this recipe? Let me know in the comments how it turned out—I love hearing your tweaks and favorite flavor combos!
High Protein Energy Balls
Equipment
- Mixing Bowl
- Measuring cups and spoons
- Spatula or wooden spoon
- Baking Sheet or Plate
- Refrigerator or freezer
Ingredients
Energy Balls Base:
- 1 cup rolled oats
- ½ cup natural peanut butter or almond butter
- ¼ cup honey or maple syrup
- ½ cup vanilla protein powder
Mix-Ins:
- ¼ cup mini chocolate chips optional, but highly recommended!
- 2 tbsp chia seeds or flaxseeds
- ½ tsp cinnamon
- Pinch of salt
Instructions
Step 1: Prep Your Ingredients
- Measure out all your ingredients so everything is ready to go.
- If your peanut butter is too thick, microwave it for 10–15 seconds to make mixing easier.
- Pro Tip: Sifting the protein powder can help prevent clumps and make your balls smoother.
Step 2: Mix the Base
- In a large mixing bowl, combine the oats, protein powder, cinnamon, chia or flax seeds, and salt.
- Stir until evenly distributed.
Step 3: Add Wet Ingredients
- Add the peanut butter and honey (or maple syrup) to the dry mix.
- Use a spatula or wooden spoon to fold everything together until it forms a sticky, cohesive mixture.
- Pro Tip: If the mixture feels too dry, add an extra teaspoon of honey or a splash of milk until it sticks together.
Step 4: Incorporate Mix-Ins
- Gently fold in chocolate chips or any other mix-ins you like.
- Make sure they are evenly spread but don’t overmix, or the mixture can get too soft.
Step 5: Form the Balls
- Scoop out small portions (about 1–2 tablespoons each) and roll them into balls using your hands.
- Place them on a parchment-lined baking sheet or plate.
- Pro Tip: Lightly wetting your hands with water helps prevent sticking while rolling.
Step 6: Chill and Set
- Place the tray in the refrigerator for at least 30 minutes to firm up.
- For faster setting, pop them in the freezer for 10–15 minutes.
- Once set, transfer to an airtight container for storage.
Notes
Nutritional Value (Per 1 Energy Ball – approximate)
- Calories: 110–130
- Protein: 6–8g
- Carbohydrates: 10–12g
- Fat: 6–8g
- Fiber: 2–3g
- Sugar: 4–6g