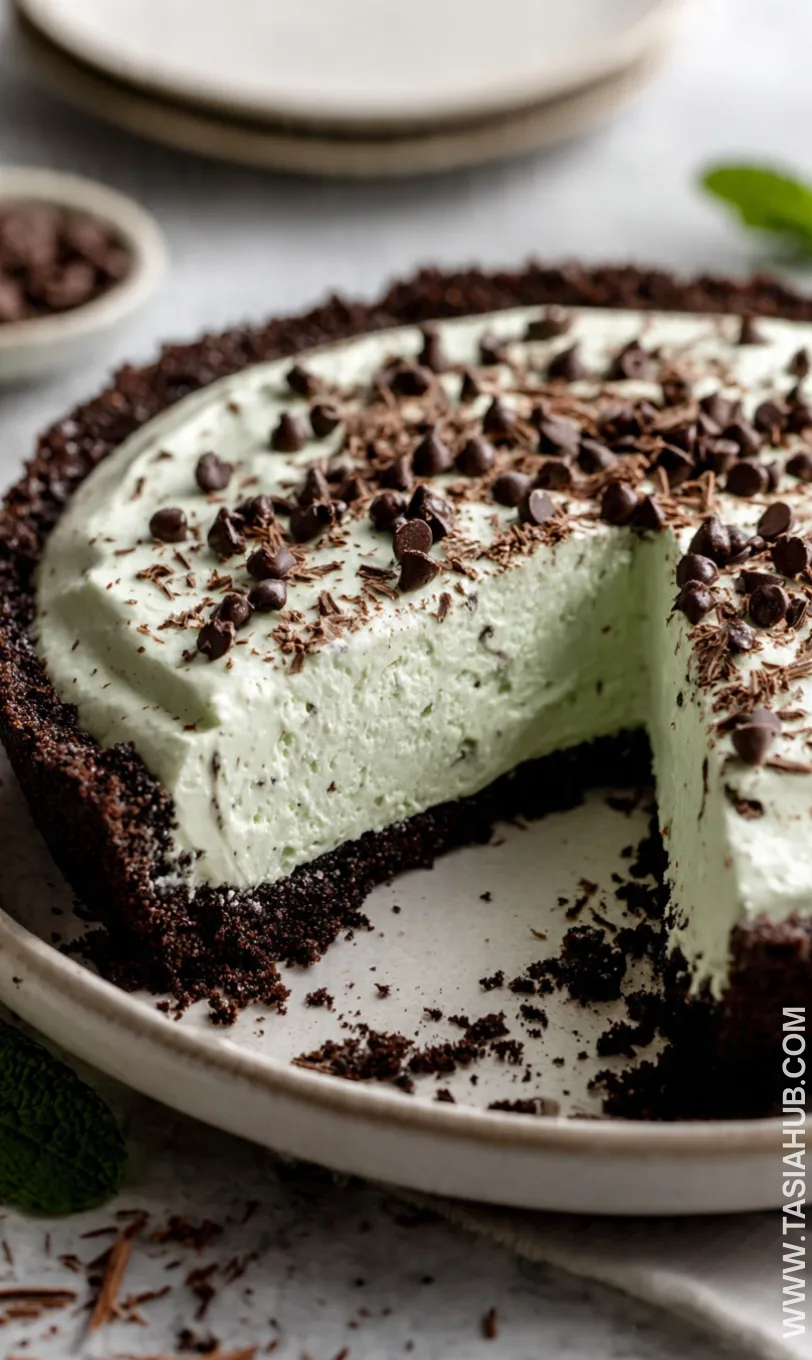
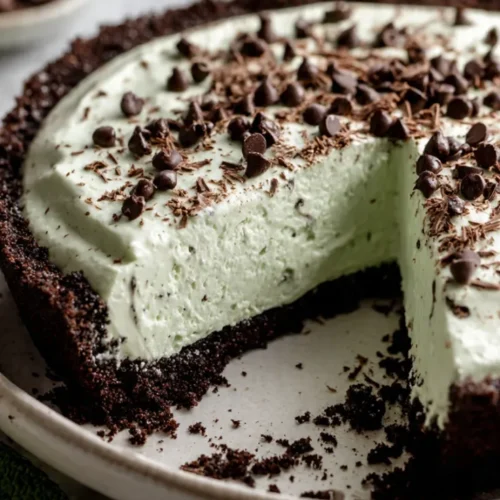
Grasshopper Pie Recipe
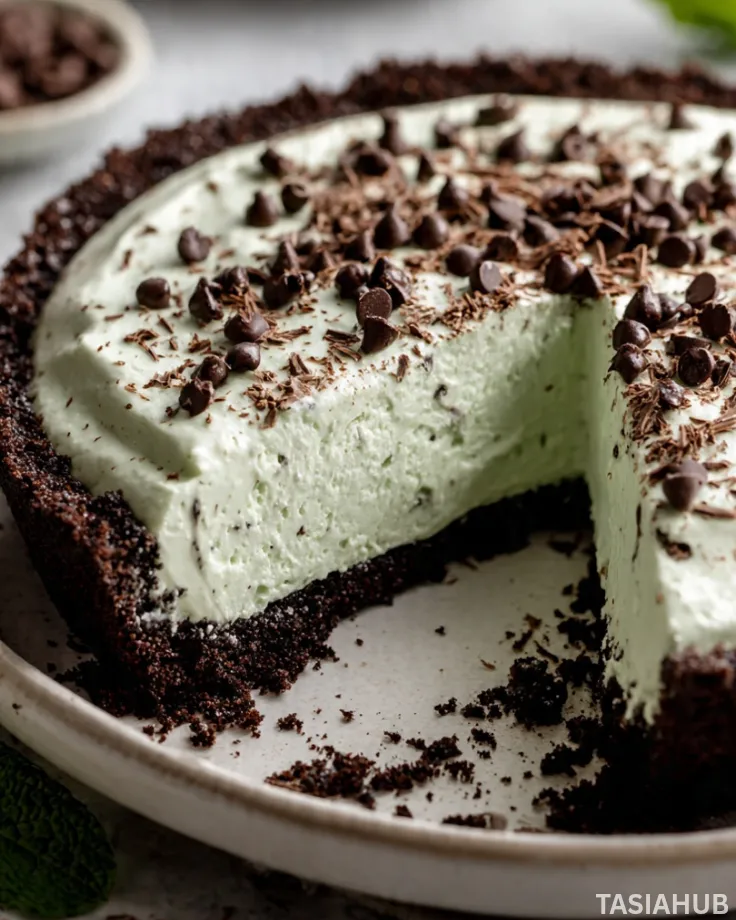
When the holiday season rolls around, I love bringing a little green into the kitchen, and this grasshopper pie is a classic treat that never disappoints. Its creamy, minty filling paired with a chocolate crust makes it a standout St Patrick’s day dessert, perfect for celebrating in style. Every slice feels indulgent without being overly heavy, and it’s a dessert that sparks nostalgia for those familiar with the old fashioned grasshopper pie.
One of my favorite things about this recipe is how approachable it is. Even if you’re not an experienced baker, this easy grasshopper pie comes together quickly and beautifully. The filling is airy, sweet, and has just the right hint of mint, making it a crowd-pleaser at any gathering. You don’t even need to turn on the oven, which makes it an ideal choice for those warm spring days when a no bake grasshopper pie is exactly what you want.
I also love how versatile this dessert can be. You can serve it in a traditional pie pan or in individual glasses for a fun twist. It’s perfect for a holiday table, a casual dinner party, or just because you’re craving a creamy, chocolatey treat. And the best part? It’s one of those easy pie recipes that somehow feels fancy, even if it’s made in minutes.
This grasshopper pie recipe brings together the best of both worlds: classic charm and effortless preparation. Whether you’re revisiting a childhood favorite or discovering it for the first time, it’s sure to become a staple in your dessert rotation. Let’s dive into how to make this minty, chocolatey delight.
Why You’ll Love It
- Minty and Chocolatey Perfection – Every bite of this grasshopper pie hits the sweet spot with a creamy mint filling and rich chocolate crust. It’s that nostalgic flavor combination that makes it a must-have St Patrick’s day dessert.
- No Oven Needed – This no bake grasshopper pie is a lifesaver on busy days or when you want a cool dessert without heating up the kitchen. It’s simple, stress-free, and still feels indulgent.
- Quick and Easy to Make – With this easy grasshopper pie recipe, you can have dessert ready in under 30 minutes. It’s an easy pie recipe that doesn’t compromise on flavor, perfect for last-minute celebrations.
- A Classic Everyone Remembers – This old fashioned grasshopper pie has been delighting families for generations. It’s the kind of dessert that sparks memories while creating new ones.
- Versatile Presentation – Whether you serve it as a full pie or in individual cups, this pie is as fun to present as it is to eat. Add whipped cream, chocolate shavings, or even a few mint leaves for a simple yet stunning touch.
Ingredient List
For the Chocolate Crust:
- 1 ½ cups chocolate cookie crumbs (Oreos or chocolate graham crackers work great)
- ¼ cup unsalted butter, melted
For the Mint Filling:
- 8 oz cream cheese, softened
- 1 cup powdered sugar
- 1 tsp peppermint extract
- 1 ½ cups heavy whipping cream
For the Topping (Optional but Amazing):
- ½ cup mini chocolate chips or shaved chocolate
- Fresh mint leaves for garnish
Ingredient Notes
- I always use Oreos for the crust—it adds a rich chocolatey flavor that makes this old fashioned grasshopper pie extra indulgent.
- Don’t skip the peppermint extract! It gives the pie that signature minty punch that makes it a standout St Patrick’s day dessert.
- For the whipped cream, I prefer whipping it fresh—it makes the filling so light and airy compared to store-bought.
- Mini chocolate chips on top aren’t required, but they add a fun crunch and extra chocolate hit.
- Using room temperature cream cheese makes mixing the filling smooth and creamy—trust me, it’s worth the little extra prep.
Kitchen Equipment Needed
- 9-inch Pie Pan – Perfect for shaping the pie; I love using a glass one so you can see all the layers.
- Mixing Bowls – For combining crust and filling; I usually keep a medium and large one handy.
- Hand Mixer or Stand Mixer – Makes whipping the cream and mixing the filling smooth and easy.
- Spatula – For folding ingredients together without deflating the filling.
- Measuring Cups & Spoons – Accurate measurements make this easy grasshopper pie recipe foolproof.
- Whisk – Optional, but handy if you prefer whipping cream by hand or mixing the sugar and cream cheese smoothly.
Instructions
1. Prepare the Chocolate Crust
- Preheat your workspace by gathering all crust ingredients.
- Crush the chocolate cookies into fine crumbs using a food processor or by placing them in a zip-top bag and rolling with a rolling pin.
- Transfer crumbs to a medium bowl and stir in the melted butter until fully combined.
- Press the mixture evenly into the bottom and up the sides of a 9-inch pie pan.
- Pro Tip: Use the bottom of a measuring cup to press the crumbs firmly—it helps the crust hold together perfectly.
- Chill the crust in the refrigerator for at least 15 minutes while you prepare the filling.
2. Make the Mint Filling
- In a large mixing bowl, beat the softened cream cheese with a hand or stand mixer until smooth and creamy.
- Add the powdered sugar gradually and continue to mix until fully incorporated.
- Stir in the peppermint extract. Taste and adjust if you want a stronger mint flavor.
- In a separate bowl, whip the heavy cream until stiff peaks form.
- Pro Tip: Make sure your bowl and beaters are cold—this helps the cream whip faster and hold its shape.
- Gently fold the whipped cream into the cream cheese mixture using a spatula until fully combined and light.
- Pro Tip: Fold slowly to keep the filling fluffy. Avoid overmixing, or it can deflate.
3. Assemble the Pie
- Spoon the mint filling into the chilled chocolate crust.
- Smooth the top with a spatula for an even finish.
- Optional: Sprinkle mini chocolate chips or shaved chocolate over the top for a decorative touch.
4. Chill and Set
- Cover the pie with plastic wrap or a pie cover.
- Refrigerate for at least 4 hours, or ideally overnight, to let the filling set completely.
- Pro Tip: The longer it chills, the cleaner the slices will be when serving.
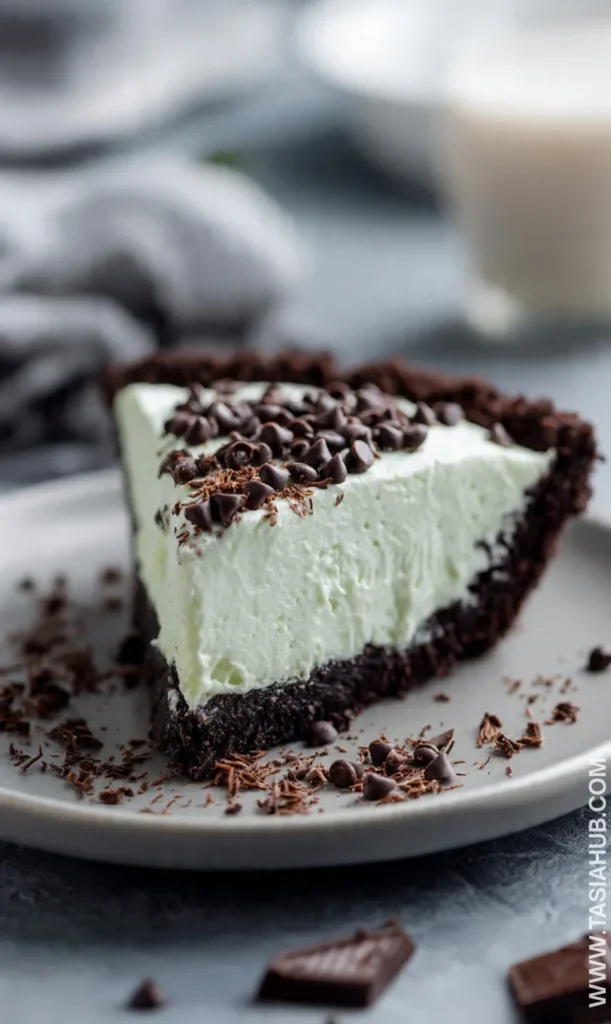
5. Serve and Enjoy
- Slice the pie with a sharp knife, wiping the blade clean between cuts for neat pieces.
- Garnish with fresh mint leaves if desired.
- Serve chilled and enjoy a creamy, minty bite of this classic dessert!
Tips and Tricks for Success
- Chill Everything: Make sure the crust, filling, and even your mixing bowls are cold for the best texture and clean slices.
- Fold Gently: When combining whipped cream with the cream cheese mixture, fold slowly to keep the filling light and airy.
- Use a Sharp Knife: For perfect slices, wipe the knife clean between cuts—this keeps the pie looking neat.
- Sweeten to Taste: If you prefer a sweeter filling, add a bit more powdered sugar, but go gradually to avoid overpowering the mint.
- Decorate Last Minute: Add chocolate shavings or mint leaves just before serving so they stay fresh and vibrant.
Ingredient Substitutions and Variations
- Cookie Crust: Swap chocolate cookies for graham crackers or gingersnaps for a slightly different flavor.
- Cream Cheese: You can use mascarpone for a richer, creamier filling.
- Mint Flavor: If you don’t have peppermint extract, a few drops of mint extract or a tiny amount of crème de menthe liqueur works beautifully.
- Chocolate Topping: Use white chocolate curls, crushed Andes mints, or even a drizzle of chocolate sauce for extra flair.
- Individual Portions: Serve this no bake grasshopper pie in small cups or jars for an easy, make-ahead dessert option.
Serving Suggestions
- I love serving this grasshopper pie chilled with a dollop of freshly whipped cream—it makes each bite extra creamy and festive!
- Pair a slice with a cup of hot chocolate or coffee for a cozy afternoon treat; the mint and chocolate combo is irresistible.
- For a fun St Patrick’s day dessert table, cut the pie into small squares and serve on a platter with extra chocolate shavings on top.
- Add a few fresh mint leaves and a drizzle of chocolate sauce just before serving—it makes the presentation feel fancy without extra work.
- Serve individual portions in small glass cups layered with crushed cookies for a playful, personal twist that’s perfect for parties.
Storage and Reheating Instructions
- Refrigerate: Keep the pie covered in the fridge for up to 4–5 days—it stays fresh and the filling keeps its creamy texture.
- Freeze: You can freeze the pie for up to 2 months. Wrap tightly in plastic wrap and foil to prevent freezer burn.
- Thawing: Thaw in the fridge overnight before serving; avoid microwaving as it can ruin the texture.
- Leftover Slices: Store individual slices in airtight containers to make grab-and-go treats easy and convenient.
- Decorations: Add fresh chocolate shavings or mint leaves just before serving to keep them looking fresh and vibrant.
Frequently Asked Questions
Can I make this pie ahead of time?
Absolutely! This easy grasshopper pie actually tastes better after chilling overnight. It gives the filling time to set and the flavors to meld beautifully.
Can I use a different crust?
Yes! While chocolate cookies are classic, graham crackers or even gingersnaps make a tasty alternative. Just press them firmly so the crust holds together.
Is there a way to make this pie lighter?
You can substitute half of the heavy cream with whipped topping or use a lighter cream cheese to reduce richness without sacrificing flavor.
Can I skip the peppermint extract?
You could, but the peppermint extract is what gives this old fashioned grasshopper pie its signature minty flavor. A few drops of mint liqueur can work in a pinch too!
How long will leftovers last?
Stored in an airtight container in the fridge, the pie stays fresh for 4–5 days. It can also be frozen for up to 2 months—just thaw in the fridge before serving.
Can I make individual servings?
Yes! This no bake grasshopper pie is perfect for serving in cups, jars, or mini dessert dishes—great for parties or portion control.
Did you try this recipe? Let me know in the comments how it turned out—I’d love to hear your tips and see your photos!
Grasshopper Pie Recipe
Equipment
- 9-inch pie pan
- Mixing Bowls
- Hand mixer or stand mixer
- Spatula
- Measuring Cups & Spoons
- Whisk
Ingredients
For the Chocolate Crust:
- 1 ½ cups chocolate cookie crumbs Oreos or chocolate graham crackers work great
- ¼ cup unsalted butter melted
For the Mint Filling:
- 8 oz cream cheese softened
- 1 cup powdered sugar
- 1 tsp peppermint extract
- 1 ½ cups heavy whipping cream
For the Topping (Optional but Amazing):
- ½ cup mini chocolate chips or shaved chocolate
- Fresh mint leaves for garnish
Instructions
Prepare the Chocolate Crust
- Preheat your workspace by gathering all crust ingredients.
- Crush the chocolate cookies into fine crumbs using a food processor or by placing them in a zip-top bag and rolling with a rolling pin.
- Transfer crumbs to a medium bowl and stir in the melted butter until fully combined.
- Press the mixture evenly into the bottom and up the sides of a 9-inch pie pan.
- Pro Tip: Use the bottom of a measuring cup to press the crumbs firmly—it helps the crust hold together perfectly.
- Chill the crust in the refrigerator for at least 15 minutes while you prepare the filling.
Make the Mint Filling
- In a large mixing bowl, beat the softened cream cheese with a hand or stand mixer until smooth and creamy.
- Add the powdered sugar gradually and continue to mix until fully incorporated.
- Stir in the peppermint extract. Taste and adjust if you want a stronger mint flavor.
- In a separate bowl, whip the heavy cream until stiff peaks form.
- Pro Tip: Make sure your bowl and beaters are cold—this helps the cream whip faster and hold its shape.
- Gently fold the whipped cream into the cream cheese mixture using a spatula until fully combined and light.
- Pro Tip: Fold slowly to keep the filling fluffy. Avoid overmixing, or it can deflate.
Assemble the Pie
- Spoon the mint filling into the chilled chocolate crust.
- Smooth the top with a spatula for an even finish.
- Optional: Sprinkle mini chocolate chips or shaved chocolate over the top for a decorative touch.
Chill and Set
- Cover the pie with plastic wrap or a pie cover.
- Refrigerate for at least 4 hours, or ideally overnight, to let the filling set completely.
- Pro Tip: The longer it chills, the cleaner the slices will be when serving.
Serve and Enjoy
- Slice the pie with a sharp knife, wiping the blade clean between cuts for neat pieces.
- Garnish with fresh mint leaves if desired.
- Serve chilled and enjoy a creamy, minty bite of this classic dessert!
Notes
Nutritional Value (per serving, approximate):
- Calories: 380 kcal
- Fat: 28 g
- Saturated Fat: 16 g
- Carbohydrates: 32 g
- Sugars: 24 g
- Protein: 4 g
- Fiber: 2 g
- Sodium: 150 mg