Cottage Cheese Cheesecake
This cottage cheese cheesecake is one of those recipes that surprises you in the best way. It has the creamy, rich feel you expect from a classic cheesecake, but with a lighter twist that makes it feel a bit more balanced and easy to enjoy any day of the week. It’s the kind of dessert you can serve after dinner without feeling like you’ve gone overboard.
What makes it stand out is how cottage cheese blends so smoothly once it’s whipped or blended. Instead of a heavy, dense bite, you get a soft, velvety texture that still delivers that satisfying cheesecake flavor. It’s a simple switch, but it completely transforms the dessert into something fresher and more modern.
This recipe also fits beautifully into a healthy dessert mindset. It gives you that sweet, creamy finish you’re craving while still using wholesome ingredients you can feel good about. It’s not about restriction—it’s about finding smarter ways to enjoy the treats you already love.
For anyone who enjoys a cottage cheese dessert or is simply looking for a lighter cheese dessert option, this one is worth adding to your rotation. It’s easy to make, flexible with toppings, and honestly tastes even better after chilling for a few hours.
Why You’ll Love It
- It has that classic cheesecake flavor you crave, but feels noticeably lighter and less heavy after eating, so you can enjoy a slice without feeling weighed down.
- The texture is incredibly creamy once blended properly, giving you that smooth, melt-in-your-mouth feel you expect from a good cheesecake.
- It’s surprisingly simple to make with basic ingredients, making it perfect for both beginners and anyone who doesn’t want a complicated dessert process.
- It works beautifully as a healthy dessert option when you want something sweet but still a bit more nourishing than traditional cheesecake.
- It’s versatile enough to dress up or keep simple—fresh berries, a drizzle of honey, or even a chocolate topping all work perfectly.
Ingredient List
For the crust (optional but recommended):
- 1 ½ cups graham cracker crumbs
- ¼ cup melted butter
- 2 tablespoons sugar
For the filling:
- 2 cups cottage cheese
- 8 oz cream cheese, softened
- ½ cup Greek yogurt
- ½ to ¾ cup sugar (adjust to taste)
- 3 large eggs
- 2 teaspoons vanilla extract
- 1 tablespoon lemon juice
- 2 tablespoons cornstarch
Optional topping:
- Fresh berries
- Honey or berry sauce
- Whipped cream
Ingredient Notes
- Cottage cheese: I always use full-fat cottage cheese for this—it blends way smoother and gives the cheesecake that rich, creamy finish.
- Cream cheese: Don’t skip this ingredient! It’s what gives that classic cheesecake depth and helps balance the lighter texture of the cottage cheese.
- Greek yogurt: Adds a subtle tang and keeps the texture soft. I like using plain, unsweetened Greek yogurt so it doesn’t mess with the flavor.
- Eggs: Make sure they’re at room temperature. It helps everything mix more evenly and prevents a lumpy filling.
- Vanilla extract: A good-quality vanilla makes a big difference here—it really brings out that dessert-like warmth in the cheesecake.
- Lemon juice: Just a little is enough to brighten the flavor without making it taste citrusy. It keeps everything from feeling too heavy.
- Cornstarch: This helps stabilize the filling so your cheesecake sets nicely without cracking or collapsing after baking.
Kitchen Equipment Needed
- Blender or food processor – For blending the cottage cheese until smooth and creamy (this is key for that silky cheesecake texture). I always use a high-speed blender for the best results.
- Mixing bowls – One large bowl for combining the filling and a smaller one for prepping ingredients.
- Springform pan (8 or 9-inch) – Makes it super easy to release the cheesecake without breaking it. Honestly, it’s my go-to for all cheesecakes.
- Hand mixer or stand mixer – Helps combine the cream cheese and sugar smoothly before adding other ingredients.
- Spatula – For scraping down the sides so nothing gets wasted (and everything mixes evenly).
- Measuring cups and spoons – Ensures the ratios stay accurate so the cheesecake sets properly.
- Baking tray (for water bath, optional) – Helps prevent cracks and keeps the texture extra creamy while baking.
- Oven – The final essential for setting everything into that soft, custardy cheesecake perfection.
Instructions
Step 1: Prepare the crust
- Preheat your oven to 325°F (160°C).
- In a bowl, mix graham cracker crumbs, melted butter, and sugar until it looks like wet sand.
- Press the mixture firmly into the bottom of a springform pan. Use the back of a spoon or a glass to pack it tightly.
- Bake for 8–10 minutes, then set aside to cool slightly.
Pro tip: Press the crust really well—this helps it hold together when slicing later.
Step 2: Blend the cottage cheese base
- Add cottage cheese to a blender or food processor.
- Blend until completely smooth and no curds remain.
- Scrape down the sides as needed to make sure everything is fully creamy.
Pro tip: Don’t rush this step—blending until silky is what gives the cheesecake its smooth, restaurant-style texture.
Step 3: Make the cheesecake filling
- In a large mixing bowl, beat the cream cheese and sugar until smooth and fluffy.
- Add the blended cottage cheese, Greek yogurt, vanilla extract, and lemon juice. Mix until well combined.
- Add eggs one at a time, mixing gently after each addition.
- Sprinkle in cornstarch and mix just until incorporated.
Pro tip: Mix on low speed once eggs are added—overmixing can introduce air and cause cracks later.
Step 4: Assemble and bake
- Pour the filling over the prepared crust and smooth the top with a spatula.
- Tap the pan lightly on the counter to remove air bubbles.
- Place the pan in a larger baking tray and add hot water halfway up the sides (water bath method).
- Bake for 50–60 minutes, or until the edges are set and the center is slightly jiggly.
Pro tip: The center should still have a gentle wobble—it will firm up as it cools.
Step 5: Cool and chill
- Turn off the oven and leave the cheesecake inside with the door slightly open for 30–60 minutes.
- Remove and let it cool completely at room temperature.
- Refrigerate for at least 4 hours, preferably overnight.
Pro tip: Chilling is non-negotiable—this is what gives the cheesecake its perfect sliceable texture.
Step 6: Slice and serve
- Run a knife around the edges before releasing the springform pan.
- Slice with a clean, sharp knife (wipe between cuts for neat slices).
- Add your favorite toppings like berries, honey, or whipped cream.
Tips and Tricks for Success
- Make sure your cottage cheese is blended until completely smooth—this is the biggest factor in getting that creamy, cheesecake-like texture without any graininess.
- Bring cream cheese and eggs to room temperature before mixing so everything blends easily and you don’t end up with lumps in the batter.
- Don’t overmix once the eggs are added. Mix just until combined to avoid adding too much air, which can cause cracks while baking.
- Use a water bath if possible—it helps the cheesecake bake evenly and keeps the texture soft and silky.
- Let it chill overnight if you can. The flavor deepens and the texture becomes much firmer and more “classic cheesecake” the next day.
Ingredient Substitutions and Variations
- Cottage cheese: You can swap with ricotta for a slightly richer, more traditional Italian-style cheesecake texture.
- Cream cheese: Try Neufchâtel for a lighter version, or use all cottage cheese if you want a higher-protein, lighter option.
- Greek yogurt: Sour cream works just as well and gives a slightly tangier flavor.
- Sugar: You can replace with honey, maple syrup, or a sugar substitute like erythritol for a lower-sugar version.
- Crust: Swap graham crackers with digestive biscuits, oat cookies, or even a nut-based crust for a gluten-free option.
- Flavor variations: Add cocoa powder for a chocolate version, lemon zest for a citrus twist, or swirl in fruit puree before baking for a marbled effect.
Serving Suggestions
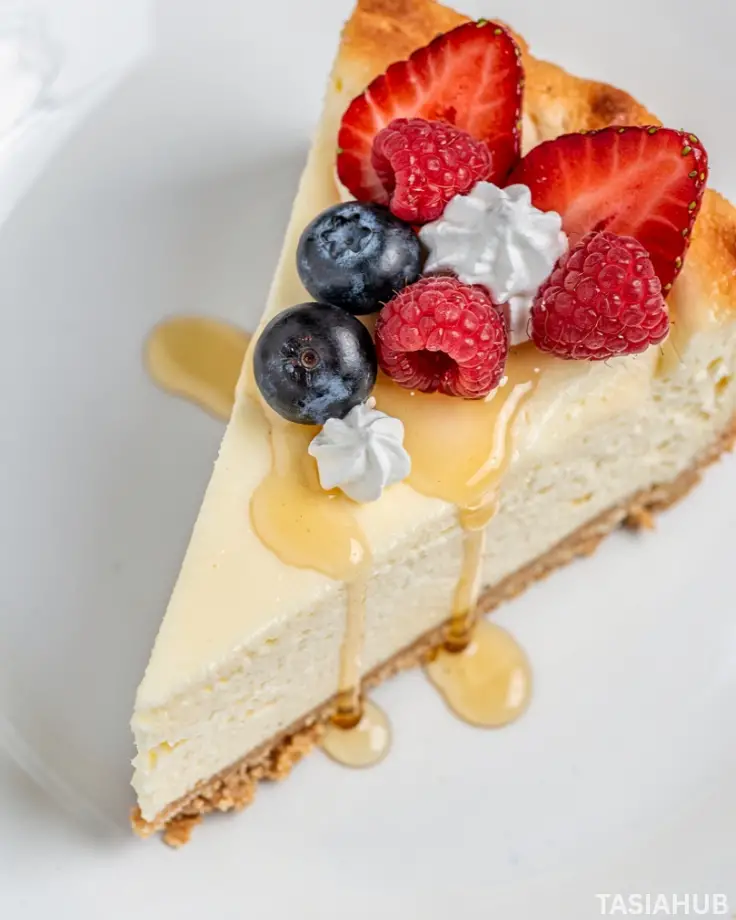
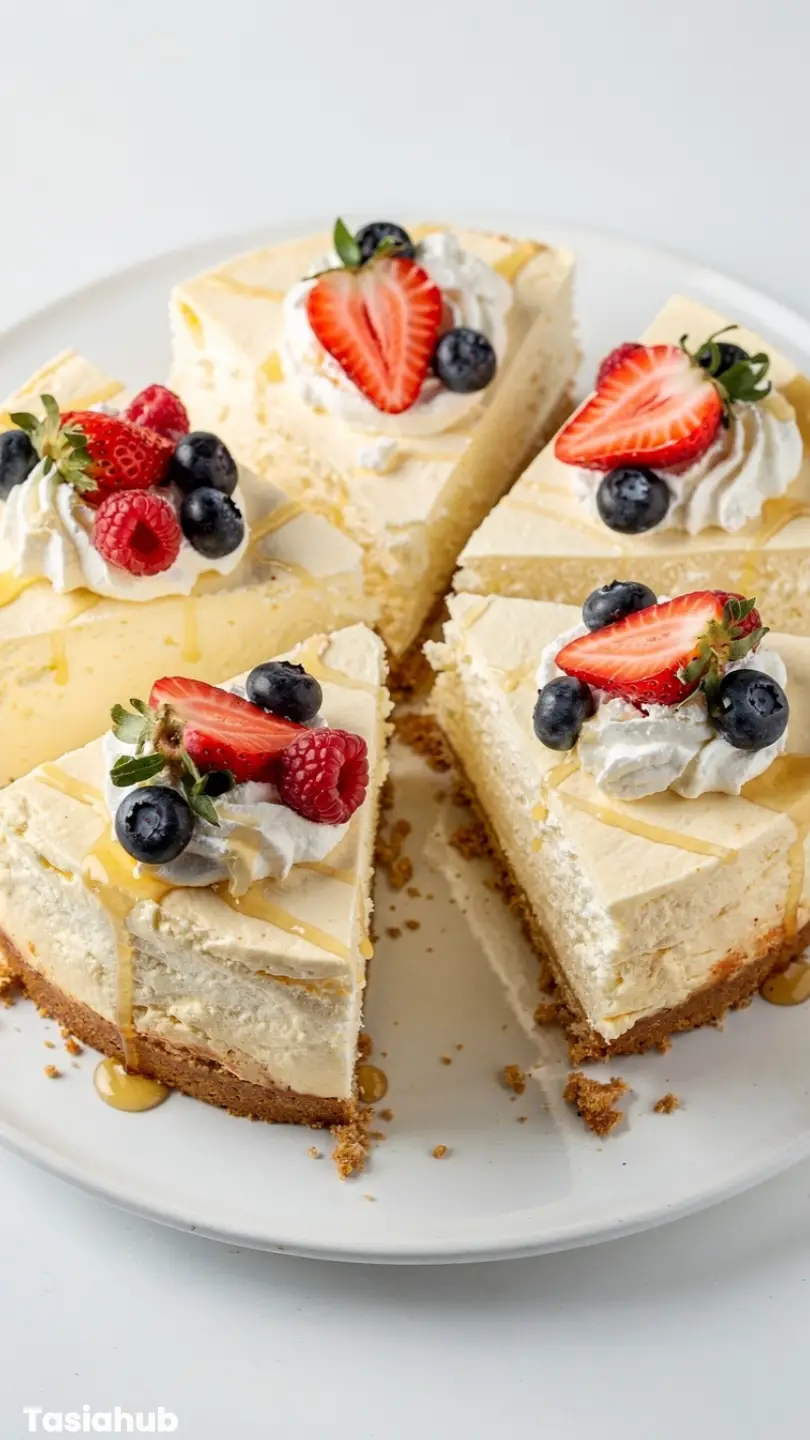
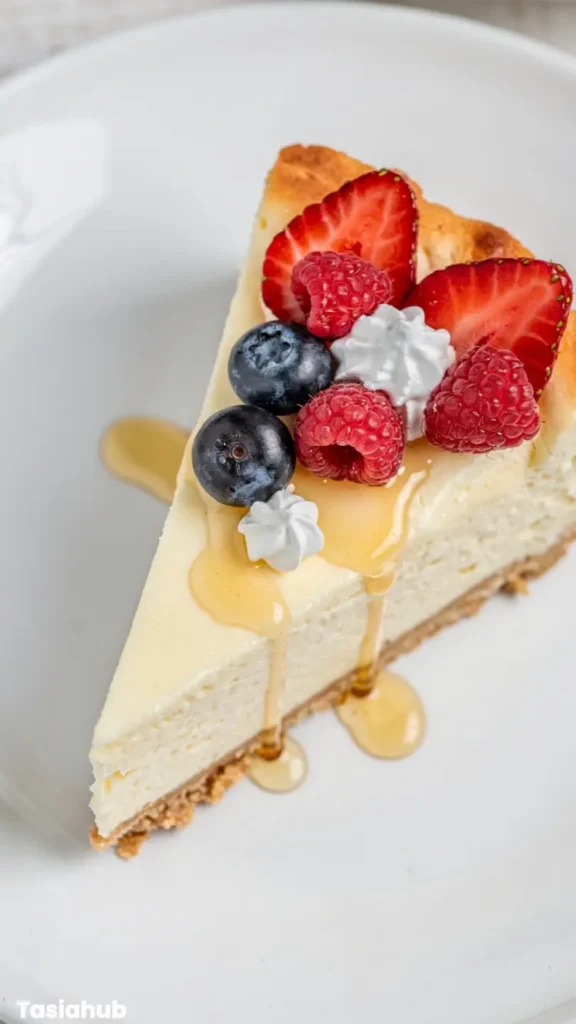
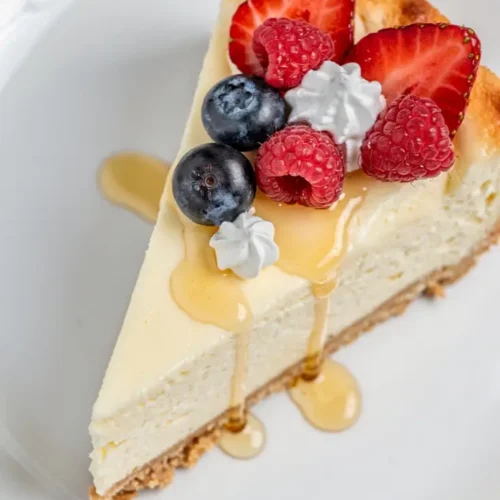
- I love serving this cottage cheese cheesecake with a handful of fresh berries on top—it adds a juicy, slightly tart contrast that makes every bite feel fresh and balanced.
- A drizzle of honey or maple syrup takes it to another level, especially when you want a simple but elegant finishing touch.
- It pairs beautifully with a cup of coffee or tea in the afternoon—it honestly feels like a little café-style treat at home.
- For a more indulgent dessert plate, I like adding a dollop of whipped cream and a sprinkle of crushed nuts for extra texture.
- If I’m serving guests, I sometimes add a berry sauce on the side so everyone can pour as much as they like—it makes it feel a bit more special without extra effort.
Storage and Reheating Instructions
- Store leftovers in an airtight container or tightly wrapped in the refrigerator for up to 4–5 days.
- Keep the cheesecake chilled at all times—it holds its texture best when cold and firm.
- For longer storage, freeze individual slices wrapped in plastic wrap and foil for up to 2 months.
- To thaw, place frozen slices in the fridge overnight until soft and creamy again.
- This cheesecake is best enjoyed cold—no reheating needed, just slice and serve straight from the fridge for the perfect texture.
Frequently Asked Questions
Can I taste the cottage cheese in this cheesecake?
Not really. Once it’s blended and baked, the flavor becomes very mild and creamy. It mainly adds a smooth texture and extra richness.
Do I need a water bath for this recipe?
It’s optional, but highly recommended. A water bath helps the cheesecake bake evenly and reduces the chances of cracks on top.
Can I make this cheesecake without a blender?
You can, but the texture won’t be as smooth. If you don’t have a blender, try pressing the cottage cheese through a fine sieve before mixing.
How do I know when the cheesecake is done baking?
The edges should look set, but the center should still have a slight jiggle. It will firm up fully as it cools and chills.
Can I make this ahead of time?
Yes, and it actually tastes better the next day. Overnight chilling allows the texture to set perfectly and the flavors to deepen.
Is this a good healthy dessert option?
Yes, it’s a lighter take on classic cheesecake and fits well into a balanced eating style while still feeling indulgent.
Did you try this cottage cheese cheesecake? Let me know in the comments how it turned out!
Cottage Cheese Cheesecake
Equipment
- Blender or Food Processor
- Mixing Bowls
- Springform pan (8 or 9-inch)
- Hand mixer or stand mixer
- Spatula
- Measuring cups and spoons
- Baking tray (for water bath, optional)
- Oven
Ingredients
For the crust (optional but recommended):
- 1 ½ cups graham cracker crumbs
- ¼ cup melted butter
- 2 tablespoons sugar
For the filling:
- 2 cups cottage cheese
- 8 oz cream cheese softened
- ½ cup Greek yogurt
- ½ to ¾ cup sugar adjust to taste
- 3 large eggs
- 2 teaspoons vanilla extract
- 1 tablespoon lemon juice
- 2 tablespoons cornstarch
Optional topping:
- Fresh berries
- Honey or berry sauce
- Whipped cream
Instructions
Step 1: Prepare the crust
- Preheat your oven to 325°F (160°C).
- In a bowl, mix graham cracker crumbs, melted butter, and sugar until it looks like wet sand.
- Press the mixture firmly into the bottom of a springform pan. Use the back of a spoon or a glass to pack it tightly.
- Bake for 8–10 minutes, then set aside to cool slightly.
- Pro tip: Press the crust really well—this helps it hold together when slicing later.
Step 2: Blend the cottage cheese base
- Add cottage cheese to a blender or food processor.
- Blend until completely smooth and no curds remain.
- Scrape down the sides as needed to make sure everything is fully creamy.
- Pro tip: Don’t rush this step—blending until silky is what gives the cheesecake its smooth, restaurant-style texture.
Step 3: Make the cheesecake filling
- In a large mixing bowl, beat the cream cheese and sugar until smooth and fluffy.
- Add the blended cottage cheese, Greek yogurt, vanilla extract, and lemon juice. Mix until well combined.
- Add eggs one at a time, mixing gently after each addition.
- Sprinkle in cornstarch and mix just until incorporated.
- Pro tip: Mix on low speed once eggs are added—overmixing can introduce air and cause cracks later.
Step 4: Assemble and bake
- Pour the filling over the prepared crust and smooth the top with a spatula.
- Tap the pan lightly on the counter to remove air bubbles.
- Place the pan in a larger baking tray and add hot water halfway up the sides (water bath method).
- Bake for 50–60 minutes, or until the edges are set and the center is slightly jiggly.
- Pro tip: The center should still have a gentle wobble—it will firm up as it cools.
Step 5: Cool and chill
- Turn off the oven and leave the cheesecake inside with the door slightly open for 30–60 minutes.
- Remove and let it cool completely at room temperature.
- Refrigerate for at least 4 hours, preferably overnight.
- Pro tip: Chilling is non-negotiable—this is what gives the cheesecake its perfect sliceable texture.
Step 6: Slice and serve
- Run a knife around the edges before releasing the springform pan.
- Slice with a clean, sharp knife (wipe between cuts for neat slices).
- Add your favorite toppings like berries, honey, or whipped cream.
Notes
Nutritional Value (Per Serving Approx.)
- Calories: 260–320 kcal
- Protein: 10–13g
- Carbohydrates: 20–26g
- Fat: 14–18g
- Saturated Fat: 7–9g
- Sugar: 14–18g
- Fiber: 0–1g
- Calcium: High source of calcium
- Sodium: 280–380mg