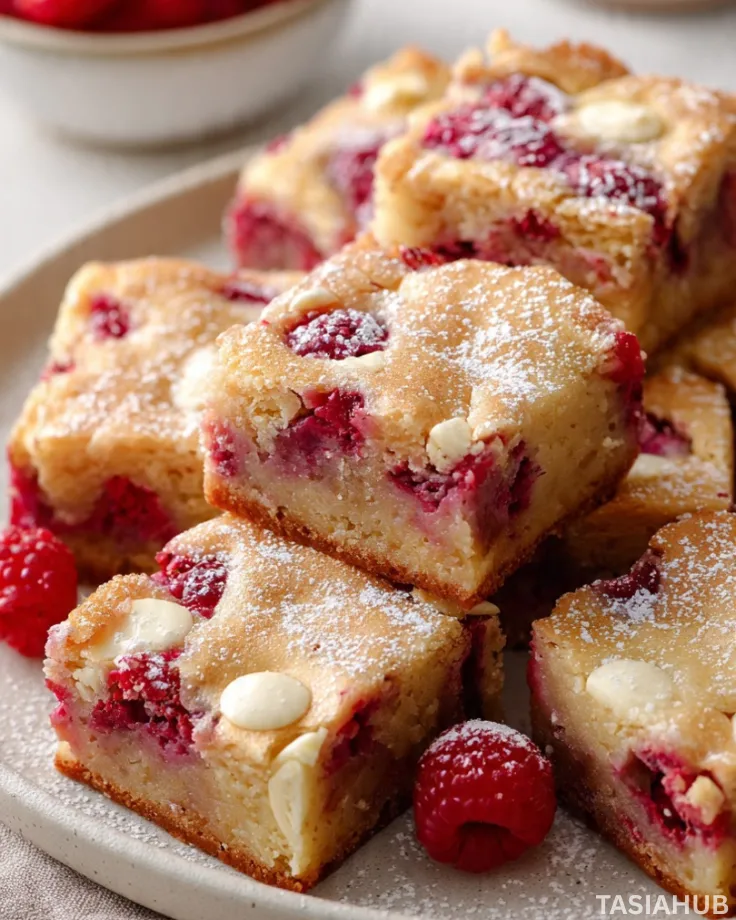
White Chocolate Raspberry Blondies
Valentine’s season is the perfect excuse to bake something sweet, colorful, and utterly irresistible. These white chocolate raspberry blondies hit all the marks—rich, buttery, and studded with tangy raspberries that balance the sweetness perfectly. They’re the kind of treat that makes you want to linger in the kitchen just to savor the aroma while they bake.
The golden blondie base is soft and chewy, with pockets of melted white chocolate that give every bite a creamy indulgence. Swirls of fresh raspberries add a fruity brightness, making them more than just a dessert—they’re a little celebration in each square. Whether you’re planning a special treat for a loved one or just treating yourself, these bars bring both elegance and comfort.
These raspberry chocolate dessert bars are versatile enough for every occasion. They work beautifully as a Valentine’s day dessert, but their festive look and rich flavor also make them an excellent choice for holiday gatherings. Think of them as a hybrid between classic blondies and fruity bars, with a softness that melts in your mouth and a flavor that keeps everyone coming back for more.
The best part? They’re straightforward to make. You don’t need fancy equipment or complicated techniques—just a mixing bowl, a pan, and your favorite white chocolate and raspberries. By the time you’ve finished prepping, your kitchen will smell like a cozy bakery, and you’ll have a tray of Christmas blondie bars ready to delight anyone lucky enough to get a square.
Why You’ll Love It
- Bursting with flavor in every bite – The combination of sweet, creamy white chocolate and tangy raspberries creates a flavor profile that feels both decadent and fresh. It’s a raspberry chocolate dessert you’ll crave again and again.
- Perfectly soft and chewy – These blondies aren’t dry or cakey. They have that ideal fudgy texture that makes each square feel like a little bite of heaven.
- Beautifully versatile – Whether you’re making them for Valentine’s day dessert, a holiday gathering, or just a cozy weekend treat, these bars fit any occasion. They’re as festive as Christmas blondie bars and as romantic as a pink dessert plate for two.
- Quick and easy to make – No complicated steps or specialty ingredients needed. You can go from mixing to fresh-from-the-oven in under an hour, which makes them a lifesaver for last-minute celebrations.
- Instagram-worthy look – With vibrant red raspberries swirling through golden blondie batter, these raspberry bars are as pretty as they are delicious. They practically photograph themselves!
Ingredient List
For the Blondie Base:
- 1 cup (2 sticks) unsalted butter, melted
- 2 cups light brown sugar, packed
- 2 large eggs
- 2 teaspoons vanilla extract
- 2 ½ cups all-purpose flour
- ½ teaspoon baking powder
- ¼ teaspoon salt
For the Mix-Ins:
- 1 ½ cups white chocolate chips or chunks
- 1 cup fresh or frozen raspberries
Ingredient Notes
- I always use light brown sugar for blondies—it adds a rich, caramel-y flavor that’s unbeatable.
- Don’t skip the vanilla extract! It really brings all the flavors together.
- Fresh raspberries are ideal, but frozen works in a pinch—just don’t thaw them completely or the bars can get soggy.
- For extra gooey pockets of sweetness, I love using white chocolate chunks instead of chips. It melts into creamy little clouds in each bite.
- A pinch of salt might feel small, but it balances the sweetness beautifully—definitely don’t skip it!
Kitchen Equipment Needed
- Mixing bowls – For combining the wet and dry ingredients separately. I love using glass bowls so I can see everything clearly.
- Whisk or wooden spoon – For mixing the butter, sugar, and eggs. A sturdy wooden spoon makes it effortless.
- Measuring cups and spoons – Accurate measurements make all the difference for perfect blondies.
- Rubber spatula – Perfect for folding in the raspberries and chocolate without smashing them.
- 8×8-inch baking pan – Ideal for even baking. I always line mine with parchment paper for easy removal.
- Oven – Preheated to get that golden, chewy texture. Mine’s been trusty for years!
- Cooling rack – Helps the blondies cool evenly and prevents soggy bottoms.
Instructions
Step 1: Prep Your Pan and Oven
- Preheat your oven to 350°F (175°C).
- Line an 8×8-inch baking pan with parchment paper, leaving a little overhang on the sides for easy removal.
- Lightly grease the parchment with butter or non-stick spray to ensure your blondies come out cleanly.
Pro Tip: Using parchment over just greasing the pan prevents the edges from sticking and keeps your blondies perfectly square.
Step 2: Mix the Wet Ingredients
- In a large mixing bowl, combine the melted butter and light brown sugar.
- Whisk together until smooth and glossy—no sugar clumps should remain.
- Add the eggs, one at a time, mixing well after each addition.
- Stir in the vanilla extract.
Pro Tip: Whisk continuously after adding the eggs to prevent curdling and ensure a silky batter.
Step 3: Combine the Dry Ingredients
- In a separate bowl, sift together the all-purpose flour, baking powder, and salt.
- Gently fold the dry ingredients into the wet mixture using a rubber spatula.
- Mix just until incorporated; overmixing can make the blondies tough.
Step 4: Add the Chocolate and Raspberries
- Gently fold in the white chocolate chips or chunks until evenly distributed.
- Carefully fold in the raspberries, trying not to break them too much.
Pro Tip: If using frozen raspberries, add them straight from the freezer to prevent the batter from becoming watery.
Step 5: Bake the Blondies
- Pour the batter into the prepared pan and spread it evenly.
- Bake for 35–40 minutes, or until the edges are golden and a toothpick inserted in the center comes out with a few moist crumbs.
Pro Tip: Don’t overbake! The center should still be slightly soft—it will firm up as it cools.
Step 6: Cool and Slice
- Allow the blondies to cool in the pan for 15–20 minutes.
- Use the parchment overhang to lift them out of the pan and place on a cooling rack.
- Once fully cooled, slice into squares or rectangles.
Pro Tip: Clean your knife between cuts for perfectly neat slices and to prevent dragging crumbs through the bars.
Tips and Tricks for Success
- Use room temperature eggs – They mix in more easily and help create a smoother batter.
- Measure flour carefully – Too much can make blondies dry. Spoon it into the cup and level it off.
- Don’t overmix – Once the flour is in, fold gently to keep your blondies soft and chewy.
- Fold in raspberries last – This keeps them from getting crushed and turning the batter pink.
- Let them cool completely – Blondies are easier to slice cleanly and hold their shape better once fully cooled.
Ingredient Substitutions and Variations
- Butter substitute: You can use coconut oil for a subtle tropical flavor, though the texture may be slightly different.
- Sugar swap: Maple sugar or coconut sugar works if you want a different sweetness profile.
- White chocolate alternative: Milk chocolate or dark chocolate chunks can be used for a richer, less sweet version.
- Berry variation: Swap raspberries for chopped strawberries, blackberries, or even frozen blueberries.
- Nutty addition: Add ½ cup chopped pecans, almonds, or macadamia nuts for extra crunch.
Serving Suggestions
- I love serving these blondies slightly warm with a scoop of vanilla ice cream—it’s pure indulgence!
- They’re perfect alongside a cup of hot coffee or cocoa for a cozy afternoon treat.
- Cut into small squares for a party platter; they pair beautifully with fresh fruit and a drizzle of chocolate.
- These raspberry bars are great as a Valentine’s day dessert, served on a pretty plate with a few whole raspberries for decoration.
- For a festive touch, sprinkle a little powdered sugar over the top for a simple, elegant look—great for Christmas blondie bars!
Storage and Reheating Instructions
- Room temperature: Store in an airtight container for up to 3 days.
- Refrigerator: Keep in an airtight container for up to 5 days—best if you like them chilled.
- Freezer: Wrap individually in plastic wrap and place in a freezer-safe bag for up to 2 months.
- Reheating: Warm in the microwave for 15–20 seconds per square for that fresh-baked feel.
- Serving from frozen: Let thaw at room temperature for about 30 minutes before slicing.
Frequently Asked Questions
Can I use frozen raspberries?
Yes! You can use them straight from the freezer. Just fold them in gently to prevent the batter from turning too pink or watery.
Can I make these gluten-free?
Absolutely. Swap the all-purpose flour for a gluten-free flour blend 1:1. The texture will stay soft and chewy.
How do I prevent the white chocolate from melting too much?
Add the chocolate chunks after the batter is fully mixed and fold them in gently. They’ll melt just enough while baking for pockets of creamy sweetness.
Can I add nuts to these blondies?
Yes! Chopped pecans, almonds, or macadamia nuts work beautifully and add a nice crunch. About ½ cup is perfect.
How do I get clean slices without crumbs?
Use a sharp knife and wipe it clean between each cut. Let the blondies cool completely or chill them slightly for even cleaner squares.
Can I double the recipe?
Definitely! Just use a 9×13-inch pan and adjust the baking time—check at 40–45 minutes for doneness.
Did you try this recipe? Let me know in the comments how it turned out—I’d love to hear your tips and twists!
White Chocolate Raspberry Blondies
Equipment
- Mixing Bowls
- Whisk or Wooden Spoon
- Measuring cups and spoons
- Rubber spatula
- 8×8-inch baking pan
- Oven
- Cooling Rack
Ingredients
For the Blondie Base:
- 1 cup 2 sticks unsalted butter, melted
- 2 cups light brown sugar packed
- 2 large eggs
- 2 teaspoons vanilla extract
- 2 ½ cups all-purpose flour
- ½ teaspoon baking powder
- ¼ teaspoon salt
For the Mix-Ins:
- 1 ½ cups white chocolate chips or chunks
- 1 cup fresh or frozen raspberries
Instructions
Step 1: Prep Your Pan and Oven
- Preheat your oven to 350°F (175°C).
- Line an 8×8-inch baking pan with parchment paper, leaving a little overhang on the sides for easy removal.
- Lightly grease the parchment with butter or non-stick spray to ensure your blondies come out cleanly.
- Pro Tip: Using parchment over just greasing the pan prevents the edges from sticking and keeps your blondies perfectly square.
Step 2: Mix the Wet Ingredients
- In a large mixing bowl, combine the melted butter and light brown sugar.
- Whisk together until smooth and glossy—no sugar clumps should remain.
- Add the eggs, one at a time, mixing well after each addition.
- Stir in the vanilla extract.
- Pro Tip: Whisk continuously after adding the eggs to prevent curdling and ensure a silky batter.
Step 3: Combine the Dry Ingredients
- In a separate bowl, sift together the all-purpose flour, baking powder, and salt.
- Gently fold the dry ingredients into the wet mixture using a rubber spatula.
- Mix just until incorporated; overmixing can make the blondies tough.
Step 4: Add the Chocolate and Raspberries
- Gently fold in the white chocolate chips or chunks until evenly distributed.
- Carefully fold in the raspberries, trying not to break them too much.
- Pro Tip: If using frozen raspberries, add them straight from the freezer to prevent the batter from becoming watery.
Step 5: Bake the Blondies
- Pour the batter into the prepared pan and spread it evenly.
- Bake for 35–40 minutes, or until the edges are golden and a toothpick inserted in the center comes out with a few moist crumbs.
- Pro Tip: Don’t overbake! The center should still be slightly soft—it will firm up as it cools.
Step 6: Cool and Slice
- Allow the blondies to cool in the pan for 15–20 minutes.
- Use the parchment overhang to lift them out of the pan and place on a cooling rack.
- Once fully cooled, slice into squares or rectangles.
- Pro Tip: Clean your knife between cuts for perfectly neat slices and to prevent dragging crumbs through the bars.
Notes
Nutritional Value (Per Serving – Approximate)
- Calories: 320–350 kcal
- Carbohydrates: 42g
- Protein: 4g
- Fat: 16g
- Saturated Fat: 9g
- Sugar: 28g
- Fiber: 2g
- Sodium: 120mg