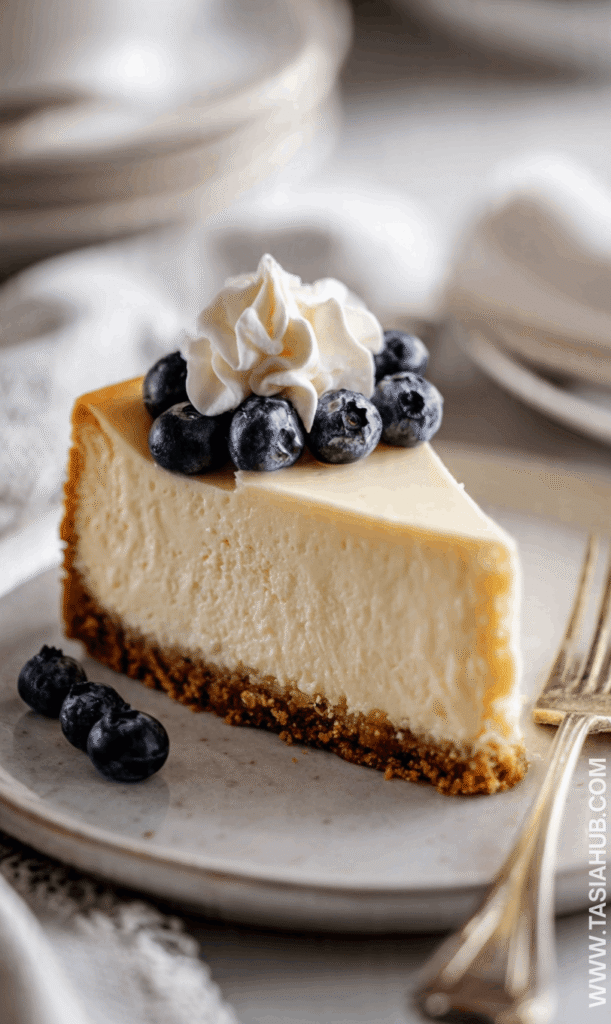
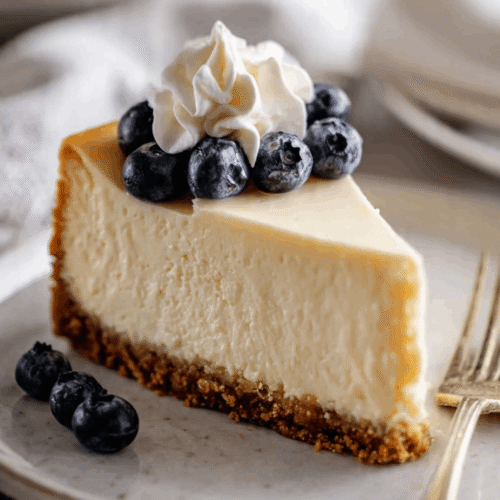
Vanilla Bean Cheesecake
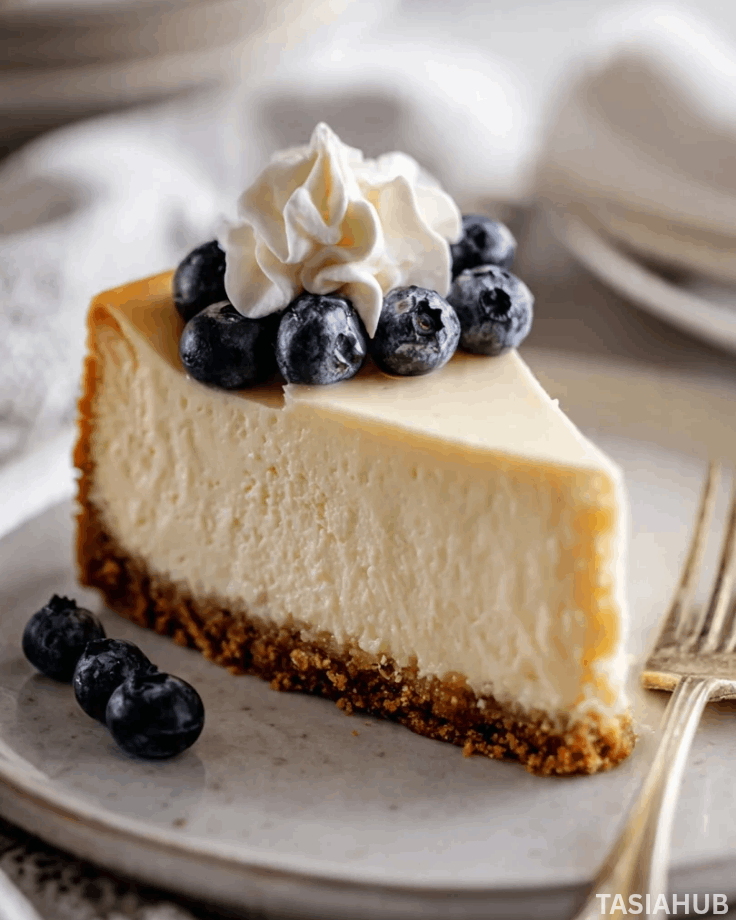
Spring brings fresh flavors, lighter meals, and a desire for desserts that feel both classic and indulgent. One dessert that perfectly fits this season is a creamy, rich vanilla bean cheesecake. Its smooth texture and subtle sweetness make it a crowd-pleaser for gatherings, special occasions, or even a cozy night in. What sets this cheesecake apart is the natural aroma of real vanilla beans, which infuse each bite with a warm, comforting flavor that’s simply unforgettable.
Easter is the perfect time to serve this dessert. Its elegant appearance, paired with a luscious taste, makes it a standout Easter dessert for both kids and adults. Imagine slicing into a golden, velvety cheesecake, the tiny specks of vanilla beans visible in each slice, and seeing the smiles as everyone takes that first heavenly bite. It’s a dessert that feels both celebratory and approachable, without being overly fussy.
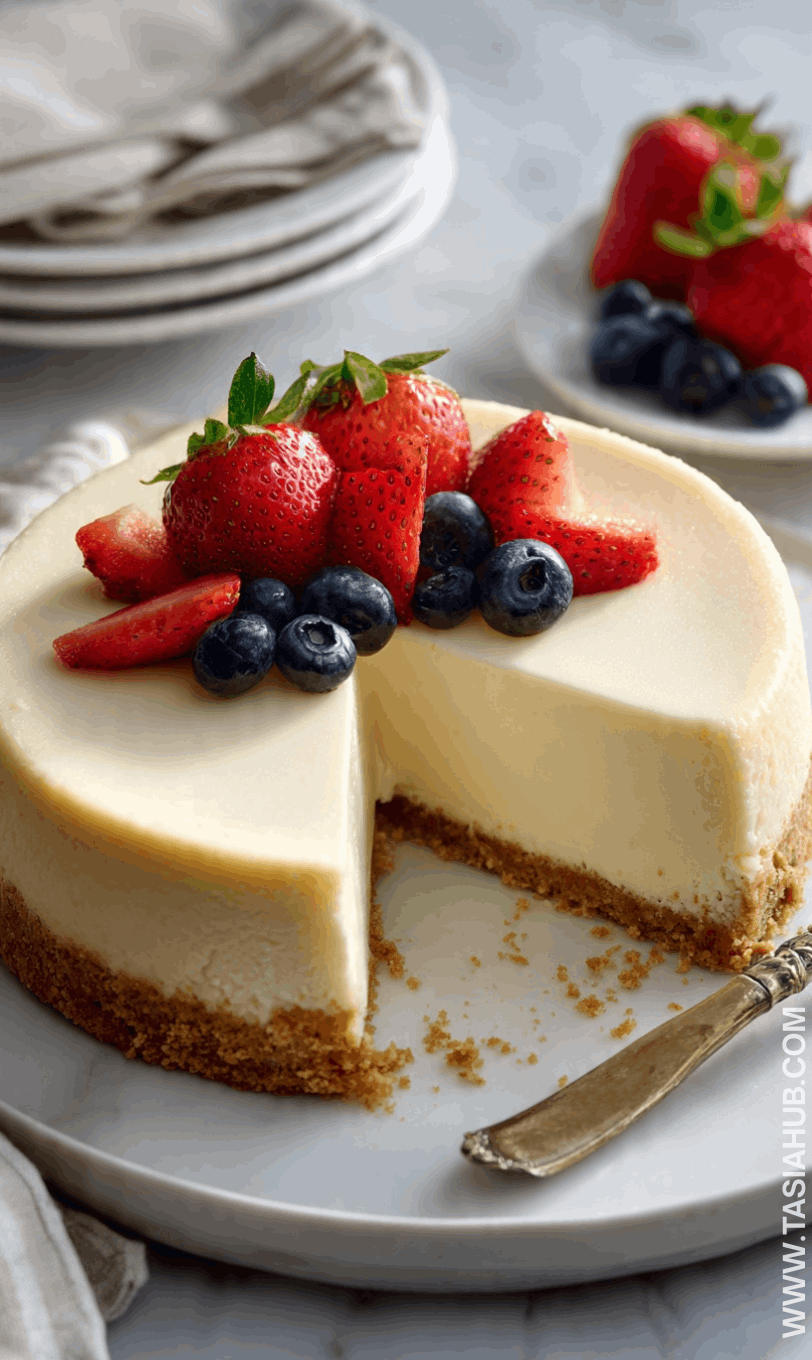
This vanilla dessert also works beautifully beyond the holiday table. Pair it with fresh berries, a drizzle of chocolate, or a tangy fruit compote to make it suitable for birthdays, brunches, or dinner parties. Its versatility makes it one of those desserts that people keep coming back to, again and again, because it never disappoints.
What makes this vanilla bean cheesecake recipe so special is the combination of a buttery crust, rich cream cheese filling, and the unmistakable fragrance of real vanilla beans. Each step, from preparing the crust to baking to the final chill, is worth it for the reward of a silky-smooth, flavorful cheesecake that’s as delightful to look at as it is to eat.
Why You’ll Love It
- Rich, creamy texture in every bite – This cheesecake is silky smooth, melting on your tongue with just the right balance of sweetness and creaminess. You’ll notice the difference that real vanilla beans make—they add depth and a natural, fragrant flavor you can’t get from extract alone.
- Perfect for celebrations – Whether it’s Easter, a birthday, or a casual dinner with friends, this dessert feels special without being intimidating to make. Its elegant appearance and delightful flavor make it a showstopper on any table.
- Versatile serving options – Top it with fresh berries, a drizzle of chocolate, caramel, or even a light fruit compote. It pairs beautifully with coffee, tea, or even a glass of sparkling wine. There’s a way to enjoy it for every occasion.
- Make-ahead convenience – Cheesecakes actually get better with time. You can prepare it a day or two in advance, giving the flavors time to meld and letting you focus on other parts of your meal or celebration.
- A true vanilla dessert experience – The tiny flecks of real vanilla bean in the filling make each bite aromatic and indulgent, proving that simple ingredients can create something truly luxurious.
Ingredient List
For the Crust
- 1 ½ cups graham cracker crumbs
- ¼ cup granulated sugar
- ½ cup unsalted butter, melted
For the Filling
- 4 (8 oz) packages cream cheese, softened
- 1 cup granulated sugar
- 4 large eggs
- 1 tsp vanilla extract
- 1 vanilla bean, split and seeds scraped
- 1 cup sour cream
- 2 tbsp all-purpose flour
For the Topping (Optional)
- Fresh berries (strawberries, blueberries, raspberries)
- Whipped cream
- Fruit compote or caramel sauce
Ingredient Notes
- Cream cheese – I always use full-fat cream cheese for the creamiest, richest texture. Low-fat versions just won’t give the same indulgent result.
- Vanilla bean – Don’t skip it! Scraping the seeds from a real vanilla bean makes this cheesecake taste gourmet and fragrant in a way vanilla extract alone can’t.
- Sour cream – Adds a subtle tang that balances the sweetness and keeps the filling silky. I prefer [Daisy] brand—it’s smooth and reliable.
- Graham cracker crumbs – I like [Honey Maid] because it’s slightly sweet and adds a nice depth to the crust.
- Eggs – Room temperature eggs help prevent cracks and give the cheesecake a smooth texture.
Kitchen Equipment Needed
- 9-inch springform pan – Makes removing the cheesecake easy without ruining the edges. I love [Wilton] for a snug, leak-free fit.
- Mixing bowls – For combining crust and filling ingredients separately. Glass or metal works great.
- Electric mixer – Helps beat the cream cheese until silky smooth. Hand mixers work too, but a stand mixer saves effort.
- Spatula – Perfect for scraping the bowl and folding in ingredients gently. I always use a silicone one—it’s flexible and heat-resistant.
- Measuring cups & spoons – Accurate measurements make a huge difference in baking.
- Saucepan – Optional, if you’re making a fruit compote for topping.
- Aluminum foil – Useful for wrapping the pan if using a water bath to prevent cracks.
- Cooling rack – Allows the cheesecake to cool evenly without soggy bottoms.
Instructions
1. Prepare the Crust
- Preheat your oven to 325°F (163°C).
- Mix the crumbs and sugar – In a medium bowl, combine graham cracker crumbs and sugar until evenly mixed.
- Add melted butter – Pour in melted butter and stir until the mixture looks like wet sand.
-
Press into pan – Press the mixture firmly into the bottom of a 9-inch springform pan. Use the bottom of a glass to pack it evenly.
- Pro tip: A tightly packed crust prevents it from crumbling when you slice the cheesecake.
- Bake for 10 minutes – Remove from oven and let it cool while preparing the filling.
2. Make the Filling
- Soften the cream cheese – Make sure it’s at room temperature. Beat it on medium speed until smooth and creamy.
- Add sugar gradually – Beat in the sugar slowly to prevent a grainy texture.
-
Incorporate eggs one at a time – Beat gently after each addition until fully combined.
- Pro tip: Overmixing after adding eggs can create cracks in the cheesecake, so mix just until smooth.
- Add vanilla – Scrape seeds from the vanilla bean and stir in with the vanilla extract.
- Fold in sour cream and flour – Use a spatula to fold these in gently until the mixture is smooth and even.
3. Assemble the Cheesecake
- Pour filling over crust – Smooth the top with a spatula.
- Optional water bath – Wrap the bottom of the springform pan with aluminum foil and place it in a larger pan filled halfway with hot water. This helps prevent cracks.
-
Bake – Place in the preheated oven and bake for 50–60 minutes, until the edges are set and the center slightly jiggles.
- Pro tip: Don’t worry if the center jiggles; it will firm up as it cools.
4. Cool and Chill
- Cool at room temperature – Let the cheesecake sit for 1–2 hours after baking.
- Refrigerate overnight – Chill for at least 6 hours, preferably overnight, to allow flavors to develop and the texture to set perfectly.
5. Serve
- Release from pan – Carefully remove the springform sides.
- Add toppings – Garnish with fresh berries, whipped cream, or a drizzle of fruit compote.
- Slice and enjoy – Use a sharp knife dipped in hot water for clean slices.
Tips and Tricks for Success
- Use room temperature cream cheese and eggs – This ensures a smooth, lump-free filling.
- Don’t overmix after adding eggs – Overbeating can trap air and cause cracks.
- Water bath for baking – Wrapping the pan in foil and using a water bath prevents cracking and keeps the cheesecake extra creamy.
- Cool gradually – Let the cheesecake cool at room temperature before refrigerating; sudden temperature changes can cause cracks.
- Sharp knife for slicing – Dip your knife in hot water and wipe clean between cuts for perfect, clean slices.
Ingredient Substitutions and Variations
- Graham cracker crust – Swap for digestive biscuits, shortbread cookies, or gluten-free cookies for a twist.
- Sour cream – Can substitute with Greek yogurt for a slightly tangier flavor and lighter texture.
- Vanilla bean – If unavailable, increase vanilla extract slightly, but the bean seeds give a speckled, luxurious look.
- Toppings – Use chocolate ganache, caramel drizzle, or lemon curd instead of berries for a different flavor profile.
- Crust butter – Use browned butter for a nuttier, richer flavor in the crust.
Serving Suggestions
- I love serving this cheesecake with a handful of fresh raspberries and a light dusting of powdered sugar—it brightens the richness perfectly.
- Top slices with a drizzle of caramel or chocolate sauce for a decadent dessert that feels extra special.
- Pair with a scoop of vanilla ice cream for a double vanilla dessert experience that’s pure indulgence.
- Serve with a fresh berry compote and a sprig of mint for a springtime Easter dessert that looks as beautiful as it tastes.
- Add a few toasted almond slivers on top for a bit of crunch—it’s my little twist when I want extra texture.
Storage and Reheating Instructions
- Refrigerate – Store leftovers in an airtight container in the fridge for up to 5 days.
- Freeze – Cheesecake slices can be frozen for up to 2 months; wrap each slice tightly in plastic wrap and place in a freezer-safe container.
- Thawing – Move frozen slices to the fridge overnight before serving for the best texture.
- No reheating needed – This cheesecake is best served chilled, but if you prefer, let slices sit at room temperature for 10–15 minutes before enjoying.
- Keep toppings separate – If using fresh fruit or sauces, store them separately until ready to serve to maintain texture and freshness.
Frequently Asked Questions
Can I make this cheesecake ahead of time?
Absolutely! This cheesecake actually tastes even better when made a day in advance. Chill it overnight to let the flavors fully develop and the texture set perfectly.
Can I use vanilla extract instead of a vanilla bean?
Yes, you can! Use 2 tsp of vanilla extract if you don’t have a vanilla bean. You’ll miss the speckled look, but the flavor will still be lovely.
How do I prevent cracks in my cheesecake?
Using a water bath and letting the cheesecake cool gradually at room temperature before refrigerating helps prevent cracks. Also, avoid overmixing after adding the eggs.
Can I freeze this cheesecake?
Yes! Wrap individual slices in plastic wrap and store in a freezer-safe container for up to 2 months. Thaw overnight in the fridge before serving.
What toppings work best with vanilla bean cheesecake?
Fresh berries, fruit compote, chocolate or caramel drizzle, whipped cream, or toasted nuts all pair beautifully. I love berries for a bright, springtime touch.
How do I get clean slices when serving?
Use a sharp knife dipped in hot water, and wipe it clean between cuts. This keeps each slice smooth and pretty for presentation.
Did you try this vanilla bean cheesecake recipe? Let me know in the comments how it turned out—I’d love to hear your favorite toppings and tweaks!
Vanilla Bean Cheesecake
Equipment
- 9-inch springform pan
- Mixing Bowls
- Electric mixer
- Spatula
- Measuring Cups & Spoons
- Saucepan
- Aluminum Foil
- Cooling Rack
Ingredients
For the Crust
- 1 ½ cups graham cracker crumbs
- ¼ cup granulated sugar
- ½ cup unsalted butter melted
For the Filling
- 4 8 oz packages cream cheese, softened
- 1 cup granulated sugar
- 4 large eggs
- 1 tsp vanilla extract
- 1 vanilla bean split and seeds scraped
- 1 cup sour cream
- 2 tbsp all-purpose flour
For the Topping (Optional)
- Fresh berries strawberries, blueberries, raspberries
- Whipped cream
- Fruit compote or caramel sauce
Instructions
Prepare the Crust
- Preheat your oven to 325°F (163°C).
- Mix the crumbs and sugar – In a medium bowl, combine graham cracker crumbs and sugar until evenly mixed.
- Add melted butter – Pour in melted butter and stir until the mixture looks like wet sand.
- Press into pan – Press the mixture firmly into the bottom of a 9-inch springform pan. Use the bottom of a glass to pack it evenly.
- Pro tip: A tightly packed crust prevents it from crumbling when you slice the cheesecake.
- Bake for 10 minutes – Remove from oven and let it cool while preparing the filling.
Make the Filling
- Soften the cream cheese – Make sure it’s at room temperature. Beat it on medium speed until smooth and creamy.
- Add sugar gradually – Beat in the sugar slowly to prevent a grainy texture.
- Incorporate eggs one at a time – Beat gently after each addition until fully combined.
- Pro tip: Overmixing after adding eggs can create cracks in the cheesecake, so mix just until smooth.
- Add vanilla – Scrape seeds from the vanilla bean and stir in with the vanilla extract.
- Fold in sour cream and flour – Use a spatula to fold these in gently until the mixture is smooth and even.
Assemble the Cheesecake
- Pour filling over crust – Smooth the top with a spatula.
- Optional water bath – Wrap the bottom of the springform pan with aluminum foil and place it in a larger pan filled halfway with hot water. This helps prevent cracks.
- Bake – Place in the preheated oven and bake for 50–60 minutes, until the edges are set and the center slightly jiggles.
- Pro tip: Don’t worry if the center jiggles; it will firm up as it cools.
Cool and Chill
- Cool at room temperature – Let the cheesecake sit for 1–2 hours after baking.
- Refrigerate overnight – Chill for at least 6 hours, preferably overnight, to allow flavors to develop and the texture to set perfectly.
Serve
- Release from pan – Carefully remove the springform sides.
- Add toppings – Garnish with fresh berries, whipped cream, or a drizzle of fruit compote.
- Slice and enjoy – Use a sharp knife dipped in hot water for clean slices.
Notes
- Calories: 450 kcal
- Total Fat: 32 g
- Saturated Fat: 19 g
- Cholesterol: 135 mg
- Sodium: 220 mg
- Total Carbohydrates: 32 g
- Sugars: 23 g
- Protein: 8 g