Valentine Chocolate Chip Cookies
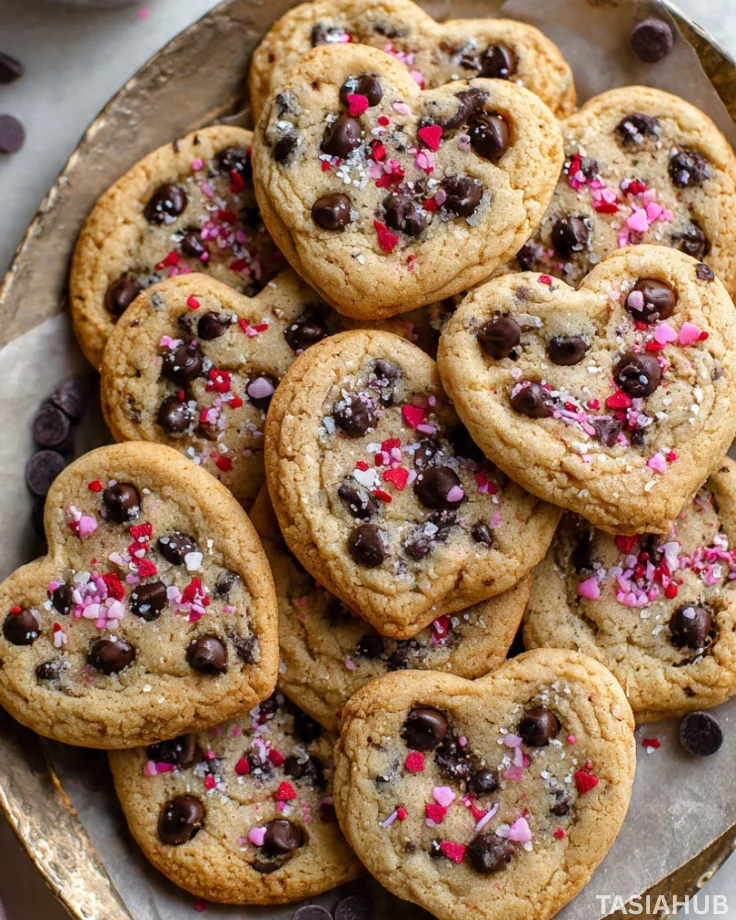
Valentine’s Day is the perfect excuse to get a little creative in the kitchen, and what better way to celebrate than with cookies that are sweet, soft, and shaped with love? These Valentine Chocolate Chip Cookies are a playful twist on a classic favorite, turning an everyday treat into a festive dessert that everyone will adore. They’re not just about the chocolate chips—they’re about the heartwarming experience of making and sharing something special.
What makes these cookies stand out is the shape. Using cookie cutters, you can transform each bite into a little heart, making them the ultimate Valentine’s Day cookies. Kids love helping to press out the dough, adults enjoy sneaking a few before they’re even baked, and everyone appreciates the thought behind a handmade treat. Even if you’re new to baking, the process is simple, and the results are guaranteed to impress.
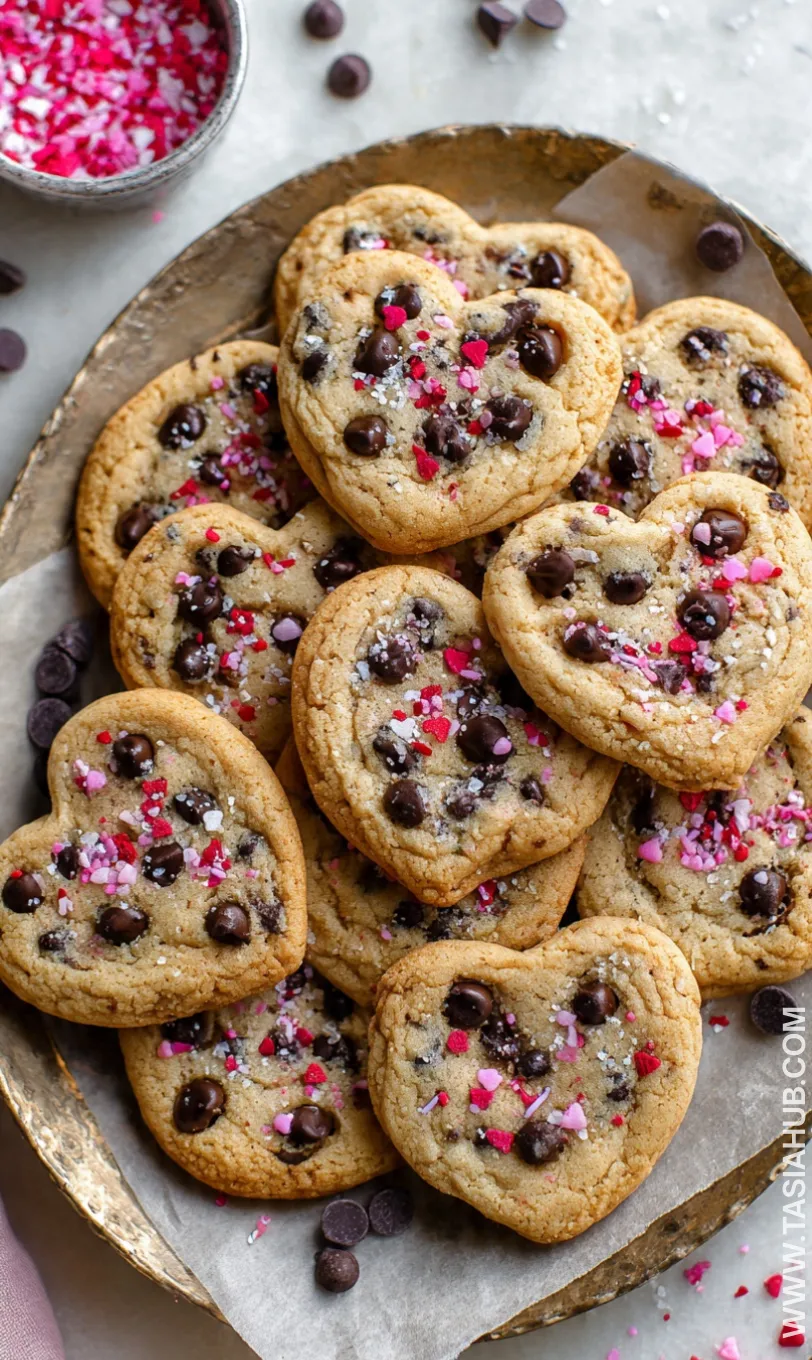
The combination of sweet dough and melty chocolate chips creates the perfect balance of flavors in every bite. You can personalize them too—sprinkle a little pink sugar on top, add some red or white chocolate chips, or even drizzle a little icing for extra flair. These cookies aren’t just a dessert; they’re a fun, interactive way to celebrate love, friendship, and the joy of baking together.
Whether you’re gifting them to a loved one, serving them at a Valentine’s Day party, or just treating yourself, these heart-shaped chocolate chip cookies bring a festive touch to any occasion. They’re soft, chewy, and bursting with chocolatey goodness, making them a standout choice among Valentine’s day desserts. Grab your rolling pin and cookie cutters, and let’s make a batch that’s as charming as it is delicious.
Why You’ll Love It
- Perfect for sharing – These heart-shaped chocolate chip cookies are more than just a treat; they’re a fun way to show someone you care. Package them in a cute box or tin, and you’ve got an instant, heartfelt Valentine’s Day gift.
- Soft, chewy, and chocolatey – Every bite melts in your mouth with gooey chocolate chips, while the cookie itself stays tender. It’s the kind of cookie that makes you smile with every chew.
- Fun to bake together – Rolling out the dough and cutting out heart shapes is a playful activity for kids, friends, or partners. Baking these cookies becomes an experience, not just a dessert.
- Customizable for extra flair – Sprinkle colored sugar, add white or red chocolate chips, or drizzle icing on top. You can make them festive, unique, and totally your own.
- A crowd-pleaser – Whether you’re making them for a Valentine’s party, school treats, or a cozy night in, these cookies are guaranteed to be a hit with everyone who tries them.
Ingredient List
For the Cookies:
- 2 ½ cups all-purpose flour
- 1 tsp baking soda
- ½ tsp salt
- ¾ cup unsalted butter, softened
- ¾ cup brown sugar, packed
- ½ cup granulated sugar
- 2 large eggs
- 2 tsp vanilla extract
- 2 cups semi-sweet chocolate chips
For Decorating (Optional):
- Red or pink sanding sugar
- White or colored chocolate chips
- Icing for drizzling
Ingredient Notes
- I always use unsalted butter because it lets you control the sweetness better and makes the cookies extra soft.
- Don’t skip the brown sugar—it’s what gives the cookies that chewy, slightly caramelized texture.
- Chocolate chips are the star here; I prefer semi-sweet, but feel free to mix in white or milk chocolate for a fun twist.
- Vanilla extract is key—it brings out all the flavors and makes the cookies smell irresistible while baking.
- Optional toppings like colored sugar or icing are purely for fun, but trust me, they make the cookies feel extra Valentine-y!
Kitchen Equipment Needed
- Mixing bowls – For combining your dry and wet ingredients; I like using glass bowls because they’re easy to see into.
- Electric mixer or hand whisk – To cream butter and sugar until fluffy; I usually reach for my trusty hand mixer.
- Measuring cups and spoons – For accuracy in every batch; a must for consistent cookies.
- Spatula – Perfect for folding in chocolate chips without breaking them.
- Rolling pin – For rolling out dough evenly; I love my silicone one because nothing sticks.
- Heart-shaped cookie cutters – To make those adorable Valentine’s Day cookies; sizes can vary for fun variety.
- Baking sheets – For even baking; I line mine with parchment paper to avoid sticking.
- Cooling rack – Lets cookies cool properly without getting soggy on the bottom.
Instructions
Step 1: Prep Your Ingredients
- Measure out all your ingredients so everything is ready to go.
- Preheat your oven to 350°F (175°C).
- Line your baking sheets with parchment paper to prevent sticking.
Pro Tip: I like to soften butter at room temperature for about 30 minutes—it blends easier and makes the cookies super tender.
Step 2: Mix the Dry Ingredients
- In a medium bowl, whisk together the flour, baking soda, and salt.
- Set aside for later.
Pro Tip: Whisk continuously to make sure the baking soda is evenly distributed; this helps the cookies rise evenly.
Step 3: Cream Butter and Sugars
- In a large bowl, use an electric mixer (or hand whisk) to cream the softened butter, brown sugar, and granulated sugar together until light and fluffy—about 2–3 minutes.
- Scrape down the sides of the bowl with a spatula as needed.
Pro Tip: Don’t rush this step; the fluffier the butter-sugar mixture, the softer your cookies will be.
Step 4: Add Eggs and Vanilla
- Beat in the eggs one at a time until fully incorporated.
- Add the vanilla extract and mix until smooth.
Step 5: Combine Wet and Dry Ingredients
- Gradually add the dry flour mixture into the wet mixture, mixing on low speed or folding with a spatula.
- Stop mixing as soon as you don’t see flour streaks.
Pro Tip: Overmixing here can make the cookies tough, so gentle folding is best.
Step 6: Fold in Chocolate Chips
- Add the chocolate chips and fold them evenly into the dough using a spatula.
- Make sure every scoop of dough has some chocolate chips for that perfect bite.
Step 7: Roll Out and Cut Shapes
- Lightly flour your surface and rolling pin.
- Roll dough to about ¼-inch thickness.
- Use heart-shaped cookie cutters to cut out shapes and place them on the prepared baking sheets.
Pro Tip: If the dough gets too soft while rolling, pop it in the fridge for 10–15 minutes—it makes cutting cleaner shapes easier.
Step 8: Bake
- Bake the cookies in the preheated oven for 10–12 minutes, or until the edges are lightly golden.
- Rotate the baking sheet halfway through for even baking.
Pro Tip: The centers may look slightly soft when you take them out—that’s perfect! They’ll firm up as they cool.
Step 9: Cool and Decorate
- Let the cookies cool on the baking sheet for 5 minutes, then transfer to a cooling rack.
- Once cooled, sprinkle with colored sugar, add extra chocolate chips, or drizzle icing for a festive Valentine’s Day touch.
Tips and Tricks for Success
- Chill the dough if it’s too soft – This makes rolling and cutting hearts much easier and keeps the shapes intact.
- Use parchment paper or silicone mats – Prevents sticking and makes cleanup a breeze.
- Don’t overbake – Cookies may look slightly undercooked in the center when you pull them out; they’ll set as they cool for that soft, chewy texture.
- Space cookies evenly – Leave about 2 inches between each cookie to allow for spreading.
- Mix-ins for fun – Add a few red or pink chocolate chips or mini candies for a festive Valentine’s twist.
Ingredient Substitutions and Variations
- Butter substitute – Use coconut oil or margarine for a dairy-free option; flavor will be slightly different but still delicious.
- Flour alternative – Try 1:1 gluten-free flour if needed; texture will be similar but may be a touch more crumbly.
- Sugar swaps – Coconut sugar can replace brown sugar for a subtle caramel note; adjust granulated sugar to taste.
- Chocolate chip variations – White, milk, or even strawberry-flavored chocolate chips add fun colors and flavors.
- Decorating ideas – Sprinkle heart-shaped sprinkles or drizzle melted chocolate for extra flair and presentation.
Serving Suggestions
- Gift them in a cute box – I love wrapping a few heart-shaped chocolate chip cookies in a small box with tissue paper; it’s an instant Valentine’s Day treat for friends or coworkers.
- Pair with a warm drink – Serve these cookies with hot cocoa or a frothy latte; the chocolate melts perfectly alongside a cozy drink.
- Add to a dessert platter – I like mixing them with strawberries and mini cupcakes for a festive Valentine’s Day dessert board.
- Enjoy as an afternoon snack – A soft, chewy cookie with a glass of milk makes my mid-afternoon break feel extra special.
- Decorate with loved ones – Let kids or friends add sprinkles and icing before serving; it turns snack time into a fun, creative activity.
Storage and Reheating Instructions
- Room temperature – Store cookies in an airtight container for up to 5 days; they stay soft and chewy.
- Refrigeration – Keep in the fridge for up to 1 week; bring to room temperature before serving for the best texture.
- Freezing – Freeze baked cookies in a sealed bag for up to 3 months; thaw at room temperature or warm in the oven for a few minutes.
- Reheating – Pop cookies in the microwave for 10–15 seconds to refresh their softness, or warm in a 300°F oven for 5 minutes.
- Dough freezing – You can freeze the shaped dough before baking; just bake directly from frozen, adding 1–2 extra minutes to the baking time.
Frequently Asked Questions
Can I make these cookies dairy-free?
Yes! Substitute the butter with coconut oil or a plant-based margarine, and choose dairy-free chocolate chips. The cookies will still be soft and delicious.
Can I use whole wheat or gluten-free flour?
Absolutely. Whole wheat flour adds a nuttier flavor, while a 1:1 gluten-free flour blend works well too. Just keep in mind the texture may be slightly different.
How do I keep the cookies soft?
Store them in an airtight container at room temperature. You can also add a slice of bread in the container—it helps retain moisture and keeps them soft longer.
Can I make the dough ahead of time?
Yes! The dough can be made a day in advance and stored in the fridge. You can also freeze it for up to 3 months—just bake directly from frozen, adding a minute or two to the baking time.
Can I make different shapes besides hearts?
Definitely! While hearts are perfect for Valentine’s Day, you can use any cookie cutter you like. Stars, circles, or even letters make fun variations.
How do I prevent the cookies from spreading too much?
Chilling the dough before rolling and cutting helps maintain the shape. Also, avoid overmixing the dough once the flour is added.
Did you try this recipe? Let me know in the comments how it turned out! I’d love to hear your baking stories and see your adorable heart-shaped cookies.
Valentine Chocolate Chip Cookies
Equipment
- Mixing Bowls
- Electric Mixer (or Hand Whisk)
- Measuring cups and spoons
- Spatula
- Rolling Pin
- Heart-shaped cookie cutters
- Baking sheets
- Cooling Rack
Ingredients
For the Cookies:
- 2 ½ cups all-purpose flour
- 1 tsp baking soda
- ½ tsp salt
- ¾ cup unsalted butter softened
- ¾ cup brown sugar packed
- ½ cup granulated sugar
- 2 large eggs
- 2 tsp vanilla extract
- 2 cups semi-sweet chocolate chips
For Decorating (Optional):
- Red or pink sanding sugar
- White or colored chocolate chips
- Icing for drizzling
Instructions
Step 1: Prep Your Ingredients
- Measure out all your ingredients so everything is ready to go.
- Preheat your oven to 350°F (175°C).
- Line your baking sheets with parchment paper to prevent sticking.
- Pro Tip: I like to soften butter at room temperature for about 30 minutes—it blends easier and makes the cookies super tender.
Step 2: Mix the Dry Ingredients
- In a medium bowl, whisk together the flour, baking soda, and salt.
- Set aside for later.
- Pro Tip: Whisk continuously to make sure the baking soda is evenly distributed; this helps the cookies rise evenly.
Step 3: Cream Butter and Sugars
- In a large bowl, use an electric mixer (or hand whisk) to cream the softened butter, brown sugar, and granulated sugar together until light and fluffy—about 2–3 minutes.
- Scrape down the sides of the bowl with a spatula as needed.
- Pro Tip: Don’t rush this step; the fluffier the butter-sugar mixture, the softer your cookies will be.
Step 4: Add Eggs and Vanilla
- Beat in the eggs one at a time until fully incorporated.
- Add the vanilla extract and mix until smooth.
Step 5: Combine Wet and Dry Ingredients
- Gradually add the dry flour mixture into the wet mixture, mixing on low speed or folding with a spatula.
- Stop mixing as soon as you don’t see flour streaks.
- Pro Tip: Overmixing here can make the cookies tough, so gentle folding is best.
Step 6: Fold in Chocolate Chips
- Add the chocolate chips and fold them evenly into the dough using a spatula.
- Make sure every scoop of dough has some chocolate chips for that perfect bite.
Step 7: Roll Out and Cut Shapes
- Lightly flour your surface and rolling pin.
- Roll dough to about ¼-inch thickness.
- Use heart-shaped cookie cutters to cut out shapes and place them on the prepared baking sheets.
- Pro Tip: If the dough gets too soft while rolling, pop it in the fridge for 10–15 minutes—it makes cutting cleaner shapes easier.
Step 8: Bake
- Bake the cookies in the preheated oven for 10–12 minutes, or until the edges are lightly golden.
- Rotate the baking sheet halfway through for even baking.
- Pro Tip: The centers may look slightly soft when you take them out—that’s perfect! They’ll firm up as they cool.
Step 9: Cool and Decorate
- Let the cookies cool on the baking sheet for 5 minutes, then transfer to a cooling rack.
- Once cooled, sprinkle with colored sugar, add extra chocolate chips, or drizzle icing for a festive Valentine’s Day touch.
Notes
Nutritional Value (Per Cookie – Approximate)
- Calories: 190 kcal
- Carbohydrates: 25 g
- Protein: 2 g
- Fat: 9 g
- Saturated Fat: 5 g
- Sugar: 15 g
- Fiber: 1 g
- Sodium: 120 mg