Shrimp Sushi Bowl
A shrimp sushi bowl is one of those meals that feels a little fancy but is secretly very easy to pull together. It brings together juicy shrimp, fluffy rice, crisp veggies, and bold sauces in one colorful bowl that’s satisfying without being heavy. Every bite has a mix of textures and flavors that keeps things interesting from start to finish.
What I love most about this dish is how flexible it is. You can keep it simple for a quick lunch or load it up with extra toppings when you want something more filling. It’s inspired by classic sushi flavors but skips the rolling, which makes it perfect for busy days when you still want something fresh and homemade.
This sushi bowl recipe is also great if you enjoy meals that look as good as they taste. The vibrant colors from the shrimp, avocado, cucumber, and rice make it feel special, even if you’re just eating at home. It’s the kind of bowl you’ll want to sit down and enjoy instead of rushing through.
Whether you’re already a sushi lover or just want to try something new, a sushi bowl like this is an easy way to switch up your usual routine. It’s comforting, flavorful, and endlessly customizable—exactly the kind of meal you’ll find yourself craving again and again.
Why You’ll Love It
- All the sushi flavors without the fuss – You get everything you love about sushi in one bowl, no rolling mats or special skills needed. It’s simple, stress-free, and still feels special.
- Perfectly balanced and satisfying – Between the tender shrimp, warm rice, and fresh veggies, each bite hits that sweet spot of hearty yet light. It fills you up without weighing you down.
- Easy to customize for your mood – Add more spice, swap in your favorite veggies, or drizzle on extra sauce. This bowl adapts effortlessly to whatever you’re craving that day.
- Great for quick meals or meal prep – It comes together fast, making it ideal for busy weekdays, and it holds up beautifully if you want to prep it ahead for lunch.
- Looks impressive with minimal effort – The colorful layers make it feel restaurant-worthy, even though it’s made with everyday ingredients right in your kitchen.
Ingredient List
For the Shrimp
- 1 lb shrimp, peeled and deveined
- 1 tablespoon olive oil
- ½ teaspoon garlic powder
- ½ teaspoon paprika
- Salt and black pepper, to taste
For the Rice
- 2 cups cooked sushi rice
- 2 tablespoons rice vinegar
- 1 tablespoon sugar
- ½ teaspoon salt
For the Bowl Toppings
- 1 avocado, sliced
- 1 cup cucumber, thinly sliced
- 1 medium carrot, shredded
- 2 green onions, sliced
- Sesame seeds, for garnish
For the Sauce
- ¼ cup mayonnaise
- 1–2 tablespoons sriracha (adjust to taste)
- 1 teaspoon soy sauce
Ingredient Notes
- Shrimp – Medium or large shrimp work best here. I always go for raw shrimp and season them myself—it gives you way more flavor than pre-cooked ones.
- Sushi rice – Short-grain rice is key for that slightly sticky texture. Don’t skip seasoning it with vinegar, sugar, and salt—it’s what makes the bowl taste like real sushi.
- Rice vinegar – Use unseasoned rice vinegar so you can control the flavor. It adds that subtle tang that ties everything together.
- Avocado – Creamy, ripe avocado balances out the shrimp perfectly. If it’s not soft enough to mash slightly with a fork, it’s not ready yet.
- Sriracha – This brings the heat. I love using classic sriracha, but feel free to adjust the amount or swap it for your favorite chili sauce.
- Sesame seeds – They might seem optional, but don’t skip them! That little nutty crunch makes a noticeable difference in the final bowl.
Kitchen Equipment Needed
- Large skillet or pan – For cooking the shrimp quickly and evenly. I always reach for a nonstick pan here—it makes cleanup so much easier.
- Medium saucepan or rice cooker – Used to cook the rice. A rice cooker is my go-to when I want perfectly fluffy rice without babysitting it.
- Mixing bowls – One for seasoning the shrimp and another for stirring together the sauce. I like using small glass bowls so I can see everything clearly.
- Measuring cups and spoons – To keep the flavors balanced, especially when seasoning the rice and sauce.
- Cutting board – For prepping the veggies. A sturdy board gives you better control when slicing.
- Sharp knife – Makes cutting avocado and cucumber quick and clean—no squishing or slipping.
- Spoon or rice paddle – For fluffing and serving the rice. A rice paddle is gentle and keeps the grains from getting mushy.
Instructions
1. Cook the Rice
- Rinse the rice under cold water until the water runs mostly clear. This removes excess starch and keeps the rice from turning gummy.
- Cook the rice according to package instructions or using your rice cooker.
- While the rice is still warm, gently fold in the rice vinegar, sugar, and salt. Mix just until combined—don’t mash the rice.
Pro tip: Use a slicing motion with your spoon when seasoning the rice. This helps keep the grains fluffy instead of compacted.
2. Prepare the Shrimp
- Pat the shrimp dry with paper towels so they sear properly in the pan.
- Add the shrimp to a bowl and toss with olive oil, garlic powder, paprika, salt, and black pepper until evenly coated.
Pro tip: Dry shrimp = better flavor. Moisture causes steaming instead of that lightly crisp exterior.
3. Cook the Shrimp
- Heat a skillet over medium-high heat until hot.
- Add the seasoned shrimp in a single layer.
- Cook for 2–3 minutes per side, flipping once, until the shrimp turn pink and opaque.
- Remove from heat immediately to avoid overcooking.
Pro tip: Don’t overcrowd the pan. If needed, cook the shrimp in batches so they brown instead of boiling.
4. Make the Sauce
- In a small bowl, combine the mayonnaise, sriracha, and soy sauce.
- Whisk until smooth and creamy, adjusting the spice level to your liking.
Pro tip: Taste as you go. A tiny extra splash of soy sauce can really balance the richness of the mayo.
5. Prep the Toppings
- Slice the avocado, cucumber, and green onions.
- Shred the carrot if it’s not already prepared.
- Set everything within reach for easy bowl assembly.
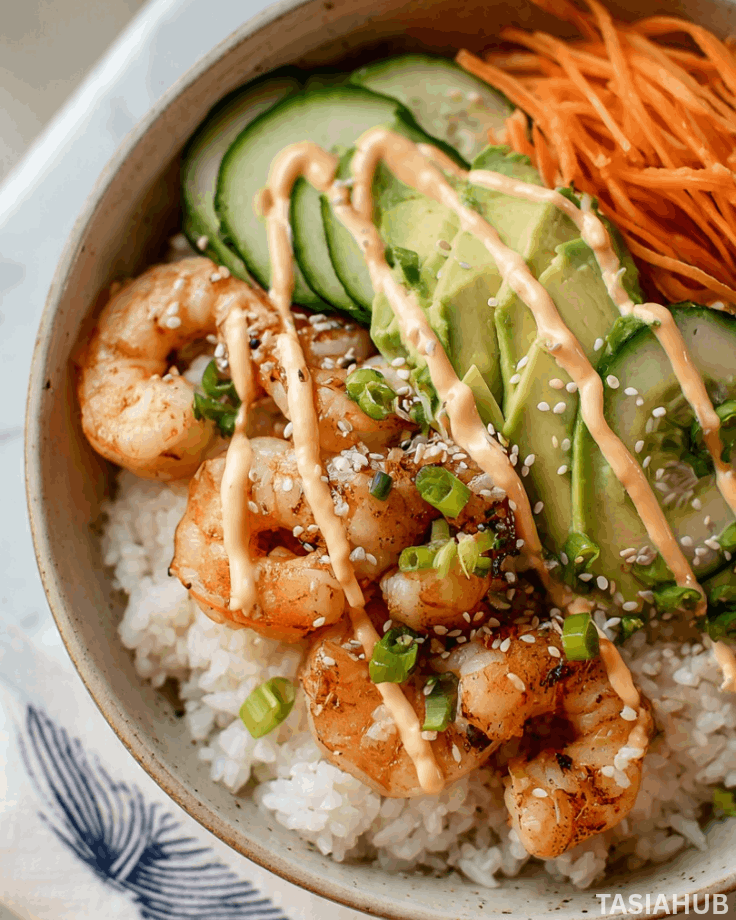
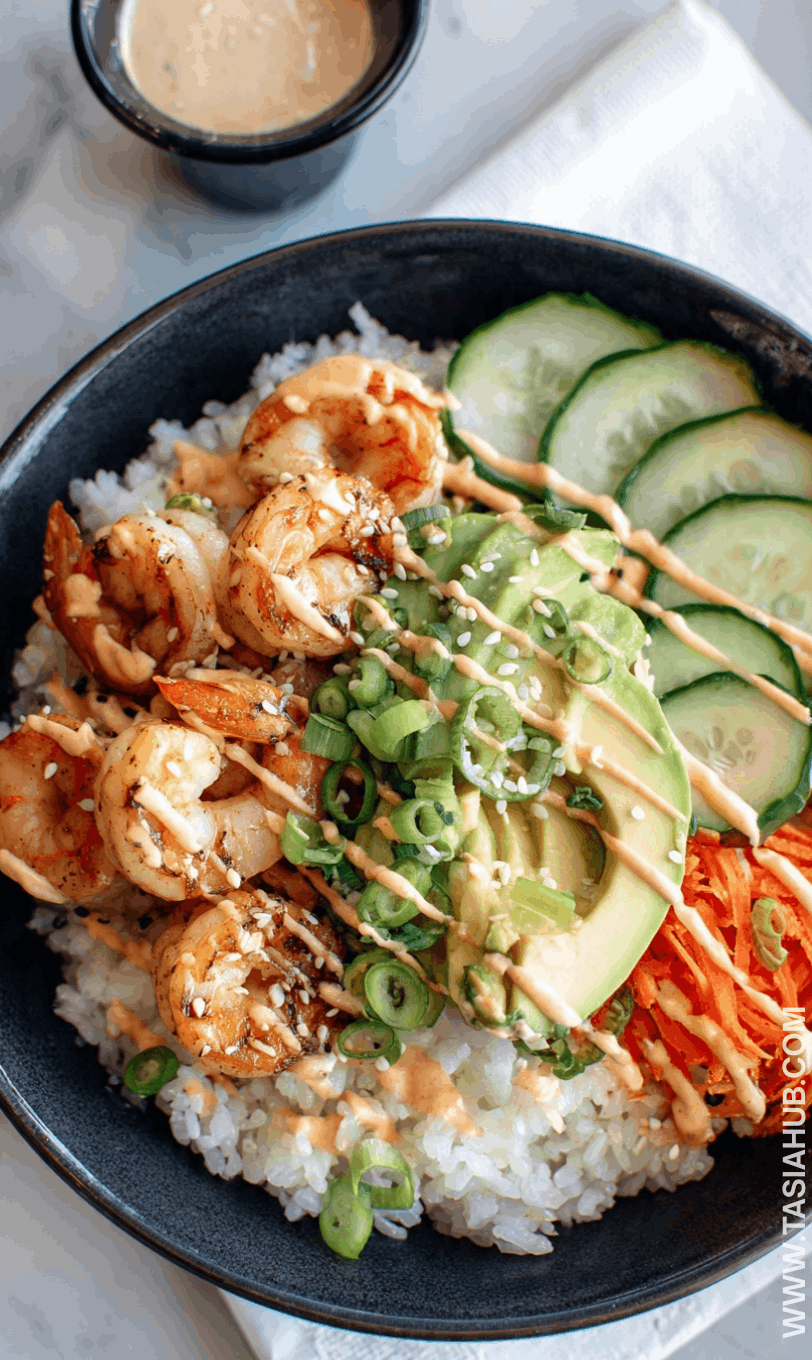
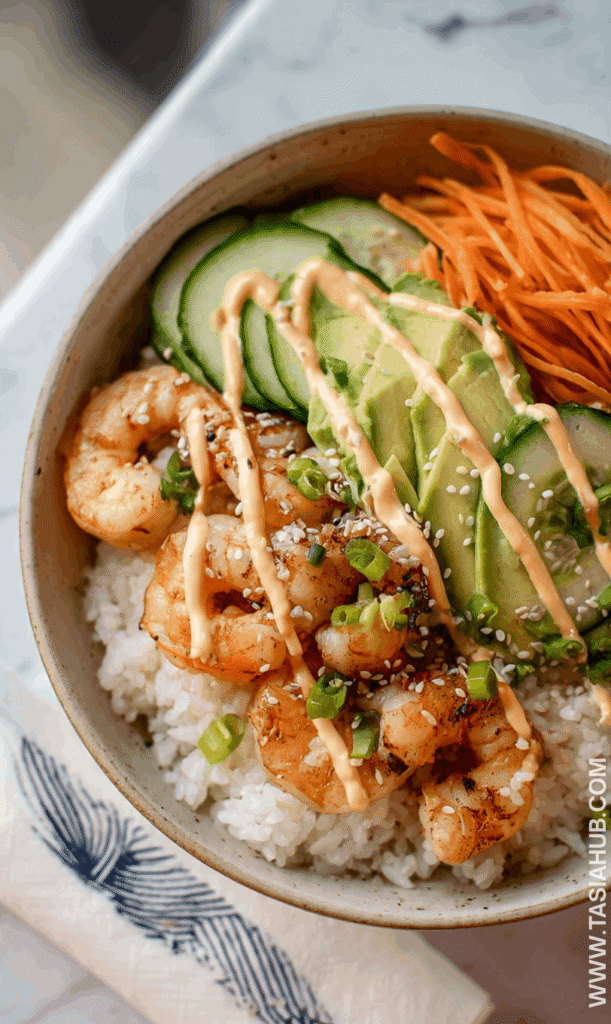
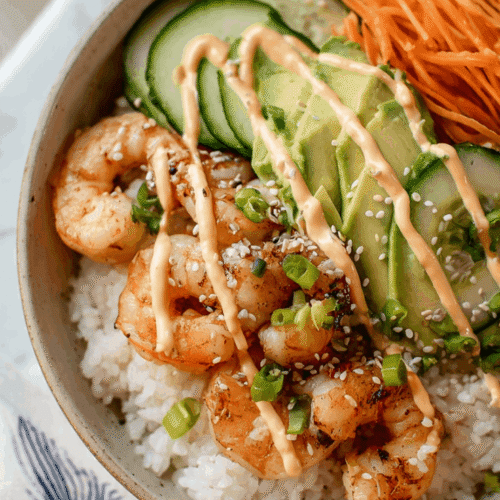
6. Assemble the Sushi Bowls
- Start with a generous scoop of seasoned rice at the bottom of each bowl.
- Arrange the shrimp, avocado, cucumber, carrot, and green onions on top.
- Drizzle with the sauce and finish with a sprinkle of sesame seeds.
Pro tip: Layer ingredients instead of mixing everything together—it makes the bowl more visually appealing and lets each flavor shine.
Tips and Tricks for Success
- Season the rice while it’s warm – This helps the vinegar mixture absorb properly and gives the rice that signature sushi flavor.
- Don’t overcook the shrimp – As soon as they turn pink and opaque, pull them off the heat. Overcooked shrimp turn rubbery fast.
- Prep everything before assembling – Having all your toppings ready makes the final step quick and stress-free.
- Adjust the sauce to your taste – Like it spicy? Add more sriracha. Prefer it milder? Start with less and build from there.
- Serve immediately for best texture – Freshly cooked rice and warm shrimp make a big difference in overall flavor.
Ingredient Substitutions and Variations
- Protein swap – Use salmon, crab, tofu, or even grilled chicken if shrimp isn’t your thing.
- Rice alternatives – Try brown rice, jasmine rice, or cauliflower rice for a lighter option.
- Veggie mix-ins – Add edamame, shredded cabbage, radishes, or mango for extra color and crunch.
- Sauce variations – Swap the spicy mayo for eel sauce, teriyaki sauce, or a simple soy-sesame drizzle.
- Low-carb version – Skip the rice and serve everything over a bed of mixed greens for a fresh, sushi-inspired salad bowl.
Serving Suggestions
- As a fresh weeknight dinner – I love serving this shrimp sushi bowl right after assembling it, with extra sauce on the side so everyone can drizzle to taste.
- For lunch or meal prep – It’s perfect for a make-ahead lunch. I usually pack the rice and shrimp together and keep the toppings separate until I’m ready to eat.
- With a light side dish – Pair it with a simple seaweed salad or a small bowl of miso soup for a more complete, restaurant-style meal.
- Family-style bowl night – Lay out all the toppings and let everyone build their own bowl. It’s fun, interactive, and great for picky eaters.
- As part of a sushi-inspired spread – I like serving it alongside spring rolls or dumplings when I’m hosting—it fits right in without extra effort.
Storage and Reheating Instructions
- Refrigeration – Store leftover components in separate airtight containers in the fridge for up to 3 days.
- Best way to store – Keep rice, shrimp, sauce, and toppings separate to maintain texture and freshness.
- Reheating the shrimp and rice – Warm gently in the microwave in short intervals until just heated through.
- Avoid reheating fresh toppings – Avocado and cucumber are best added fresh after reheating.
- Serving leftovers – Drizzle on fresh sauce and add a sprinkle of sesame seeds to bring everything back to life.
Frequently Asked Questions
Can I use frozen shrimp?
Yes! Just make sure they’re fully thawed and patted dry before seasoning. Removing excess moisture helps them cook evenly and develop better flavor.
Is this shrimp sushi bowl served hot or cold?
It’s best served warm. The rice and shrimp are warm, while the toppings are cool, which creates a really nice contrast in texture and temperature.
Can I make this ahead of time?
Absolutely. You can prep the rice, shrimp, and sauce in advance and store them separately. Assemble the bowl just before serving for the freshest taste.
How do I keep the avocado from browning?
If prepping ahead, squeeze a little lemon or lime juice over the avocado and store it in an airtight container. This helps slow down browning.
Is this recipe spicy?
It has a mild kick from the sriracha, but it’s easy to adjust. Use less for a milder bowl or add more if you love extra heat.
Can I make it dairy-free?
Yes! Simply swap the mayo in the sauce for a dairy-free alternative. The flavors still come together beautifully.
Did you try this shrimp sushi bowl? Let me know in the comments how it turned out, or share your favorite toppings—I’d love to hear from you!
Shrimp Sushi Bowl
Equipment
- Large Skillet or Pan
- Medium saucepan or rice cooker
- Mixing Bowls
- Measuring cups and spoons
- Cutting board
- Sharp Knife
- Spoon or rice paddle
Ingredients
For the Shrimp
- 1 lb shrimp peeled and deveined
- 1 tablespoon olive oil
- ½ teaspoon garlic powder
- ½ teaspoon paprika
- Salt and black pepper to taste
For the Rice
- 2 cups cooked sushi rice
- 2 tablespoons rice vinegar
- 1 tablespoon sugar
- ½ teaspoon salt
For the Bowl Toppings
- 1 avocado sliced
- 1 cup cucumber thinly sliced
- 1 medium carrot shredded
- 2 green onions sliced
- Sesame seeds for garnish
For the Sauce
- ¼ cup mayonnaise
- 1 –2 tablespoons sriracha adjust to taste
- 1 teaspoon soy sauce
Instructions
Cook the Rice
- Rinse the rice under cold water until the water runs mostly clear. This removes excess starch and keeps the rice from turning gummy.
- Cook the rice according to package instructions or using your rice cooker.
- While the rice is still warm, gently fold in the rice vinegar, sugar, and salt. Mix just until combined—don’t mash the rice.
- Pro tip: Use a slicing motion with your spoon when seasoning the rice. This helps keep the grains fluffy instead of compacted.
Prepare the Shrimp
- Pat the shrimp dry with paper towels so they sear properly in the pan.
- Add the shrimp to a bowl and toss with olive oil, garlic powder, paprika, salt, and black pepper until evenly coated.
- Pro tip: Dry shrimp = better flavor. Moisture causes steaming instead of that lightly crisp exterior.
Cook the Shrimp
- Heat a skillet over medium-high heat until hot.
- Add the seasoned shrimp in a single layer.
- Cook for 2–3 minutes per side, flipping once, until the shrimp turn pink and opaque.
- Remove from heat immediately to avoid overcooking.
- Pro tip: Don’t overcrowd the pan. If needed, cook the shrimp in batches so they brown instead of boiling.
Make the Sauce
- In a small bowl, combine the mayonnaise, sriracha, and soy sauce.
- Whisk until smooth and creamy, adjusting the spice level to your liking.
- Pro tip: Taste as you go. A tiny extra splash of soy sauce can really balance the richness of the mayo.
Prep the Toppings
- Slice the avocado, cucumber, and green onions.
- Shred the carrot if it’s not already prepared.
- Set everything within reach for easy bowl assembly.
Assemble the Sushi Bowls
- Start with a generous scoop of seasoned rice at the bottom of each bowl.
- Arrange the shrimp, avocado, cucumber, carrot, and green onions on top.
- Drizzle with the sauce and finish with a sprinkle of sesame seeds.
- Pro tip: Layer ingredients instead of mixing everything together—it makes the bowl more visually appealing and lets each flavor shine.
Notes
- Calories: 420 kcal
- Protein: 28 g
- Carbohydrates: 45 g
- Fat: 16 g
- Fiber: 6 g
- Sugar: 5 g
- Sodium: 600 mg