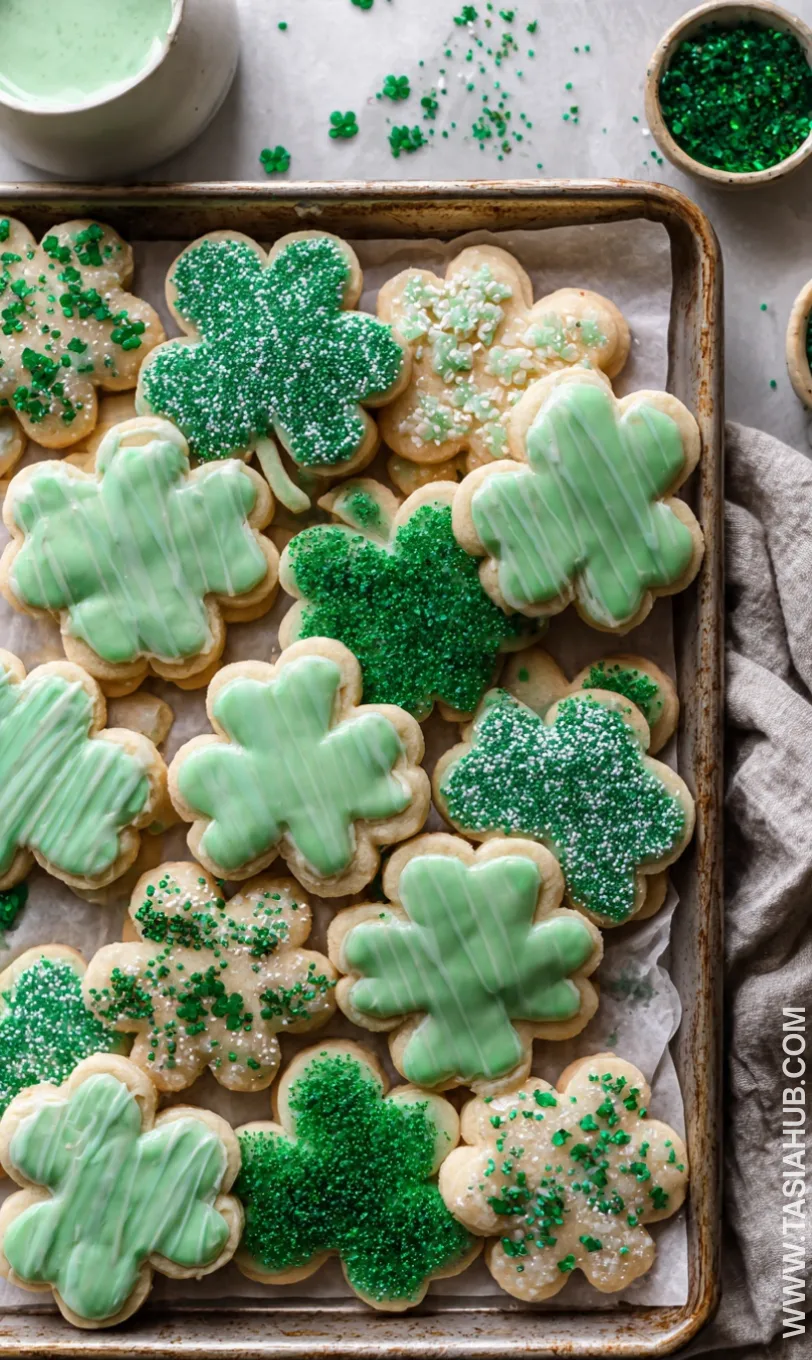
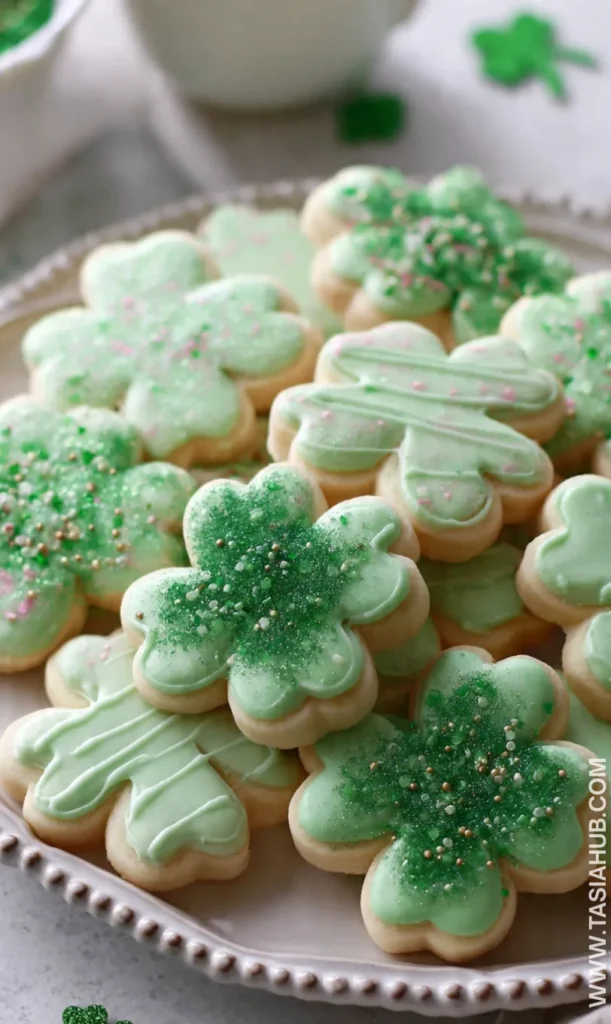
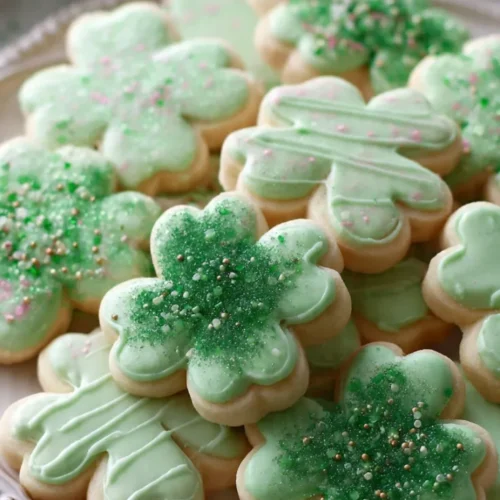
Shamrock Sugar Cookies
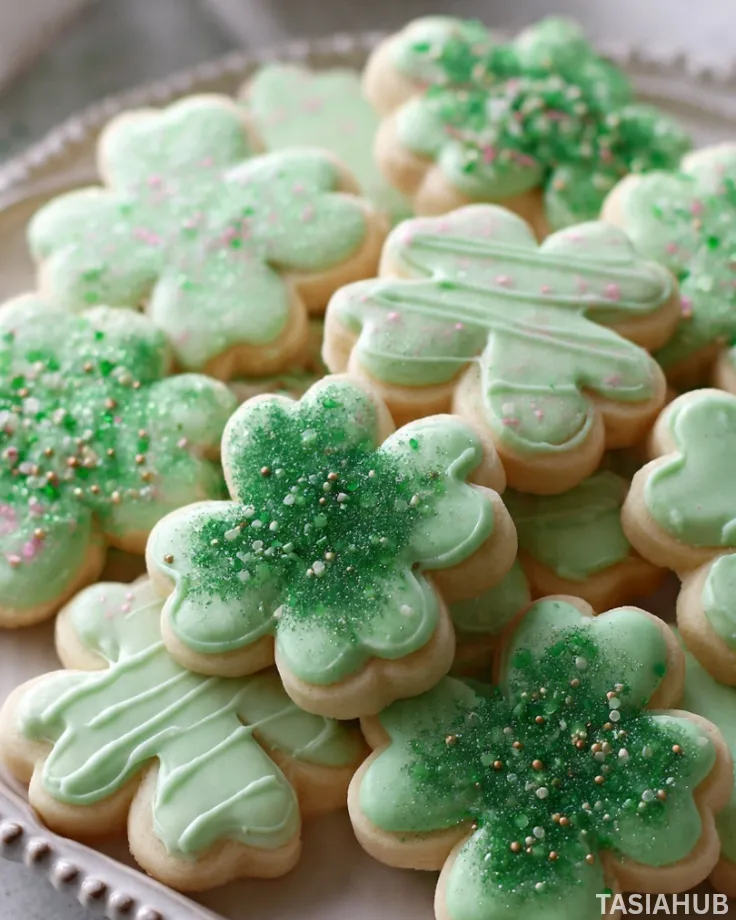
Shamrock sugar cookies are one of those treats that instantly make a celebration feel more festive. With their soft centers, lightly crisp edges, and playful green color, they fit right into the joyful spirit of March. Whether you’re baking for family, friends, or just for fun, these cookies bring a little extra charm to the season.
I love how these cookies balance simplicity with creativity. A classic sugar cookie dough becomes something special with a shamrock shape and a touch of green icing or sugar. They’re sweet without being overpowering, which makes them perfect for sharing, gifting, or setting out on a dessert table.
These cookies also shine as a St Patrick’s Day dessert because they’re so versatile. You can keep them plain and buttery, decorate them with royal icing, or add sprinkles for extra flair. They work beautifully as St Patrick’s Day cookies for parties, school events, or cozy baking days at home.
What makes them even better is how well they fit into the season beyond the holiday. As spring sugar cookies, they feel light, cheerful, and fresh—ideal for early spring baking. If you’re planning a lineup of March cookies or specifically craving St Patrick’s Day sugar cookies that are fun and festive without being complicated, shamrock sugar cookies are always a winning choice.
Why You’ll Love It
- Fun and Festive – The shamrock shape instantly brings a cheerful vibe to your kitchen and dessert table. Perfect for celebrating St Patrick’s Day or just adding a pop of green to your spring baking.
- Customizable Decorations – You can keep them simple with a light dusting of sugar, or get creative with icing, sprinkles, or edible glitter. Each cookie becomes a little work of art.
- Soft, Yet Slightly Crisp – These cookies have the perfect texture—soft and tender on the inside with just enough crisp around the edges to make every bite satisfying.
- Great for Gifting – Pack them in a cute box or jar, and you’ve got an easy, homemade St Patrick’s Day gift that feels personal and thoughtful.
- Kid-Friendly Baking – The dough is easy to work with, making these cookies a fun project to bake with kids. Plus, cutting out shamrocks is a joyful activity for little hands.
Ingredient List
For the Cookies:
- 2 ¾ cups all-purpose flour
- 1 teaspoon baking powder
- ½ teaspoon salt
- 1 cup unsalted butter, softened
- 1 ½ cups granulated sugar
- 1 large egg
- 1 teaspoon vanilla extract
- ½ teaspoon almond extract (optional, but adds a lovely depth!)
- Green food coloring (a few drops for that festive shamrock hue)
For Decorating:
- ½ cup powdered sugar
- 1–2 teaspoons milk (adjust for consistency)
- Green sprinkles or sanding sugar
- Optional: royal icing for more detailed designs
Ingredient Notes
- I always use unsalted butter because it lets the sweetness of the sugar shine without adding extra saltiness.
- Don’t skip the baking powder! It gives the cookies that perfect soft-yet-slightly-crisp texture.
- Almond extract is optional, but I love adding it—it gives the cookies a subtle, nutty aroma that makes them taste bakery-level amazing.
- Food coloring can be adjusted depending on how vibrant you want your shamrocks. A little goes a long way!
- For decorating, green sprinkles are my go-to—they make the cookies instantly festive without any fuss.
Kitchen Equipment Needed
- Mixing bowls – For combining your dry and wet ingredients; I love using glass bowls so you can see everything clearly.
- Electric mixer or stand mixer – Makes creaming butter and sugar effortless; saves your arms from a workout!
- Measuring cups & spoons – Accurate measurements are key for perfect sugar cookies every time.
- Rolling pin – To roll out the dough evenly; a non-stick one works wonders.
- Shamrock cookie cutter – The star of the show! Choose a sturdy metal or plastic cutter for clean shapes.
- Baking sheets – Flat and sturdy for even baking; I line mine with parchment paper for easy cleanup.
- Cooling rack – Lets cookies cool evenly without getting soggy on the bottom.
- Small spatula – For transferring cookies from sheet to rack without breaking them.
Instructions
Step 1: Prep Your Ingredients
- Take the butter out of the fridge and let it soften at room temperature for about 30–45 minutes. Soft butter blends more easily with sugar.
- Measure out all your flour, baking powder, and salt so they’re ready to go.
- If using almond extract, have it measured and ready alongside the vanilla.
Pro Tip: Softened butter should still be slightly firm, not melting. Too soft butter can make the dough too sticky.
Step 2: Mix the Dry Ingredients
- In a medium bowl, whisk together the flour, baking powder, and salt.
- Set aside.
Pro Tip: Whisk thoroughly to evenly distribute the baking powder—this ensures your cookies rise consistently.
Step 3: Cream the Butter and Sugar
- In a large mixing bowl, use an electric mixer to beat the butter and granulated sugar together on medium speed until fluffy and pale, about 2–3 minutes.
- Add the egg, vanilla, and almond extract (if using), and beat until fully combined.
Pro Tip: Scrape down the sides of the bowl with a spatula to make sure everything is evenly mixed.
Step 4: Combine Wet and Dry Ingredients
- Gradually add the dry ingredients to the wet ingredients, mixing on low speed until a soft dough forms.
- Add a few drops of green food coloring and gently knead it into the dough until evenly colored.
Pro Tip: Don’t overmix here—overworking the dough can make the cookies tough.
Step 5: Chill the Dough
- Divide the dough into two disks, wrap in plastic wrap, and chill in the fridge for at least 1 hour.
- Chilling makes it easier to roll out and keeps the cookies from spreading too much.
Step 6: Roll Out and Cut the Cookies
- Lightly flour your work surface and rolling pin. Roll the dough to about ¼-inch thickness.
- Press the shamrock cookie cutter into the dough and transfer each cutout to a lined baking sheet.
Pro Tip: If the dough starts sticking, sprinkle a little more flour on the surface or the rolling pin.
Step 7: Bake the Cookies
- Preheat your oven to 350°F (175°C).
- Bake cookies for 8–10 minutes, or until the edges just start to turn golden.
- Let them cool on the baking sheet for 5 minutes before transferring to a cooling rack.
Pro Tip: Keep a close eye during the last 2 minutes—cookies can go from perfect to overbaked quickly.
Step 8: Decorate
- Mix powdered sugar with milk to create a smooth icing, if desired.
- Spread or pipe icing onto cooled cookies and add sprinkles while still wet so they stick.
- Let the icing set completely before stacking or storing.
Pro Tip: For extra sparkle, lightly dust with sanding sugar or edible glitter after icing dries.
Tips and Tricks for Success
- Chill the dough – It makes rolling and cutting the cookies much easier and prevents them from spreading too much in the oven.
- Even thickness – Roll your dough evenly (¼-inch is ideal) so cookies bake at the same rate.
- Use parchment paper – It prevents sticking and makes cleanup a breeze.
- Don’t overbake – Cookies will firm up as they cool; take them out just as the edges turn golden.
- Decorate once cooled – Warm cookies can cause icing to melt or run, so let them cool completely before decorating.
- Store properly – Keep cookies in an airtight container to stay soft for days.
Ingredient Substitutions and Variations
- Butter substitute – Use coconut oil or vegan butter for a dairy-free version; texture may be slightly different.
- Flour alternative – Try a 1:1 gluten-free flour blend for gluten-free shamrock cookies.
- Sugar swap – Brown sugar adds a subtle caramel flavor, giving a slightly chewier texture.
- Flavor twists – Add a few drops of peppermint extract or lemon zest for a seasonal spin.
- Decorating variation – Use colored royal icing, chocolate drizzle, or edible gold dust instead of sprinkles for a fancy look.
- Mini cookies – Roll dough thinner and cut smaller shamrocks for bite-sized treats perfect for parties.
Serving Suggestions
- I love pairing shamrock sugar cookies with a warm cup of tea or coffee—it makes a simple morning feel festive and special.
- Serve them alongside a scoop of vanilla or mint ice cream for a fun St Patrick’s Day dessert treat.
- Arrange them on a platter with other spring sugar cookies for a cheerful party display; they’re always the first to disappear!
- I enjoy packing a few in a small bag for coworkers or friends—it’s an easy way to share some holiday joy.
- Pair them with a glass of milk for a cozy snack while reading or watching a favorite spring movie; it’s comfort in cookie form!
Storage and Reheating Instructions
- Room temperature – Store in an airtight container for up to 5 days to keep cookies soft and fresh.
- Freezing – Place in a freezer-safe bag or container for up to 2 months; thaw at room temperature before decorating or serving.
- Iced cookies – Store separately from plain cookies to prevent icing from smudging.
- Reheating – Warm in the microwave for 10–15 seconds for that freshly-baked feel.
- Refreshing crispness – Pop cookies in a preheated 300°F oven for 3–5 minutes if you want a slight crisp on the edges.
Frequently Asked Questions
Can I make these cookies ahead of time?
Absolutely! You can make the dough a day or two in advance and keep it chilled in the fridge, or freeze the baked cookies for up to 2 months.
Can I use a different shape instead of shamrocks?
Yes! Any cookie cutter works—hearts, stars, or circles are all great if you want a different theme or just for fun.
My cookies spread too much—what did I do wrong?
This usually happens if the butter was too soft or the dough wasn’t chilled. Make sure to chill the dough before cutting and baking for best results.
Can I make these cookies gluten-free or dairy-free?
Yes! Substitute the flour with a 1:1 gluten-free blend and use dairy-free butter to make them suitable for special diets.
How do I get the icing to stay smooth and not crack?
Use cooled cookies and a smooth, slightly runny icing. Let it set at room temperature before stacking or storing.
Can I add extra flavors to the dough?
Definitely! A little lemon zest, peppermint extract, or even a drop of orange extract can give your cookies a unique twist.
Did you try this recipe? Let me know in the comments how your shamrock sugar cookies turned out—I’d love to hear your baking success!
Shamrock Sugar Cookies
Equipment
- Mixing Bowls
- Electric mixer or stand mixer
- Measuring Cups & Spoons
- Rolling Pin
- Shamrock cookie cutter
- Baking sheets
- Cooling Rack
- Small spatula
Ingredients
For the Cookies:
- 2 ¾ cups all-purpose flour
- 1 teaspoon baking powder
- ½ teaspoon salt
- 1 cup unsalted butter softened
- 1 ½ cups granulated sugar
- 1 large egg
- 1 teaspoon vanilla extract
- ½ teaspoon almond extract optional, but adds a lovely depth!
- Green food coloring a few drops for that festive shamrock hue
For Decorating:
- ½ cup powdered sugar
- 1 –2 teaspoons milk adjust for consistency
- Green sprinkles or sanding sugar
- Optional: royal icing for more detailed designs
Instructions
Step 1: Prep Your Ingredients
- Take the butter out of the fridge and let it soften at room temperature for about 30–45 minutes. Soft butter blends more easily with sugar.
- Measure out all your flour, baking powder, and salt so they’re ready to go.
- If using almond extract, have it measured and ready alongside the vanilla.
- Pro Tip: Softened butter should still be slightly firm, not melting. Too soft butter can make the dough too sticky.
Step 2: Mix the Dry Ingredients
- In a medium bowl, whisk together the flour, baking powder, and salt.
- Set aside.
- Pro Tip: Whisk thoroughly to evenly distribute the baking powder—this ensures your cookies rise consistently.
Step 3: Cream the Butter and Sugar
- In a large mixing bowl, use an electric mixer to beat the butter and granulated sugar together on medium speed until fluffy and pale, about 2–3 minutes.
- Add the egg, vanilla, and almond extract (if using), and beat until fully combined.
- Pro Tip: Scrape down the sides of the bowl with a spatula to make sure everything is evenly mixed.
Step 4: Combine Wet and Dry Ingredients
- Gradually add the dry ingredients to the wet ingredients, mixing on low speed until a soft dough forms.
- Add a few drops of green food coloring and gently knead it into the dough until evenly colored.
- Pro Tip: Don’t overmix here—overworking the dough can make the cookies tough.
Step 5: Chill the Dough
- Divide the dough into two disks, wrap in plastic wrap, and chill in the fridge for at least 1 hour.
- Chilling makes it easier to roll out and keeps the cookies from spreading too much.
Step 6: Roll Out and Cut the Cookies
- Lightly flour your work surface and rolling pin. Roll the dough to about ¼-inch thickness.
- Press the shamrock cookie cutter into the dough and transfer each cutout to a lined baking sheet.
- Pro Tip: If the dough starts sticking, sprinkle a little more flour on the surface or the rolling pin.
Step 7: Bake the Cookies
- Preheat your oven to 350°F (175°C).
- Bake cookies for 8–10 minutes, or until the edges just start to turn golden.
- Let them cool on the baking sheet for 5 minutes before transferring to a cooling rack.
- Pro Tip: Keep a close eye during the last 2 minutes—cookies can go from perfect to overbaked quickly.
Step 8: Decorate
- Mix powdered sugar with milk to create a smooth icing, if desired.
- Spread or pipe icing onto cooled cookies and add sprinkles while still wet so they stick.
- Let the icing set completely before stacking or storing.
- Pro Tip: For extra sparkle, lightly dust with sanding sugar or edible glitter after icing dries.
Notes
Nutritional Value (per cookie, approximate):
- Calories: 160 kcal
- Carbohydrates: 22 g
- Sugar: 14 g
- Fat: 7 g
- Saturated Fat: 4 g
- Protein: 2 g
- Fiber: 0.5 g
- Sodium: 90 mg