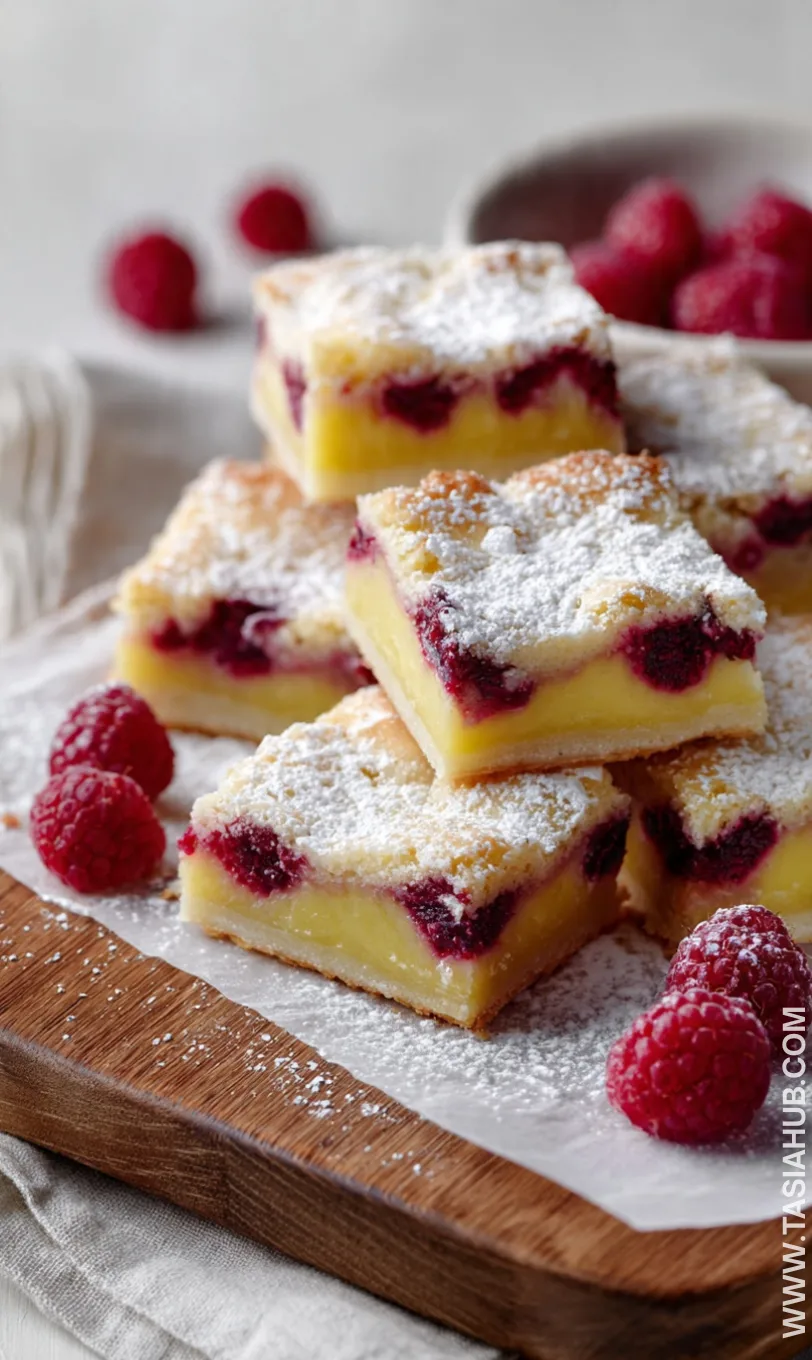
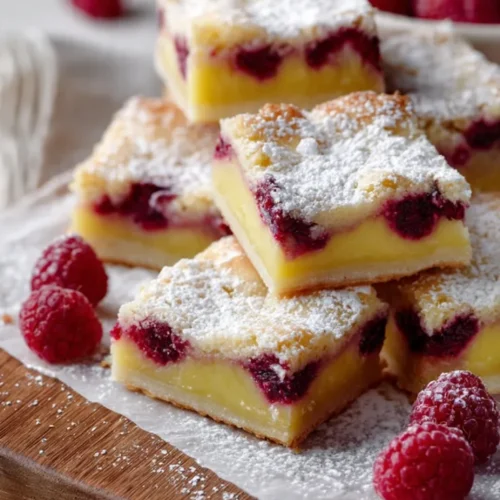
Raspberry Lemon Bars
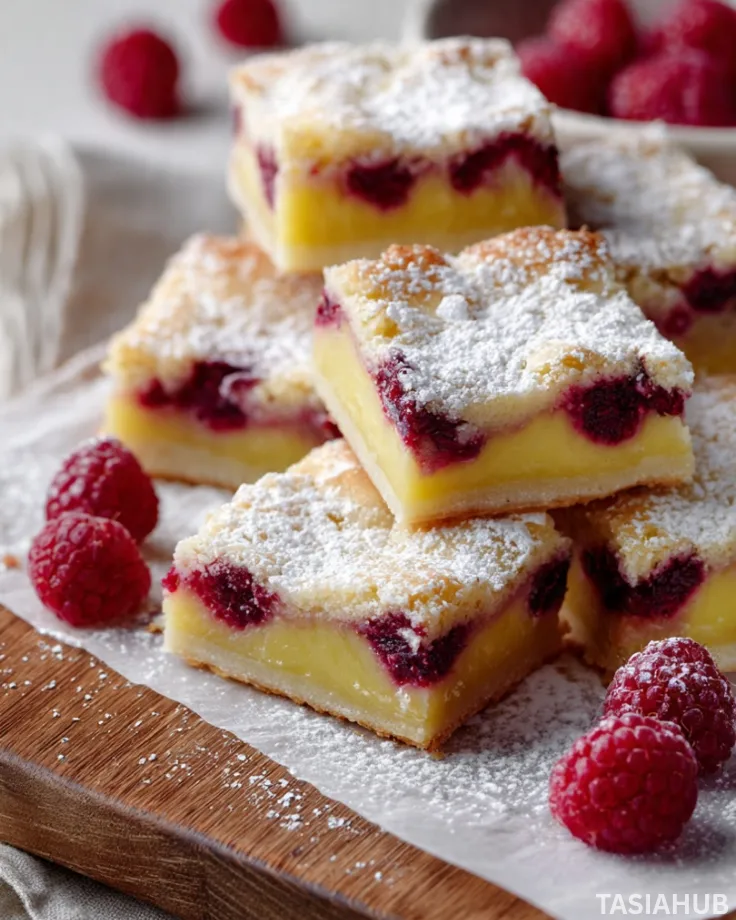
Bright, zesty, and perfectly sweet, these raspberry lemon bars are the kind of dessert that instantly lifts your mood. The tartness of fresh lemons pairs beautifully with the natural sweetness of raspberries, creating a flavor combination that’s refreshing but indulgent at the same time. Each bite melts in your mouth with a buttery crust and a soft, fruity center that’s hard to resist.
These raspberry squares are perfect for any occasion—whether you’re hosting a casual brunch, packing a treat for a picnic, or simply enjoying a little indulgence after a long day. Their vibrant color and inviting aroma make them just as enjoyable to look at as they are to eat.
Making these dessert bars at home is surprisingly easy, even if you’re new to baking. With a few simple ingredients and some basic techniques, you’ll have a tray of golden, tangy, and luscious raspberry lemon dessert bars ready to share—or savor all to yourself. The combination of buttery shortbread crust and fruity filling gives these bars a texture that’s both firm enough to cut cleanly yet tender enough to feel like a little cloud in your mouth.
Whether you love raspberries, crave a citrusy kick, or just enjoy a sweet treat that’s a little different from the usual brownies or cookies, these raspberry bars hit all the right notes. They’re versatile, approachable, and guaranteed to become a favorite in your baking rotation.
Why You’ll Love It
- Perfect Balance of Flavors: The tangy lemon filling and sweet raspberries complement each other beautifully, giving you a refreshing dessert that’s never too sweet.
- Eye-Catching Treat: With its vibrant pink and yellow layers, these raspberry squares are as gorgeous on the table as they are delicious.
- Simple Yet Impressive: You don’t need fancy techniques to make these dessert bars—they look and taste like something from a bakery!
- Versatile for Any Occasion: Serve them at brunch, pack them for lunch, or bring them to a party—the crowd will always ask for more.
- Make-Ahead Friendly: These raspberry lemon dessert bars store well in the fridge, so you can bake ahead and enjoy them throughout the week.
Ingredient List
For the Crust:
- 1 cup (2 sticks) unsalted butter, softened
- 1/2 cup granulated sugar
- 2 cups all-purpose flour
- 1/4 teaspoon salt
For the Filling:
- 1 1/2 cups granulated sugar
- 1/4 cup all-purpose flour
- 4 large eggs
- 2/3 cup freshly squeezed lemon juice (about 3–4 lemons)
- Zest of 2 lemons
- 1 cup fresh raspberries
Ingredient Notes
- I always use unsalted butter for baking—gives you complete control over sweetness and flavor.
- Don’t skip the lemon zest! It adds a punch of brightness that makes these raspberry bars unforgettable.
- Fresh raspberries make the biggest difference here—frozen ones tend to make the filling a bit watery.
- Using granulated sugar in both the crust and filling keeps the texture just right.
- A little salt in the crust balances the sweetness and brings out the buttery flavor.
Kitchen Equipment Needed
- 8×8-inch baking pan – For perfectly shaped bars; I love using a glass pan so you can see the layers.
- Mixing bowls – For combining crust and filling ingredients separately.
- Hand mixer or stand mixer – Makes the crust and filling smooth and easy to mix.
- Zester or microplane – For fresh lemon zest; adds so much flavor!
- Measuring cups and spoons – Accurate measurements = perfect texture every time.
- Spatula – For scraping the bowl and spreading the filling evenly.
- Parchment paper – Prevents sticking and makes it easy to lift bars from the pan.
Instructions
Step 1: Prepare Your Pan
- Preheat your oven to 350°F (175°C).
- Line your 8×8-inch baking pan with parchment paper, leaving an overhang on two sides for easy removal later.
- Lightly grease the parchment with a little butter to ensure the crust doesn’t stick.
Pro Tip: Make sure the parchment hangs over the sides—this makes lifting the bars out after baking much easier.
Step 2: Make the Crust
- In a mixing bowl, combine the softened butter and granulated sugar. Use a hand mixer or stand mixer to beat until creamy and smooth.
- Add the flour and salt, mixing just until combined. The dough will look crumbly but should hold together when pressed.
- Press the dough evenly into the prepared pan, making sure it reaches the edges.
Pro Tip: Use the bottom of a measuring cup to press the crust evenly—it gives a smooth, even base.
Step 3: Bake the Crust
- Bake the crust in the preheated oven for 18–20 minutes, or until lightly golden on the edges.
- Remove from the oven and let it cool slightly while preparing the filling.
Step 4: Prepare the Filling
- In a clean bowl, whisk together the sugar and flour for the filling.
- Add the eggs, lemon juice, and lemon zest. Whisk until smooth and fully combined.
Pro Tip: Whisk continuously to prevent lumps and ensure a silky, smooth filling.
Step 5: Add the Raspberries
- Gently fold in the fresh raspberries, being careful not to crush them.
- Pour the mixture evenly over the pre-baked crust.
Pro Tip: Arrange some raspberries on top for a prettier presentation—they’ll stay visible after baking.
Step 6: Bake the Bars
- Bake at 350°F (175°C) for 25–30 minutes, or until the filling is set but still slightly jiggly in the center.
- Remove from the oven and let the bars cool completely in the pan.
Step 7: Slice and Serve
- Once cooled, use the parchment overhang to lift the bars from the pan.
- Slice into squares using a sharp knife, wiping it clean between cuts for perfect edges.
- Serve as-is or dust lightly with powdered sugar for extra flair.
Pro Tip: For clean slices, chill the bars for 30 minutes before cutting—they hold their shape better.
Tips and Tricks for Success
- Don’t overmix the crust: Mix just until the dough comes together to keep it tender and buttery.
- Use fresh lemons: Freshly squeezed juice and zest give the bars that bright, tangy flavor frozen juice can’t match.
- Handle raspberries gently: Fold them in carefully to prevent the filling from turning pink or watery.
- Cool completely before slicing: Warm bars can fall apart; letting them set ensures clean squares.
- Chill for easier cutting: Pop the cooled bars in the fridge for 30 minutes before slicing for perfect edges.
- Line the pan with parchment: Makes removing the bars a breeze and keeps edges intact.
Ingredient Substitutions and Variations
- Butter substitute: Use coconut oil or vegan butter for a dairy-free version; texture will still be great.
- Flour alternatives: All-purpose flour can be swapped with a gluten-free blend, just check measurements.
- Berry variations: Swap raspberries for blueberries or blackberries for a slightly different flavor profile.
- Sugar alternatives: Coconut sugar or maple sugar works in a pinch, but the color may be slightly darker.
- Lemon twist: Add a teaspoon of lime juice for a unique citrus flavor that pairs beautifully with raspberries.
- Topping options: Sprinkle shredded coconut or white chocolate chips on top before baking for extra sweetness and texture.
Serving Suggestions
- Enjoy these raspberry lemon bars chilled with a scoop of vanilla ice cream for a refreshing summer treat.
- Serve alongside a cup of hot tea or coffee—perfect for a cozy afternoon snack.
- Pack a few squares in a lunchbox for a sweet surprise at work or school.
- Cut into small bite-sized pieces and serve on a dessert platter at parties—they’re always the first to disappear!
- I love serving these bars with a light dusting of powdered sugar and fresh raspberries on top—it makes them look fancy without extra effort.

Storage and Reheating Instructions
- Room temperature: Store in an airtight container for up to 2 days.
- Refrigerator: Keep in an airtight container for up to 5 days; helps the bars hold their shape.
- Freezer: Wrap individually in plastic wrap, then place in a freezer-safe bag for up to 2 months. Thaw in the fridge overnight.
- Reheating: Enjoy chilled or let sit at room temperature for 15–20 minutes for a softer texture.
- Serving after storage: Sprinkle a little powdered sugar on top before serving to refresh their look and flavor.
Frequently Asked Questions
Can I use frozen raspberries instead of fresh?
Yes, you can, but drain them well and pat dry first. Frozen berries can release extra liquid, which may make the filling a bit runny.
How do I prevent the crust from burning?
Make sure your oven temperature is accurate and watch the edges—if they start browning too quickly, cover lightly with foil.
Can I make these bars ahead of time?
Absolutely! They store well in the fridge for up to 5 days and even freeze nicely for up to 2 months.
How do I get clean slices?
Chill the bars for at least 30 minutes before cutting and wipe your knife between each slice for neat squares.
Can I make them gluten-free?
Yes! Swap the all-purpose flour in both the crust and filling for a gluten-free flour blend. The texture may be slightly different but still delicious.
Can I add more berries on top?
Definitely! Adding extra raspberries before baking makes the bars look extra beautiful and adds a juicy pop in every bite.
Did you try this recipe? Let me know in the comments how it turned out!
Raspberry Lemon Bars
Equipment
- 8×8-inch baking pan
- Mixing Bowls
- Hand mixer or stand mixer
- Zester or microplane
- Measuring cups and spoons
- Spatula
- Parchment paper
Ingredients
For the Crust:
- 1 cup 2 sticks unsalted butter, softened
- 1/2 cup granulated sugar
- 2 cups all-purpose flour
- 1/4 teaspoon salt
For the Filling:
- 1 1/2 cups granulated sugar
- 1/4 cup all-purpose flour
- 4 large eggs
- 2/3 cup freshly squeezed lemon juice about 3–4 lemons
- Zest of 2 lemons
- 1 cup fresh raspberries
Instructions
Step 1: Prepare Your Pan
- Preheat your oven to 350°F (175°C).
- Line your 8×8-inch baking pan with parchment paper, leaving an overhang on two sides for easy removal later.
- Lightly grease the parchment with a little butter to ensure the crust doesn’t stick.
- Pro Tip: Make sure the parchment hangs over the sides—this makes lifting the bars out after baking much easier.
Step 2: Make the Crust
- In a mixing bowl, combine the softened butter and granulated sugar. Use a hand mixer or stand mixer to beat until creamy and smooth.
- Add the flour and salt, mixing just until combined. The dough will look crumbly but should hold together when pressed.
- Press the dough evenly into the prepared pan, making sure it reaches the edges.
- Pro Tip: Use the bottom of a measuring cup to press the crust evenly—it gives a smooth, even base.
Step 3: Bake the Crust
- Bake the crust in the preheated oven for 18–20 minutes, or until lightly golden on the edges.
- Remove from the oven and let it cool slightly while preparing the filling.
Step 4: Prepare the Filling
- In a clean bowl, whisk together the sugar and flour for the filling.
- Add the eggs, lemon juice, and lemon zest. Whisk until smooth and fully combined.
- Pro Tip: Whisk continuously to prevent lumps and ensure a silky, smooth filling.
Step 5: Add the Raspberries
- Gently fold in the fresh raspberries, being careful not to crush them.
- Pour the mixture evenly over the pre-baked crust.
- Pro Tip: Arrange some raspberries on top for a prettier presentation—they’ll stay visible after baking.
Step 6: Bake the Bars
- Bake at 350°F (175°C) for 25–30 minutes, or until the filling is set but still slightly jiggly in the center.
- Remove from the oven and let the bars cool completely in the pan.
Step 7: Slice and Serve
- Once cooled, use the parchment overhang to lift the bars from the pan.
- Slice into squares using a sharp knife, wiping it clean between cuts for perfect edges.
- Serve as-is or dust lightly with powdered sugar for extra flair.
- Pro Tip: For clean slices, chill the bars for 30 minutes before cutting—they hold their shape better.
Notes
- Calories: 290–310 kcal
- Carbohydrates: 38g
- Sugar: 26g
- Fat: 14g
- Saturated Fat: 8g
- Protein: 4g
- Fiber: 2g
- Cholesterol: 85mg
- Sodium: 95mg