Raspberry Cheesecake Bars
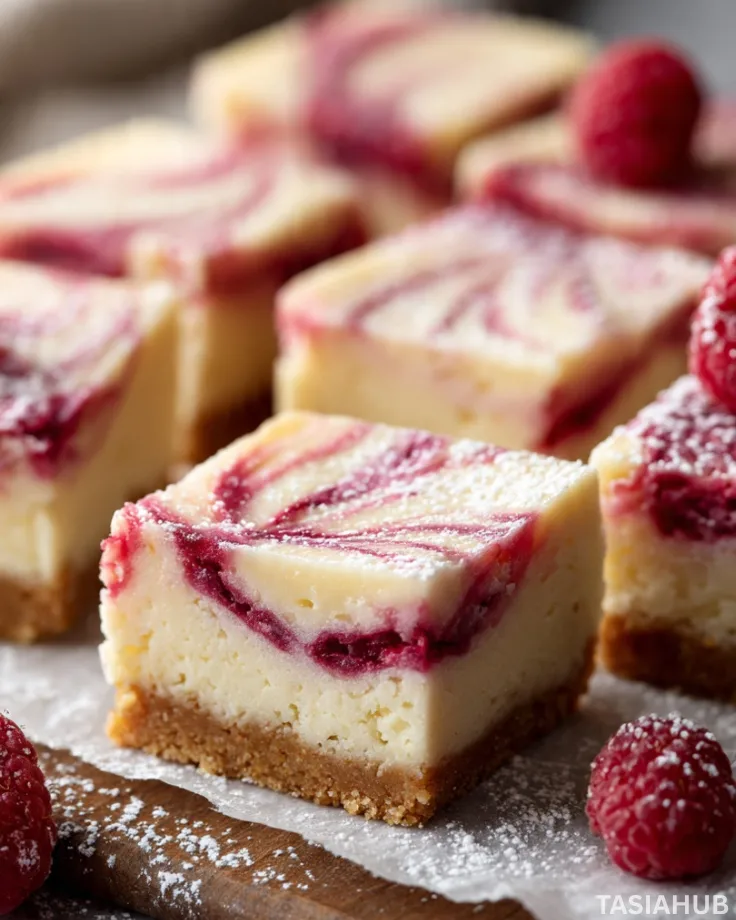
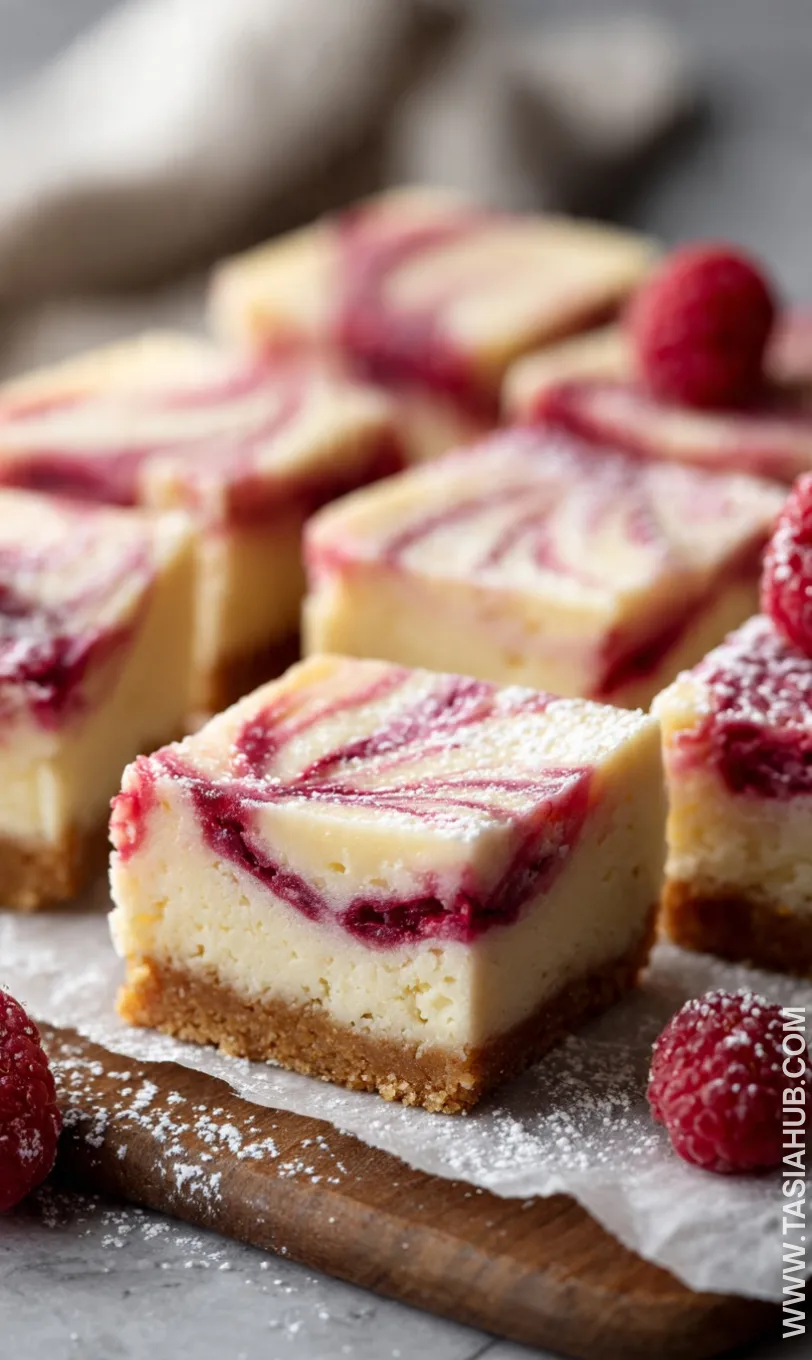
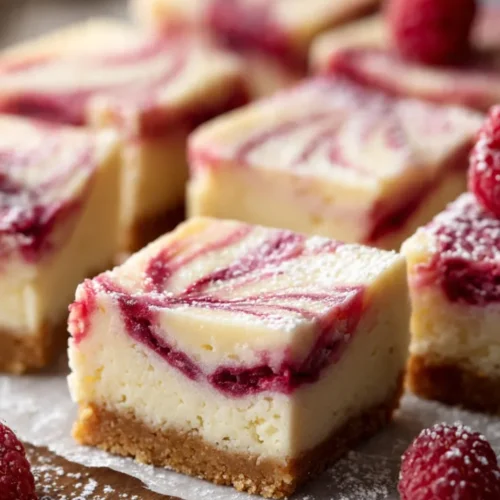
These raspberry cheesecake bars are the kind of dessert that quietly steals the show. With a buttery base, a creamy cheesecake center, and vibrant swirls of raspberry, every bite feels balanced and indulgent without being heavy. They’re rich, slightly tangy, and perfectly sweet—exactly the type of treat that disappears quickly once sliced.
I love how versatile these bars are. They work beautifully as a Valentine’s Day dessert when you want something romantic but not over-the-top, yet they’re just as welcome at casual gatherings, brunch tables, or cozy nights at home. The raspberry layer adds a pop of color and freshness that makes these bars feel special without requiring complicated steps.
What makes this recipe even better is how approachable it is. These raspberry squares come together with simple ingredients and minimal effort, making them an easy raspberry dessert you can rely on when time is limited but you still want something impressive. The cream cheese filling bakes up smooth and luscious, while the raspberry topping brings just enough brightness to cut through the richness.
If you enjoy desserts that look bakery-worthy but feel homemade, these raspberry cream cheese bars will quickly become a favorite. They strike that perfect balance between elegant and comforting, making them a go-to raspberry cheesecake dessert you’ll find yourself baking again and again.
Why You’ll Love It
- Beautiful without the fuss – The raspberry swirls give these bars a stunning, bakery-style look, yet the process is simple enough for everyday baking. No special skills or equipment needed.
- Perfect balance of flavors – Creamy, tangy cheesecake pairs beautifully with the bright sweetness of raspberries, creating a dessert that feels rich but never overwhelming.
- Make-ahead friendly – These bars taste even better after chilling, which makes them ideal for prepping ahead of time for gatherings, celebrations, or a special Valentine’s treat.
- Easy to slice and serve – Unlike traditional cheesecake, these bars cut cleanly and travel well, making them perfect for sharing at parties or gifting to loved ones.
- Crowd-pleasing versatility – They’re elegant enough for special occasions yet simple enough to enjoy as a weeknight dessert or afternoon sweet treat.
Ingredient List
For the Crust:
- 1 ½ cups graham cracker crumbs
- ¼ cup granulated sugar
- ½ cup unsalted butter, melted
For the Cheesecake Filling:
- 16 oz cream cheese, softened
- ½ cup granulated sugar
- 2 large eggs
- 1 tsp vanilla extract
- ½ cup sour cream
For the Raspberry Swirl:
- 1 cup fresh or frozen raspberries
- 2 tbsp granulated sugar
- 1 tsp lemon juice
Ingredient Notes
- I always use full-fat cream cheese for the filling—it makes the bars incredibly creamy and smooth.
- Don’t skip the sour cream! It adds a subtle tang that balances the sweetness beautifully.
- Fresh raspberries give the best flavor, but frozen work in a pinch. Just thaw and drain any extra juice.
- For the crust, graham crackers are classic, but digestive biscuits or shortbread crumbs also taste amazing.
- A touch of lemon juice in the raspberry swirl really brightens the flavor—it’s the little trick that makes these bars pop.
Kitchen Equipment Needed
- 8×8-inch baking pan – Perfect for evenly baked bars; I line mine with parchment for easy removal.
- Mixing bowls – One for the crust, one for the cheesecake filling, and one for the raspberries.
- Hand or stand mixer – Makes the cream cheese filling silky and smooth; I love using my stand mixer for zero lumps.
- Spatula – Essential for spreading the filling and swirling the raspberries.
- Measuring cups and spoons – Accuracy matters for a balanced cheesecake.
- Food processor or blender – For crushing graham crackers quickly and for pureeing raspberries.
- Small saucepan (optional) – If you want to gently warm raspberries with sugar for a smoother swirl.
Instructions
Step 1: Prepare the Crust
- Preheat your oven to 350°F (175°C).
- Line an 8×8-inch baking pan with parchment paper, leaving a little overhang for easy removal.
- In a medium bowl, combine graham cracker crumbs and sugar.
- Pour in melted butter and stir until the mixture resembles wet sand.
- Press the crumbs firmly into the bottom of the pan in an even layer.
- Bake for 8–10 minutes until lightly golden. Let it cool while you prepare the filling.
Pro tip: Press the crumbs tightly using the back of a spoon or a small cup—this prevents a crumbly crust later.
Step 2: Make the Cheesecake Filling
- In a large mixing bowl, beat the softened cream cheese until smooth using a hand or stand mixer.
- Add sugar and continue mixing until fully incorporated and creamy.
- Beat in the eggs one at a time, making sure each is fully combined before adding the next.
- Stir in vanilla extract and sour cream until smooth.
Pro tip: Scrape the sides of the bowl as you go to avoid lumps and ensure a silky filling.
Step 3: Prepare the Raspberry Swirl
- In a small bowl or blender, combine raspberries, sugar, and lemon juice.
- Mash or blend until smooth. If you prefer a few small chunks, pulse lightly instead of fully blending.
- Optional: Strain the mixture through a fine mesh sieve to remove seeds for an ultra-smooth swirl.
Step 4: Assemble the Bars
- Pour the cheesecake filling evenly over the cooled crust.
- Drop spoonfuls of raspberry puree across the top of the filling.
- Use a knife or skewer to gently swirl the raspberries into the cheesecake—don’t overmix; you want beautiful streaks.
Pro tip: Swirl in a figure-eight or circular motion for a professional-looking marbled effect.
Step 5: Bake the Bars
- Bake at 350°F (175°C) for 30–35 minutes, until the edges are set and the center slightly jiggles.
- Remove from oven and let cool to room temperature, then chill in the refrigerator for at least 2 hours.
Pro tip: Chilling is key! It allows the bars to firm up and makes slicing neat, clean squares.
Step 6: Slice and Serve
- Lift the bars from the pan using the parchment overhang.
- Use a sharp knife, wiping it clean between cuts, to slice into squares.
- Serve chilled and enjoy your creamy, fruity dessert!
Tips and Tricks for Success
- Room temperature ingredients – Make sure the cream cheese and eggs are at room temperature for a smooth, lump-free filling.
- Don’t overmix the filling – Beat just until smooth to avoid incorporating too much air, which can cause cracks.
- Even crust layer – Press the graham cracker crust firmly and evenly to prevent it from crumbling when slicing.
- Chill thoroughly – Refrigerate for at least 2 hours before slicing; this helps the bars hold their shape.
- Clean knife between cuts – Wipe your knife with a warm, damp towel for neat, professional-looking squares.
- Swirl gently – Over-swizzling the raspberry puree can blend it too much and lose the pretty marbled effect.
Ingredient Substitutions and Variations
- Crust alternatives – Use crushed digestive biscuits, shortbread cookies, or even chocolate wafer crumbs for a flavor twist.
- Dairy swaps – Greek yogurt can replace sour cream for a slightly tangier taste, and cream cheese can be swapped for a lighter Neufchâtel.
- Fruit variations – Blueberries, strawberries, or a mixed berry blend can be used instead of raspberries.
- Add-ins – Sprinkle white chocolate chips or toasted almonds into the filling for extra texture.
- Gluten-free option – Use gluten-free graham crackers or cookie crumbs for a gluten-free version without compromising flavor.
Serving Suggestions
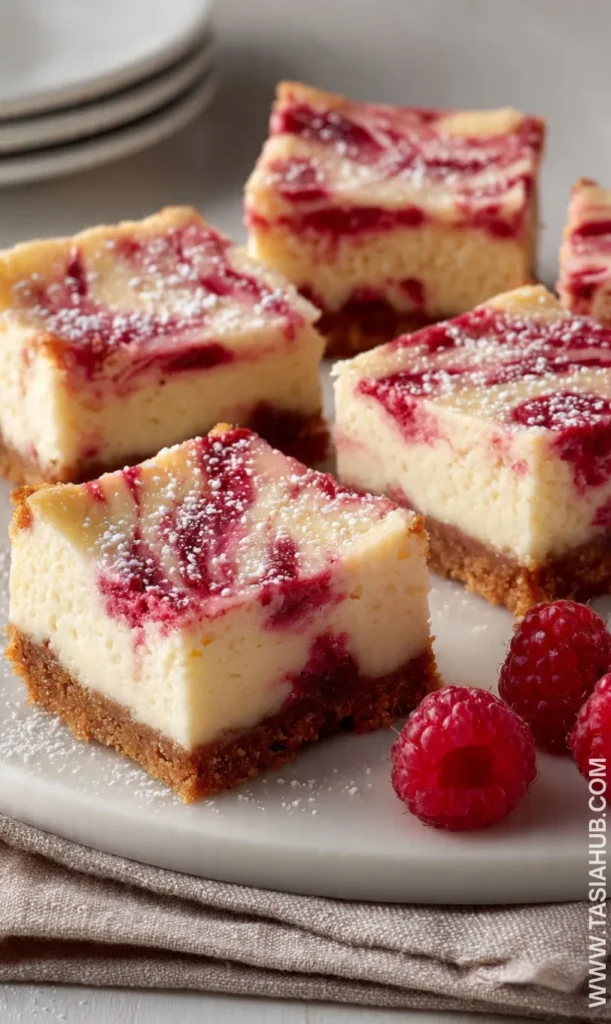
- I love serving these raspberry cheesecake bars chilled on a pretty dessert plate with a few fresh raspberries on top—it makes them look extra festive for Valentine’s Day dessert.
- Pair a square with a dollop of whipped cream or a scoop of vanilla ice cream for an indulgent treat that balances the tangy raspberry.
- Serve alongside a cup of coffee or tea for a cozy afternoon snack; the creamy bars are the perfect complement to a warm beverage.
- Cut into bite-sized squares for a party platter or potluck—they’re easy for guests to grab and always disappear fast!
- For a special touch, drizzle a little melted chocolate over the top before serving; it adds richness and looks gorgeous.
Storage and Reheating Instructions
- Refrigerate – Store in an airtight container in the fridge for up to 5 days; bars taste best chilled.
- Freeze – Wrap individual squares in plastic wrap and freeze for up to 2 months. Thaw in the fridge before serving.
- Serving after freezing – Let frozen bars thaw in the refrigerator overnight; avoid microwaving to keep the texture smooth.
- Keep toppings fresh – Add whipped cream or fresh raspberries only before serving to prevent sogginess.
- Transport tips – Use a sturdy container with parchment lining to prevent the bars from sticking together when taking them to gatherings.
Frequently Asked Questions
Can I use frozen raspberries for the swirl?
Yes! Just thaw them first and drain any excess juice. They work just as well as fresh raspberries for this easy raspberry dessert.
How do I prevent cracks in the cheesecake filling?
Avoid overmixing and bake until just set—the center should still jiggle slightly. Chilling completely before slicing also helps prevent cracks.
Can I make these bars ahead of time?
Absolutely! They actually taste even better after a few hours in the fridge, making them a perfect Valentine’s Day dessert or party treat.
Can I substitute the graham cracker crust?
Yes, you can use digestive biscuits, shortbread, or even chocolate wafers for a fun twist. Just press them firmly into the pan before baking.
How should I store leftovers?
Keep them in an airtight container in the fridge for up to 5 days, or wrap individually and freeze for up to 2 months.
Can I add other flavors to the filling?
Definitely! A teaspoon of almond extract or a sprinkle of lemon zest adds a lovely twist without overpowering the raspberry cheesecake dessert.
Did you try this recipe? Let me know in the comments how it turned out!
Raspberry Cheesecake Bars
Equipment
- 8×8-inch baking pan
- Mixing Bowls
- Hand or Stand Mixer
- Spatula
- Measuring cups and spoons
- Food Processor or Blender
- Small Saucepan (Optional)
Ingredients
For the Crust:
- 1 ½ cups graham cracker crumbs
- ¼ cup granulated sugar
- ½ cup unsalted butter melted
For the Cheesecake Filling:
- 16 oz cream cheese softened
- ½ cup granulated sugar
- 2 large eggs
- 1 tsp vanilla extract
- ½ cup sour cream
For the Raspberry Swirl:
- 1 cup fresh or frozen raspberries
- 2 tbsp granulated sugar
- 1 tsp lemon juice
Instructions
Step 1: Prepare the Crust
- Preheat your oven to 350°F (175°C).
- Line an 8×8-inch baking pan with parchment paper, leaving a little overhang for easy removal.
- In a medium bowl, combine graham cracker crumbs and sugar.
- Pour in melted butter and stir until the mixture resembles wet sand.
- Press the crumbs firmly into the bottom of the pan in an even layer.
- Bake for 8–10 minutes until lightly golden. Let it cool while you prepare the filling.
- Pro tip: Press the crumbs tightly using the back of a spoon or a small cup—this prevents a crumbly crust later.
Step 2: Make the Cheesecake Filling
- In a large mixing bowl, beat the softened cream cheese until smooth using a hand or stand mixer.
- Add sugar and continue mixing until fully incorporated and creamy.
- Beat in the eggs one at a time, making sure each is fully combined before adding the next.
- Stir in vanilla extract and sour cream until smooth.
- Pro tip: Scrape the sides of the bowl as you go to avoid lumps and ensure a silky filling.
Step 3: Prepare the Raspberry Swirl
- In a small bowl or blender, combine raspberries, sugar, and lemon juice.
- Mash or blend until smooth. If you prefer a few small chunks, pulse lightly instead of fully blending.
- Optional: Strain the mixture through a fine mesh sieve to remove seeds for an ultra-smooth swirl.
Step 4: Assemble the Bars
- Pour the cheesecake filling evenly over the cooled crust.
- Drop spoonfuls of raspberry puree across the top of the filling.
- Use a knife or skewer to gently swirl the raspberries into the cheesecake—don’t overmix; you want beautiful streaks.
- Pro tip: Swirl in a figure-eight or circular motion for a professional-looking marbled effect.
Step 5: Bake the Bars
- Bake at 350°F (175°C) for 30–35 minutes, until the edges are set and the center slightly jiggles.
- Remove from oven and let cool to room temperature, then chill in the refrigerator for at least 2 hours.
- Pro tip: Chilling is key! It allows the bars to firm up and makes slicing neat, clean squares.
Step 6: Slice and Serve
- Lift the bars from the pan using the parchment overhang.
- Use a sharp knife, wiping it clean between cuts, to slice into squares.
- Serve chilled and enjoy your creamy, fruity dessert!
Notes
Nutritional Value (Per Bar – Approximate)
- Calories: 280–320 kcal
- Carbohydrates: 28–32 g
- Protein: 5–6 g
- Fat: 18–20 g
- Saturated Fat: 10–12 g
- Sugar: 18–22 g
- Fiber: 1–2 g
- Sodium: 180–220 mg