Pink Velvet Cake
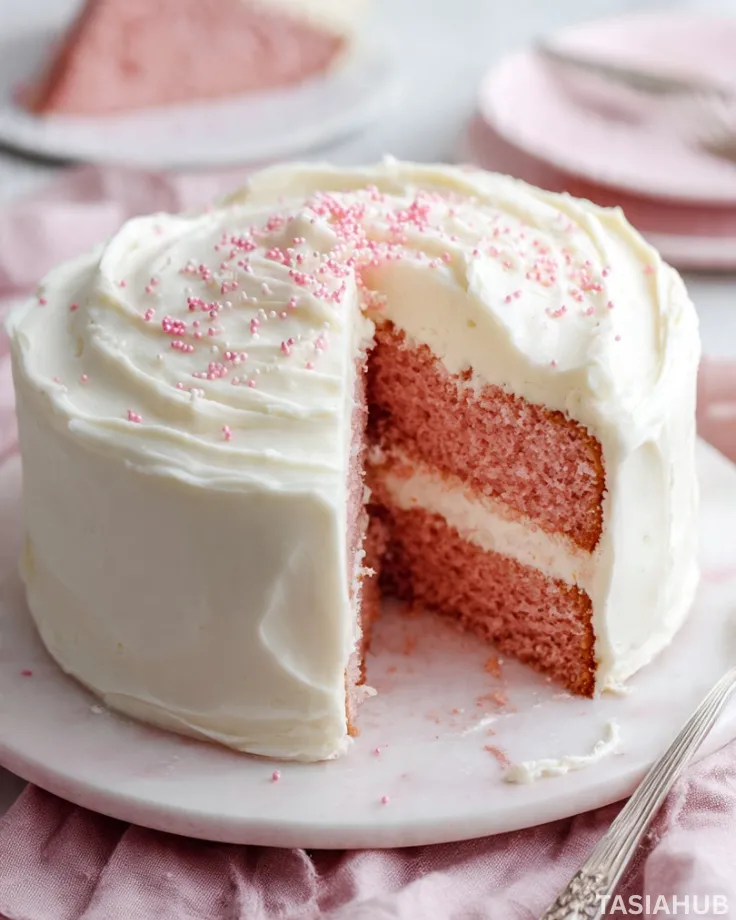
Valentine’s season is the perfect time to bring a little extra sweetness into your kitchen, and nothing says festive like a beautifully soft pink cake. This pink velvet cake is a treat that combines visual charm with rich, indulgent flavor, making it a showstopper for any special occasion. Its vibrant hue and tender crumb are guaranteed to impress everyone at the table, whether you’re celebrating love, friendship, or just a sweet moment for yourself.
Making a homemade cake like this is surprisingly simple. With just a few pantry staples and a little care, you can create layers of soft, moist cake that pair perfectly with a smooth, tangy cream cheese frosting. The frosting isn’t just for looks—it adds a subtle richness that balances the sweetness of the cake, giving each bite a melt-in-your-mouth quality that keeps people coming back for more.
This dessert is more than just a pretty face. As one of the best Valentine’s desserts, it’s versatile enough to serve as a centerpiece for a romantic dinner or as a fun treat for a gathering of friends. You can also experiment with flavors—adding a touch of raspberry, for instance, transforms it into a raspberry pink velvet cake with raspberry cream cheese frosting that’s fruity, tangy, and utterly decadent.
If you’ve been hunting for pink cake ideas that are both stunning and approachable, this recipe fits the bill. Whether you’re an experienced baker or trying a homemade cake for the first time, the steps are straightforward, and the results are consistently delicious. It’s the kind of great dessert that makes any occasion feel special and leaves everyone asking for seconds.
Why You’ll Love It
- Vibrant and festive – The soft pink color makes it a standout dessert for Valentine’s Day, birthdays, or any celebration where a pop of color adds joy. It’s a feast for the eyes before it even touches your taste buds.
- Perfectly balanced flavors – The richness of the cream cheese frosting complements the light, tender cake, creating a harmonious blend of sweet and tangy that’s hard to resist.
- Customizable twists – From classic pink velvet cake with cream cheese frosting to a raspberry pink velvet cake with raspberry cream cheese frosting, you can easily adjust flavors to match your mood or occasion.
- Homemade cake satisfaction – There’s something special about pulling a freshly baked cake from your own oven. It fills your kitchen with a cozy aroma and gives you that “I made this!” pride.
- Great dessert for any crowd – Whether it’s a small family dinner or a party with friends, this cake is universally loved. Its soft crumb and creamy frosting appeal to both kids and adults alike.
Ingredient List
For the Cake
- 2 ½ cups all-purpose flour
- 1 ½ cups granulated sugar
- 1 tsp baking soda
- 1 tsp baking powder
- ½ tsp salt
- 1 cup buttermilk, room temperature
- ½ cup unsalted butter, softened
- 2 large eggs, room temperature
- 2 tsp vanilla extract
- 2 tbsp cocoa powder
- Pink food coloring (about 1–2 tsp, depending on your desired shade)
For the Cream Cheese Frosting
- 8 oz cream cheese, softened
- ½ cup unsalted butter, softened
- 4 cups powdered sugar
- 1 tsp vanilla extract
Ingredient Notes
- I always use high-quality butter—it adds so much flavor and makes the cake extra tender.
- Don’t skip the buttermilk! It’s the secret to a moist, fluffy crumb.
- Cocoa powder is subtle here but essential—it deepens the pink color and gives that classic velvet cake hint.
- For a natural twist, you can swap pink food coloring with a tiny bit of beet juice—it works beautifully.
- If making the raspberry version, fresh raspberries give the frosting a lovely pink tint and fruity tang that takes this dessert to the next level.
Kitchen Equipment Needed
- Mixing bowls – For combining wet and dry ingredients separately; I love using my glass Pyrex bowls because they’re sturdy and easy to see what’s happening.
- Electric mixer or stand mixer – Makes creaming butter and sugar effortless and gives the frosting a silky texture.
- Measuring cups and spoons – Accuracy matters for a consistent cake rise. My favorite set has clear markings that never fade.
- Rubber spatula – Perfect for scraping down the sides of the bowl and folding in ingredients gently.
- 9-inch round cake pans (2) – For even layers; I always line mine with parchment paper so cakes release easily.
- Cooling rack – Lets the cakes cool evenly and prevents soggy bottoms.
- Sifter – Optional, but sifting flour and cocoa powder avoids lumps and keeps the cake light.
- Offset spatula – Makes frosting the cake clean and smooth; I can’t bake without mine!
Instructions
Step 1: Prepare Your Pans and Oven
- Preheat your oven to 350°F (175°C).
- Grease two 9-inch round cake pans with butter or non-stick spray.
- Line the bottoms with parchment paper for easy cake release.
- Lightly dust the pans with flour, tapping out the excess.
Pro tip: Using parchment ensures your cake layers lift out perfectly without sticking or tearing.
Step 2: Mix the Dry Ingredients
- In a large bowl, sift together 2 ½ cups flour, 2 tbsp cocoa powder, 1 tsp baking soda, 1 tsp baking powder, and ½ tsp salt.
- Whisk to combine evenly.
Pro tip: Sifting cocoa and flour prevents lumps and keeps the cake extra light.
Step 3: Cream Butter and Sugar
- In a separate bowl, beat ½ cup softened butter with 1 ½ cups granulated sugar until light and fluffy (about 3–4 minutes).
- Add 2 large eggs, one at a time, mixing well after each.
- Stir in 2 tsp vanilla extract.
Pro tip: Make sure your butter and eggs are at room temperature—it helps everything mix smoothly and keeps the cake tender.
Step 4: Combine Wet and Dry Ingredients
- Alternate adding the dry ingredients and 1 cup buttermilk to the butter mixture, starting and ending with the dry ingredients.
- Mix gently until just combined; don’t overmix.
- Add 1–2 tsp pink food coloring and stir until the color is evenly distributed.
Pro tip: Overmixing can make the cake dense—stop as soon as everything is combined.
Step 5: Bake the Cake
- Divide the batter evenly between the prepared pans.
- Smooth the tops with a spatula.
- Bake for 25–30 minutes, or until a toothpick inserted in the center comes out clean.
- Let the cakes cool in the pans for 10 minutes, then transfer to a cooling rack.
Pro tip: Cool completely before frosting to prevent the frosting from melting and sliding off.
Step 6: Make the Cream Cheese Frosting
- Beat 8 oz softened cream cheese with ½ cup butter until creamy.
- Gradually add 4 cups powdered sugar, mixing until smooth.
- Stir in 1 tsp vanilla extract.
Pro tip: Don’t overbeat after adding powdered sugar—it can make the frosting too soft.
Step 7: Frost the Cake
- Place one cake layer on your serving plate. Spread a generous amount of frosting on top.
- Place the second layer on top and frost the top and sides evenly.
- Smooth with an offset spatula for a professional finish.
Pro tip: Chill the cake for 15–20 minutes after frosting for cleaner slices.
Step 8: Serve and Enjoy
- Slice with a sharp knife and serve immediately, or store in the fridge for up to 3 days.
- Pair with fresh berries or a glass of cold milk for the ultimate treat.

Tips and Tricks for Success
- Room temperature ingredients matter – Make sure your butter, eggs, and buttermilk are at room temperature for a smooth, evenly mixed batter.
- Don’t overmix – Once you combine wet and dry ingredients, mix just until incorporated to keep the cake light and fluffy.
- Check oven temperature – An oven thermometer helps ensure the cake bakes evenly; every degree counts.
- Use parchment for easy release – Lining your pans prevents sticking and keeps your layers intact.
- Cool completely before frosting – A warm cake will melt the frosting and create a messy finish.
- Add color gradually – Start with less pink food coloring and build up to your desired shade for a vibrant yet natural-looking cake.
Ingredient Substitutions and Variations
- Buttermilk alternative – Mix 1 cup milk with 1 tbsp lemon juice or vinegar; let sit 5 minutes to thicken.
- Butter substitute – Use equal parts vegetable oil for a slightly lighter texture (cake may be a little denser).
- Raspberry twist – Fold in 2–3 tbsp fresh or frozen raspberries into the frosting for a raspberry pink velvet cake with raspberry cream cheese frosting.
- Vegan option – Replace butter with plant-based margarine and use a flax egg (1 tbsp flaxseed + 3 tbsp water) instead of eggs.
- Natural coloring – Beet juice can replace artificial pink food coloring for a more natural pink hue.
- Flavor add-ins – A teaspoon of almond extract in the frosting or a handful of white chocolate chips in the batter adds a fun, unique twist.
Serving Suggestions
- I love serving this pink velvet cake with a handful of fresh raspberries on the side—it adds a bright, tangy contrast to the sweet cream cheese frosting.
- Pair a slice with a cup of hot coffee or cocoa; the warmth complements the cake’s soft, tender crumb beautifully.
- For a festive Valentine’s dessert spread, serve with chocolate-dipped strawberries and a small scoop of vanilla ice cream.
- It’s great as a brunch treat too—I like placing a slice on a pretty plate with a drizzle of raspberry sauce for extra flair.
- For a fun twist, turn slices into mini cake sandwiches with frosting in the middle—perfect for parties or kids’ treats.

Storage and Reheating Instructions
- Room temperature – Keep the frosted cake covered at room temperature for up to 1 day; it stays soft and moist.
- Refrigeration – Store leftover cake in an airtight container in the fridge for up to 3 days.
- Freezing – Wrap individual cake layers in plastic wrap and foil; freeze for up to 2 months. Thaw overnight in the fridge before frosting or serving.
- Reheating slices – Warm a slice gently in the microwave for 10–15 seconds to restore that just-baked softness.
- Frosting tip – If chilled, let the frosting soften slightly at room temperature before serving for the creamiest texture.
Frequently Asked Questions
Can I make this cake ahead of time?
Absolutely! You can bake the cake layers a day in advance and keep them wrapped tightly at room temperature or in the fridge. Frost just before serving for the freshest taste.
Can I use a different food coloring?
Yes! You can use natural beet juice for a gentle pink hue or adjust your favorite food coloring. Start small and build the color gradually for the perfect shade.
How do I make the raspberry version?
Simply fold 2–3 tablespoons of fresh or mashed raspberries into the cream cheese frosting. It turns your pink velvet cake into a raspberry pink velvet cake with raspberry cream cheese frosting that’s fruity and tangy.
Can I make this cake gluten-free?
Yes! Substitute the all-purpose flour with a 1:1 gluten-free baking flour blend. The texture might be slightly different, but it will still be moist and delicious.
How do I store leftover cake?
Store slices or layers in an airtight container in the fridge for up to 3 days. You can also freeze the cake layers for up to 2 months and thaw overnight in the fridge.
Can I make mini cakes or cupcakes instead?
Definitely! The batter works perfectly for cupcakes or smaller cake pans—just adjust the baking time accordingly (cupcakes usually take 18–22 minutes).
Did you try this recipe? Let me know in the comments how it turned out! I’d love to hear your favorite twists, whether you went classic pink velvet or added a raspberry swirl.

Pink Velvet Cake
Equipment
- Mixing Bowls
- Electric mixer or stand mixer
- Measuring cups and spoons
- Rubber spatula
- 9-inch round cake pans (2)
- Cooling Rack
- Sifter
- Offset Spatula
Ingredients
For the Cake
- 2 ½ cups all-purpose flour
- 1 ½ cups granulated sugar
- 1 tsp baking soda
- 1 tsp baking powder
- ½ tsp salt
- 1 cup buttermilk room temperature
- ½ cup unsalted butter softened
- 2 large eggs room temperature
- 2 tsp vanilla extract
- 2 tbsp cocoa powder
- Pink food coloring about 1–2 tsp, depending on your desired shade
For the Cream Cheese Frosting
- 8 oz cream cheese softened
- ½ cup unsalted butter softened
- 4 cups powdered sugar
- 1 tsp vanilla extract
Instructions
Step 1: Prepare Your Pans and Oven
- Preheat your oven to 350°F (175°C).
- Grease two 9-inch round cake pans with butter or non-stick spray.
- Line the bottoms with parchment paper for easy cake release.
- Lightly dust the pans with flour, tapping out the excess.
- Pro tip: Using parchment ensures your cake layers lift out perfectly without sticking or tearing.
Step 2: Mix the Dry Ingredients
- In a large bowl, sift together 2 ½ cups flour, 2 tbsp cocoa powder, 1 tsp baking soda, 1 tsp baking powder, and ½ tsp salt.
- Whisk to combine evenly.
- Pro tip: Sifting cocoa and flour prevents lumps and keeps the cake extra light.
Step 3: Cream Butter and Sugar
- In a separate bowl, beat ½ cup softened butter with 1 ½ cups granulated sugar until light and fluffy (about 3–4 minutes).
- Add 2 large eggs, one at a time, mixing well after each.
- Stir in 2 tsp vanilla extract.
- Pro tip: Make sure your butter and eggs are at room temperature—it helps everything mix smoothly and keeps the cake tender.
Step 4: Combine Wet and Dry Ingredients
- Alternate adding the dry ingredients and 1 cup buttermilk to the butter mixture, starting and ending with the dry ingredients.
- Mix gently until just combined; don’t overmix.
- Add 1–2 tsp pink food coloring and stir until the color is evenly distributed.
- Pro tip: Overmixing can make the cake dense—stop as soon as everything is combined.
Step 5: Bake the Cake
- Divide the batter evenly between the prepared pans.
- Smooth the tops with a spatula.
- Bake for 25–30 minutes, or until a toothpick inserted in the center comes out clean.
- Let the cakes cool in the pans for 10 minutes, then transfer to a cooling rack.
- Pro tip: Cool completely before frosting to prevent the frosting from melting and sliding off.
Step 6: Make the Cream Cheese Frosting
- Beat 8 oz softened cream cheese with ½ cup butter until creamy.
- Gradually add 4 cups powdered sugar, mixing until smooth.
- Stir in 1 tsp vanilla extract.
- Pro tip: Don’t overbeat after adding powdered sugar—it can make the frosting too soft.
Step 7: Frost the Cake
- Place one cake layer on your serving plate. Spread a generous amount of frosting on top.
- Place the second layer on top and frost the top and sides evenly.
- Smooth with an offset spatula for a professional finish.
- Pro tip: Chill the cake for 15–20 minutes after frosting for cleaner slices.
Step 8: Serve and Enjoy
- Slice with a sharp knife and serve immediately, or store in the fridge for up to 3 days.
- Pair with fresh berries or a glass of cold milk for the ultimate treat.
Notes
Nutritional Value (per slice, approx.):
- Calories: 350–380 kcal
- Carbohydrates: 45–50 g
- Sugars: 30–32 g
- Fat: 18–20 g
- Saturated Fat: 10–12 g
- Protein: 4–5 g
- Fiber: 1–2 g
- Sodium: 250–280 mg