No-Bake Strawberry Cheesecake
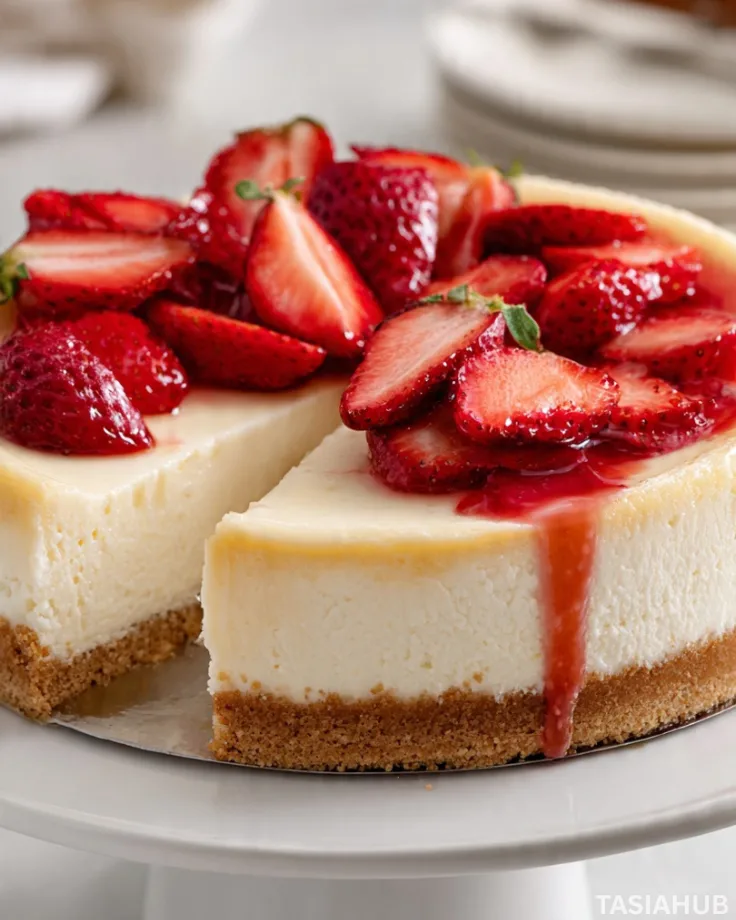
When it comes to sweet treats that are as beautiful as they are delicious, this no-bake strawberry cheesecake checks all the boxes. Perfect for a special occasion or just a cozy night at home, it’s a dessert that feels indulgent without needing hours in the kitchen. Its creamy, dreamy texture and vibrant strawberry topping make it a standout on any dessert table.
This strawberry cheesecake dessert is ideal for those times when you want something impressive but easy. The base is buttery and crisp, the filling is rich with cream cheese and just the right amount of sweetness, and the fresh strawberries on top add a pop of flavor and color. No oven is required, which makes this recipe a stress-free way to enjoy a luxurious treat.
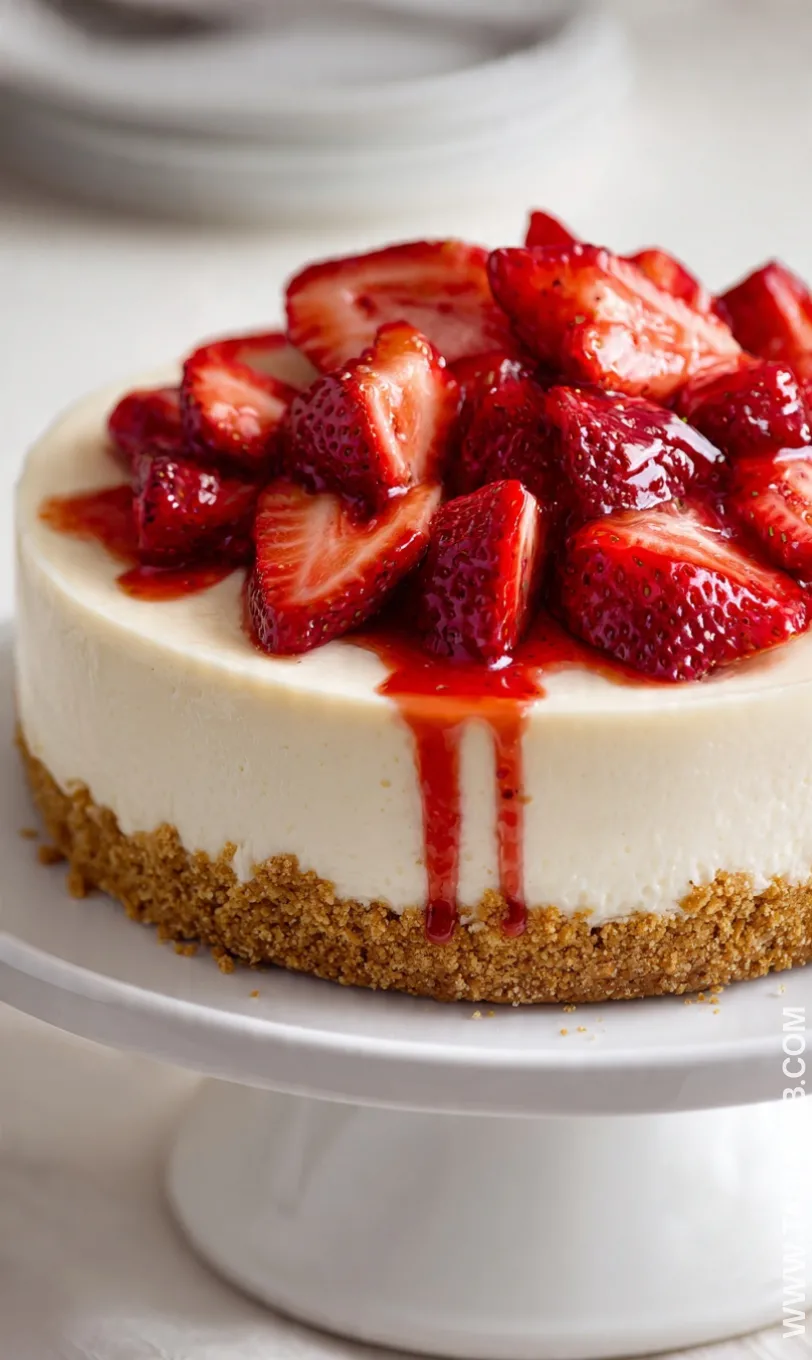
Valentine’s dessert ideas don’t get much sweeter than this. The pink hue of the strawberries, combined with the smooth, velvety cheesecake layer, makes it a romantic choice for sharing with someone special. Even if you’re making it for a gathering of friends or a family treat, it’s a crowd-pleaser that will disappear quickly.
One of the best things about this no bake strawberry dessert is how versatile it is. You can serve it in a classic round pan, in individual cups for portion control, or even in a springform pan for a dramatic presentation. Whether you’re new to baking or just looking for a quick, easy strawberry cheesecake option, this recipe is designed to make your dessert experience simple and enjoyable.
Why You’ll Love It
- No oven, no stress – This easy strawberry cheesecake skips baking entirely, so you can enjoy a creamy, dreamy dessert without heating up your kitchen or worrying about overcooking.
- Fresh, fruity flavor – The sweet, juicy strawberries on top bring a bright, fresh taste that balances perfectly with the rich cream cheese filling. Every bite is refreshing and indulgent at the same time.
- Perfect for any occasion – Whether you’re celebrating Valentine’s Day, a birthday, or just craving a sweet treat, this strawberry dessert with cream cheese feels special and looks stunning on the table.
- Customizable and versatile – Serve it in a pan, in mini jars, or even as a layered parfait. You can even swap in different berries if strawberries aren’t in season, making it your go-to no-bake dessert all year round.
- Crowd-pleaser with minimal effort – Smooth, creamy, and sweet without being overwhelming, this strawberry cheesecake dessert is guaranteed to impress friends and family while keeping your prep time short.
Ingredient List
For the Crust:
- 1 ½ cups graham cracker crumbs
- ¼ cup granulated sugar
- 6 tablespoons unsalted butter, melted
For the Cheesecake Filling:
- 16 oz (450 g) cream cheese, softened
- ½ cup granulated sugar
- 1 teaspoon vanilla extract
- 1 cup heavy whipping cream, cold
For the Strawberry Topping:
- 2 cups fresh strawberries, hulled and sliced
- 2 tablespoons granulated sugar
- 1 teaspoon lemon juice
Ingredient Notes
- I always use full-fat cream cheese for the filling—it makes the cheesecake extra creamy and rich.
- Don’t skip the butter in the crust! It’s what holds everything together and gives that buttery, melt-in-your-mouth texture.
- For the topping, fresh strawberries are best, but if they’re not in season, frozen works too—just thaw and drain them first.
- I like adding a touch of lemon juice to the strawberries; it brightens the flavor and balances the sweetness beautifully.
- Using cold heavy cream for whipping makes it fluffier and helps the cheesecake set perfectly without baking.
Kitchen Equipment Needed
- 9-inch springform pan – Perfect for easy removal of the cheesecake; I love this one because it keeps the edges clean.
- Mixing bowls – For combining the crust and the filling separately; glass or stainless steel works best.
- Hand mixer or stand mixer – Makes the cream cheese filling silky smooth; my stand mixer is a lifesaver here.
- Spatula – Essential for folding whipped cream into the cream cheese mixture without deflating it.
- Measuring cups and spoons – For accuracy, especially with sugar and butter.
- Knife and cutting board – To hull and slice your strawberries for topping.
- Whisk – Handy for lightly beating sugar into the strawberries if needed.
- Plastic wrap or foil – To cover the cheesecake while it chills in the fridge.
Instructions
Step 1: Prepare the Crust
1.1 Crush the graham crackers
- Place the graham crackers in a food processor and pulse until fine crumbs form.
- If you don’t have a processor, put them in a zip-top bag and crush with a rolling pin.
1.2 Mix with sugar and butter
- In a bowl, combine the graham cracker crumbs and sugar.
- Pour in the melted butter and stir until all crumbs are evenly coated.
1.3 Press into the pan
- Transfer the crumb mixture into a 9-inch springform pan.
- Press it firmly into the bottom using the back of a spoon or a flat-bottomed glass for an even layer.
Pro Tip: Press firmly enough so the crust holds together, but not so hard that it becomes rock solid. - Place the pan in the fridge while you make the filling.
Step 2: Make the Cheesecake Filling
2.1 Beat the cream cheese
- In a large bowl, use a hand mixer or stand mixer to beat the cream cheese until smooth and creamy.
Pro Tip: Make sure the cream cheese is fully softened; this prevents lumps.
2.2 Add sugar and vanilla
- Gradually beat in the sugar and vanilla extract until fully incorporated.
2.3 Whip the cream
- In a separate bowl, whip the cold heavy cream until stiff peaks form.
2.4 Fold cream into cream cheese
- Gently fold the whipped cream into the cream cheese mixture using a spatula.
- Do this slowly to keep the mixture light and fluffy.
Step 3: Assemble the Cheesecake
3.1 Spread filling over crust
- Pour the cream cheese filling onto the chilled crust.
- Smooth the top with a spatula for an even layer.
3.2 Chill
- Cover the cheesecake with plastic wrap or foil.
- Refrigerate for at least 4 hours, preferably overnight, to allow it to set.
Step 4: Prepare the Strawberry Topping
4.1 Slice the strawberries
- Hull and slice the fresh strawberries evenly.
4.2 Sweeten the strawberries
- Toss the sliced strawberries with sugar and lemon juice.
- Let them sit for 10–15 minutes to release their natural juices.
4.3 Top the cheesecake
- Once the cheesecake is set, arrange the strawberries on top in a single layer or a pretty pattern.
- Spoon a little of the strawberry juice over the top for extra flavor and shine.
Step 5: Serve and Enjoy
- Carefully remove the sides of the springform pan.
- Slice the cheesecake with a clean, sharp knife (wipe the knife between slices for neat edges).
- Serve chilled and enjoy every creamy, fruity bite!
Tips and Tricks for Success
- Chill the crust and filling well – It helps the cheesecake hold its shape when slicing.
- Use room-temperature cream cheese – It mixes more smoothly and avoids lumps in your filling.
- Fold whipped cream gently – Keeps the cheesecake light and fluffy instead of dense.
- Slice strawberries evenly – For a neat, beautiful topping that looks as good as it tastes.
- Wipe your knife between slices – Ensures clean, smooth edges for serving.
- Make it ahead – This no-bake strawberry dessert actually tastes better after sitting in the fridge for several hours.
Ingredient Substitutions and Variations
- Crust – Swap graham crackers for digestive biscuits, shortbread, or even crushed cookies for a different flavor.
- Sweetener – Use honey, maple syrup, or coconut sugar instead of granulated sugar for a natural twist.
- Dairy-Free Option – Replace cream cheese and heavy cream with vegan alternatives like cashew cream and coconut cream.
- Fruit Topping – Try raspberries, blueberries, or mixed berries instead of strawberries if you want a seasonal variation.
- Mini Cheesecakes – Make individual servings in jars or muffin tins for cute, portable desserts.
- Chocolate Twist – Add a layer of melted chocolate on the crust or drizzle over the top for an extra indulgent treat.
Serving Suggestions
- I love serving this no-bake strawberry cheesecake with a dollop of whipped cream and a few fresh mint leaves—it makes each slice feel extra fancy.
- Pair it with a cup of hot coffee or tea for a cozy afternoon treat; the creamy cheesecake and warm drink are a perfect match.
- For Valentine’s dessert, add a drizzle of melted chocolate or a few heart-shaped sprinkles on top—it’s simple but so festive!
- Serve in mini jars for parties or gatherings; guests love being able to grab their own little cheesecake cup.
- Add a handful of crushed nuts, like almonds or pistachios, on top for a subtle crunch and a pop of flavor.
Storage and Reheating Instructions
- Refrigerate – Keep leftovers covered in the fridge for up to 4–5 days; it stays fresh and creamy.
- Freeze – Wrap the cheesecake tightly in plastic wrap and foil; freeze for up to 1 month. Thaw in the fridge overnight before serving.
- Avoid room temperature for long – Since it’s a no-bake cheesecake with cream cheese, don’t leave it out for more than 2 hours.
- Slice after chilling – Always cut after the cheesecake has fully set in the fridge for neat slices.
- Re-serving tip – Let chilled slices sit at room temperature for 5–10 minutes before serving for a softer, creamier texture.
Frequently Asked Questions
Can I make this cheesecake ahead of time?
Absolutely! This no-bake strawberry dessert actually tastes better after chilling for several hours or overnight. Just keep it covered in the fridge until you’re ready to serve.
Can I use frozen strawberries?
Yes! Just thaw them first and drain any excess liquid so your cheesecake doesn’t get watery. You can also gently toss them with a little sugar and lemon juice to enhance their flavor.
How long will it keep in the fridge?
Stored properly in an airtight container, this cheesecake will stay fresh for up to 4–5 days. It’s perfect for making ahead for parties or Valentine’s dessert prep!
Can I make mini cheesecakes?
Definitely! Use jars or a muffin tin to create individual servings. It’s a fun way to serve dessert at gatherings and looks extra cute.
Can I substitute the crust?
Yes, you can swap graham crackers for digestive biscuits, shortbread, or even crushed cookies. Just keep the same ratio of crumbs to butter so it holds together well.
Can I make it dairy-free?
You can! Replace cream cheese and heavy cream with vegan alternatives like cashew cream and coconut cream. The cheesecake will still be creamy and delicious.
Did you try this recipe? Let me know in the comments how it turned out! I’d love to hear your favorite way to enjoy this strawberry cheesecake dessert.
No-Bake Strawberry Cheesecake
Equipment
- 9-inch springform pan
- Mixing Bowls
- Hand mixer or stand mixer
- Spatula
- Measuring cups and spoons
- Knife and Cutting Board
- Whisk
- Plastic wrap or foil
Ingredients
For the Crust:
- 1 ½ cups graham cracker crumbs
- ¼ cup granulated sugar
- 6 tablespoons unsalted butter melted
For the Cheesecake Filling:
- 16 oz 450 g cream cheese, softened
- ½ cup granulated sugar
- 1 teaspoon vanilla extract
- 1 cup heavy whipping cream cold
For the Strawberry Topping:
- 2 cups fresh strawberries hulled and sliced
- 2 tablespoons granulated sugar
- 1 teaspoon lemon juice
Instructions
Step 1: Prepare the Crust
- Crush the graham crackers
- Place the graham crackers in a food processor and pulse until fine crumbs form.
- If you don’t have a processor, put them in a zip-top bag and crush with a rolling pin.
- Mix with sugar and butter
- In a bowl, combine the graham cracker crumbs and sugar.
- Pour in the melted butter and stir until all crumbs are evenly coated.
- Press into the pan
- Transfer the crumb mixture into a 9-inch springform pan.
- Press it firmly into the bottom using the back of a spoon or a flat-bottomed glass for an even layer.
- Pro Tip: Press firmly enough so the crust holds together, but not so hard that it becomes rock solid.
- Place the pan in the fridge while you make the filling.
Step 2: Make the Cheesecake Filling
- Beat the cream cheese
- In a large bowl, use a hand mixer or stand mixer to beat the cream cheese until smooth and creamy.
- Pro Tip: Make sure the cream cheese is fully softened; this prevents lumps.
- Add sugar and vanilla
- Gradually beat in the sugar and vanilla extract until fully incorporated.
- Whip the cream
- In a separate bowl, whip the cold heavy cream until stiff peaks form.
- Fold cream into cream cheese
- Gently fold the whipped cream into the cream cheese mixture using a spatula.
- Do this slowly to keep the mixture light and fluffy.
Step 3: Assemble the Cheesecake
- Spread filling over crust
- Pour the cream cheese filling onto the chilled crust.
- Smooth the top with a spatula for an even layer.
- Chill
- Cover the cheesecake with plastic wrap or foil.
- Refrigerate for at least 4 hours, preferably overnight, to allow it to set.
Step 4: Prepare the Strawberry Topping
- Slice the strawberries
- Hull and slice the fresh strawberries evenly.
- Sweeten the strawberries
- Toss the sliced strawberries with sugar and lemon juice.
- Let them sit for 10–15 minutes to release their natural juices.
- Top the cheesecake
- Once the cheesecake is set, arrange the strawberries on top in a single layer or a pretty pattern.
- Spoon a little of the strawberry juice over the top for extra flavor and shine.
Step 5: Serve and Enjoy
- Carefully remove the sides of the springform pan.
- Slice the cheesecake with a clean, sharp knife (wipe the knife between slices for neat edges).
- Serve chilled and enjoy every creamy, fruity bite!
Notes
Nutritional Value (per serving, approx.):
- Calories: 320 kcal
- Fat: 22 g
- Saturated Fat: 13 g
- Carbohydrates: 28 g
- Sugar: 18 g
- Protein: 5 g
- Fiber: 1 g
- Sodium: 150 mg