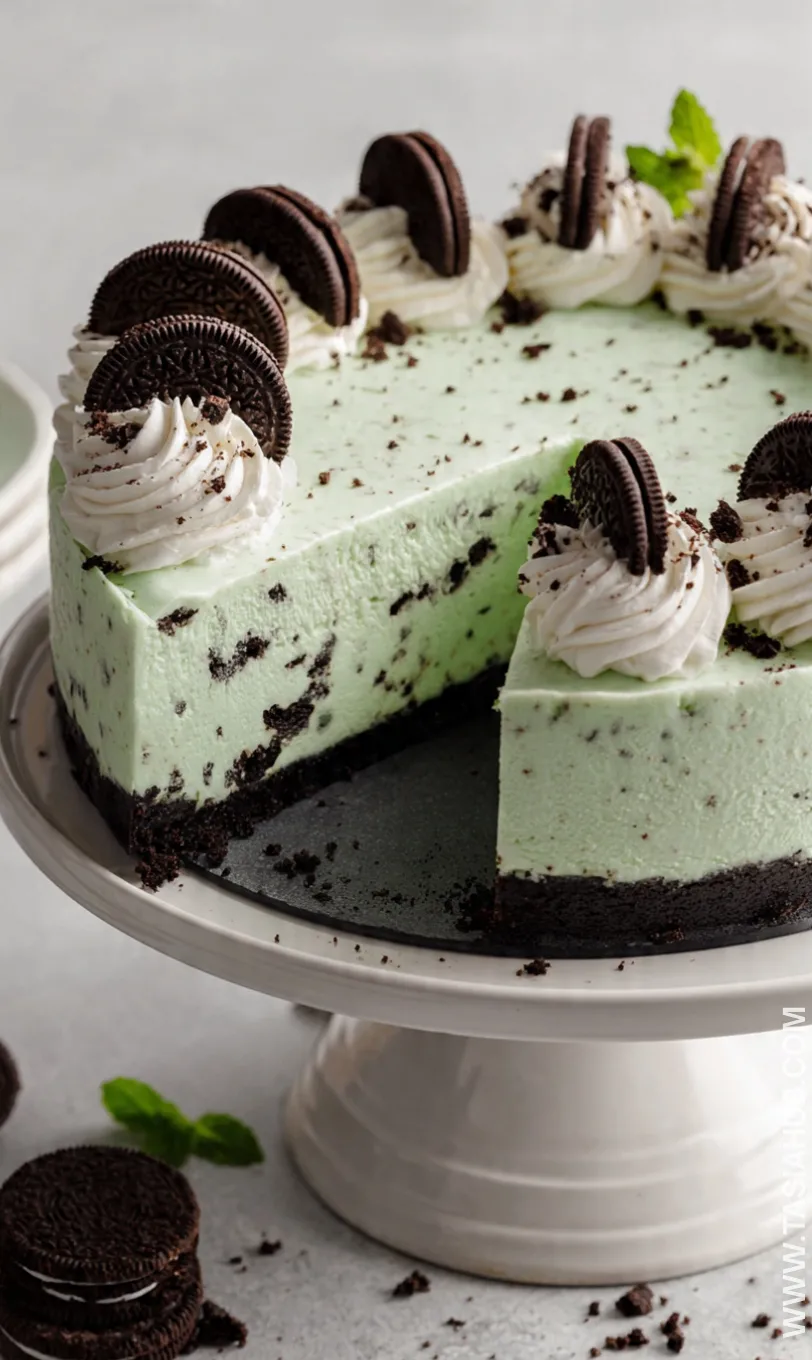
Mint Oreo Cheesecake

Bright green, creamy, and just the right amount of chocolatey crunch—this Mint Oreo cheesecake is the kind of dessert that instantly puts a smile on your face. Perfect for celebrating St Patrick’s Day, it brings together the cool freshness of mint with the indulgent richness of chocolate cookies in a dessert that’s impossible to resist. The best part? You don’t even need to turn on the oven—this is a no bake Oreo cheesecake that sets beautifully in the fridge.
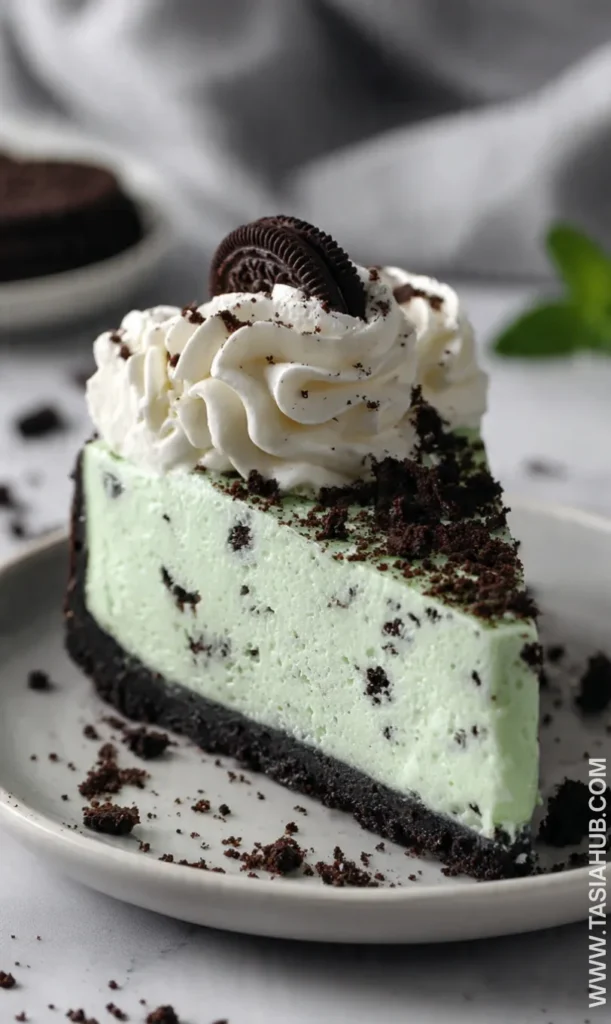
Mint Oreo desserts are always a crowd-pleaser, and this cheesecake takes them to the next level. Each slice is loaded with crushed Oreos in the base and folded into the creamy, minty filling, giving you layers of flavor and texture in every bite. Whether you’re serving it at a holiday gathering, a birthday, or just for a treat-yourself moment, it’s guaranteed to impress.
One of my favorite things about this mint dessert is how easy it is to make. With just a few simple ingredients—cream cheese, whipped cream, Oreos, and mint flavoring—you can whip up something that looks like it belongs in a bakery display. And because it’s a no bake Oreo cheesecake, it’s quick, fuss-free, and perfect for warmer days when you don’t want to heat up the kitchen.
This Mint Oreo cheesecake recipe is versatile too. You can dress it up with extra cookie crumbs on top, drizzle with chocolate, or even add a hint of green food coloring for a festive St Patrick’s Day dessert. It’s one of those recipes that’s as fun to make as it is to eat, and it’s sure to become a favorite in your collection of mint cheesecake treats.
Why You’ll Love It
- Refreshing Mint Flavor: The cool, fresh taste of mint perfectly balances the rich creaminess of the cheesecake, making every bite light, indulgent, and utterly satisfying.
- Crunchy Oreo Goodness: With a chocolatey Oreo crust and chunks folded into the filling, you get a delightful contrast of textures in every slice—soft, creamy, and slightly crunchy all at once.
- No Oven Required: This no bake Oreo cheesecake is simple to make and sets in the fridge, which means no baking stress and no waiting around for the oven to preheat. Perfect for quick treats or last-minute celebrations.
- Perfect for St Patrick’s Day: With a hint of festive green and the classic combination of chocolate and mint, this cheesecake doubles as a show-stopping holiday dessert that will impress guests instantly.
- Customizable and Fun: Top it with extra crushed Oreos, chocolate drizzle, or whipped cream. You can even get creative with sprinkles or edible gold stars for a playful touch, making it your own signature mint dessert.
Ingredient List
For the Crust:
- 24 Oreo cookies, finely crushed
- 6 tablespoons unsalted butter, melted
For the Filling:
- 16 oz (450 g) cream cheese, softened
- 1 cup heavy whipping cream
- ¾ cup powdered sugar
- 1 teaspoon peppermint extract
- 6–8 crushed Oreos (for folding in)
- Green food coloring (optional, for a festive St Patrick’s Day touch)
For the Topping (Optional):
- Extra crushed Oreos
- Whipped cream
- Chocolate drizzle
Ingredient Notes
- I always use full-fat cream cheese—it makes the cheesecake so creamy and dreamy.
- Don’t skip the peppermint extract! It’s the key to that perfect minty flavor that makes this dessert shine.
- For the crust, I use the original Oreo cookies—they give just the right chocolate crunch.
- If you want your cheesecake extra festive, a drop or two of green food coloring really brings the St Patrick’s Day vibes.
- Heavy whipping cream matters here—it whips up light and fluffy, giving the filling that melt-in-your-mouth texture.
Kitchen Equipment Needed
- 9-inch springform pan – Perfect for easy cheesecake release; I love using my non-stick one.
- Mixing bowls – For combining crust and filling separately; a set of sturdy glass bowls works best.
- Electric mixer or stand mixer – Makes the filling silky and smooth; I always reach for my hand mixer for quick cleanup.
- Spatula – Essential for folding in crushed Oreos without deflating the whipped cream.
- Measuring cups & spoons – For accuracy, especially with sugar and peppermint extract.
- Food processor or zip-top bag & rolling pin – To crush the Oreos finely; a food processor is my favorite for speed.
- Refrigerator – Not technically equipment, but critical! Your cheesecake needs a few hours to set.
Instructions
Step 1: Prepare the Oreo Crust
- Crush 24 Oreo cookies into fine crumbs using a food processor. If you don’t have one, place them in a zip-top bag and crush with a rolling pin.
- In a medium bowl, combine the crushed Oreos with 6 tablespoons of melted butter. Stir until the mixture looks like wet sand.
- Press the mixture firmly into the bottom of a 9-inch springform pan. Use the back of a spoon or a flat-bottomed cup for an even, compact layer.
Pro Tip: Pressing firmly helps the crust hold together when slicing later—it keeps everything neat and tidy.
Step 2: Whip the Cream
- In a large mixing bowl, pour 1 cup of heavy whipping cream.
- Beat with an electric mixer on medium-high speed until soft peaks form. This usually takes 2–3 minutes.
Pro Tip: Chill your mixing bowl and beaters for a few minutes beforehand—it makes whipping the cream faster and fluffier.
Step 3: Make the Cheesecake Filling
- In another large bowl, beat 16 oz of softened cream cheese until smooth and creamy.
- Gradually add ¾ cup powdered sugar and 1 teaspoon peppermint extract. Beat until fully combined.
- Optional: Add a few drops of green food coloring for a festive St Patrick’s Day look and mix until evenly colored.
- Gently fold the whipped cream into the cream cheese mixture using a spatula. Do this slowly to keep the filling light and airy.
- Fold in 6–8 crushed Oreos for extra chocolate crunch.
Step 4: Assemble the Cheesecake
- Spoon the filling over the prepared Oreo crust.
- Smooth the top with a spatula, making it even.
- Cover the pan with plastic wrap or foil and refrigerate for at least 4 hours, or overnight for the best results.
Pro Tip: Refrigerating overnight allows the flavors to meld together and makes slicing much cleaner.
Step 5: Add the Toppings
- Once set, remove the cheesecake from the springform pan.
- Decorate with extra crushed Oreos, whipped cream, or a drizzle of chocolate if desired.
- Slice carefully with a sharp knife, wiping the blade clean between cuts for perfect portions.
Tips and Tricks for Success
- Chill everything: Cold cream cheese and whipped cream make for a smoother, firmer filling.
- Press the crust firmly: A tightly packed crust helps prevent crumbling when slicing.
- Fold, don’t mix: Gently folding the whipped cream into the cream cheese keeps the cheesecake light and airy.
- Let it set long enough: 4+ hours in the fridge is essential; overnight is even better for flavor and texture.
- Use a hot knife to slice: Dip a sharp knife in hot water, wipe dry, and slice slowly for clean, perfect pieces.
Ingredient Substitutions and Variations
- Cream cheese: You can use Neufchâtel cheese for a lighter version, but the texture will be slightly softer.
- Oreos: Try mint-flavored Oreos for an extra minty twist or chocolate sandwich cookies if you want richer chocolate flavor.
- Peppermint extract: If you prefer, swap for mint syrup or even crushed fresh mint leaves for a natural mint flavor.
- Green food coloring: Optional; you can skip it or use a natural matcha powder for a subtle twist.
- Toppings: Swap chocolate drizzle for caramel or white chocolate for a different flavor profile, or add crushed Andes mints for a mint-chocolate overload.
Serving Suggestions
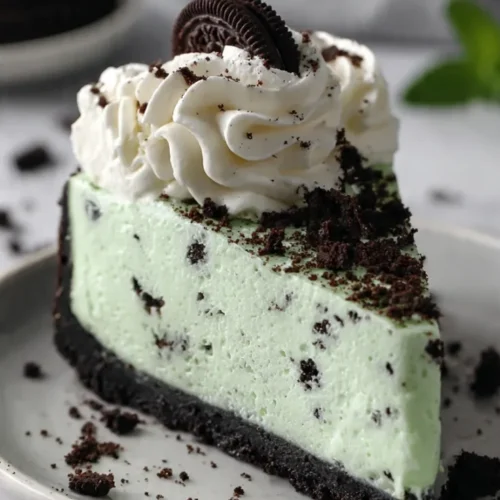
- I love serving a slice of this Mint Oreo cheesecake with a dollop of fresh whipped cream and a few extra Oreo crumbs on top—it feels like a dessert from a fancy bakery at home!
- Pair it with a hot cup of coffee or peppermint tea for a cozy afternoon treat.
- For St Patrick’s Day, serve alongside green-themed treats like pistachio cookies or shamrock-shaped sugar cookies—it makes the table extra festive.
- Cut into small squares and serve as part of a dessert platter for parties; guests can’t resist the creamy mint and chocolate combination.
- Add a drizzle of chocolate sauce or caramel right before serving—it’s indulgent, but oh-so-worth-it.
Storage and Reheating Instructions
- Refrigerator: Store leftovers in an airtight container for up to 4–5 days; the cheesecake actually tastes better after sitting a day or two.
- Freezer: Wrap tightly in plastic wrap and foil; freeze for up to 1 month. Thaw in the fridge overnight before serving.
- Slicing tip after freezing: Run a warm knife through the cheesecake for cleaner slices.
- Do not microwave: This is a no bake dessert—heating will ruin the texture and cause separation.
- Serving straight from the fridge: Let it sit for 5–10 minutes before cutting for easier slices.
Frequently Asked Questions
Can I make this cheesecake ahead of time?
Absolutely! In fact, letting it chill overnight enhances the flavors and makes slicing much easier.
Can I use low-fat cream cheese?
Yes, but the cheesecake may be slightly less creamy. I recommend full-fat for that rich, melt-in-your-mouth texture.
How long does it take to set?
Plan for at least 4 hours in the fridge, though overnight gives the best results.
Can I use a different cookie for the crust?
Definitely! Chocolate sandwich cookies work best, but feel free to try chocolate chip cookies or graham crackers for a different twist.
Is there a way to make it extra minty?
Yes! Add a few more drops of peppermint extract or fold in crushed mint candies, but be careful not to overpower the chocolate flavor.
Can I freeze the cheesecake?
Yes, wrap it tightly in plastic wrap and foil, then freeze for up to 1 month. Thaw in the fridge overnight before serving.
Did you try this Mint Oreo cheesecake recipe? I’d love to hear how it turned out! Share your thoughts or any fun variations in the comments—I always love seeing your creations.
Mint Oreo Cheesecake
Equipment
- 9-inch springform pan
- Mixing Bowls
- Electric mixer or stand mixer
- Spatula
- Measuring Cups & Spoons
- Food processor or zip-top bag + rolling pin
- Refrigerator
Ingredients
For the Crust:
- 24 Oreo cookies finely crushed
- 6 tablespoons unsalted butter melted
For the Filling:
- 16 oz 450 g cream cheese, softened
- 1 cup heavy whipping cream
- ¾ cup powdered sugar
- 1 teaspoon peppermint extract
- 6 –8 crushed Oreos for folding in
- Green food coloring optional, for a festive St Patrick’s Day touch
For the Topping (Optional):
- Extra crushed Oreos
- Whipped cream
- Chocolate drizzle
Instructions
Step 1: Prepare the Oreo Crust
- Crush 24 Oreo cookies into fine crumbs using a food processor. If you don’t have one, place them in a zip-top bag and crush with a rolling pin.
- In a medium bowl, combine the crushed Oreos with 6 tablespoons of melted butter. Stir until the mixture looks like wet sand.
- Press the mixture firmly into the bottom of a 9-inch springform pan. Use the back of a spoon or a flat-bottomed cup for an even, compact layer.
- Pro Tip: Pressing firmly helps the crust hold together when slicing later—it keeps everything neat and tidy.
Step 2: Whip the Cream
- In a large mixing bowl, pour 1 cup of heavy whipping cream.
- Beat with an electric mixer on medium-high speed until soft peaks form. This usually takes 2–3 minutes.
- Pro Tip: Chill your mixing bowl and beaters for a few minutes beforehand—it makes whipping the cream faster and fluffier.
Step 3: Make the Cheesecake Filling
- In another large bowl, beat 16 oz of softened cream cheese until smooth and creamy.
- Gradually add ¾ cup powdered sugar and 1 teaspoon peppermint extract. Beat until fully combined.
- Optional: Add a few drops of green food coloring for a festive St Patrick’s Day look and mix until evenly colored.
- Gently fold the whipped cream into the cream cheese mixture using a spatula. Do this slowly to keep the filling light and airy.
- Fold in 6–8 crushed Oreos for extra chocolate crunch.
Step 4: Assemble the Cheesecake
- Spoon the filling over the prepared Oreo crust.
- Smooth the top with a spatula, making it even.
- Cover the pan with plastic wrap or foil and refrigerate for at least 4 hours, or overnight for the best results.
- Pro Tip: Refrigerating overnight allows the flavors to meld together and makes slicing much cleaner.
Step 5: Add the Toppings
- Once set, remove the cheesecake from the springform pan.
- Decorate with extra crushed Oreos, whipped cream, or a drizzle of chocolate if desired.
- Slice carefully with a sharp knife, wiping the blade clean between cuts for perfect portions.
Notes
Nutritional Value (Per Serving – Approximate)
- Calories: 420–460 kcal
- Carbohydrates: 38–42 g
- Protein: 6–8 g
- Fat: 28–32 g
- Saturated Fat: 16–18 g
- Sugar: 26–30 g
- Fiber: 1–2 g
- Sodium: 280–320 mg