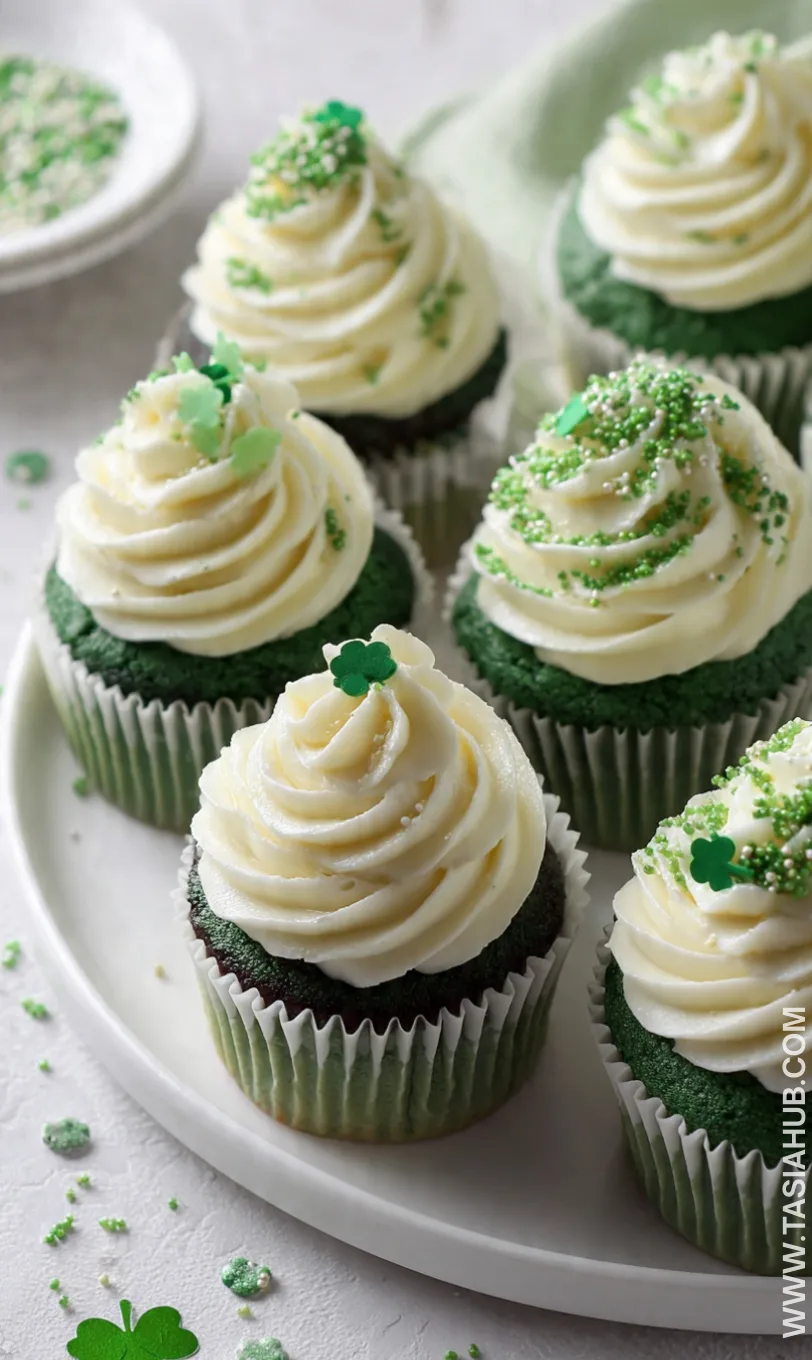
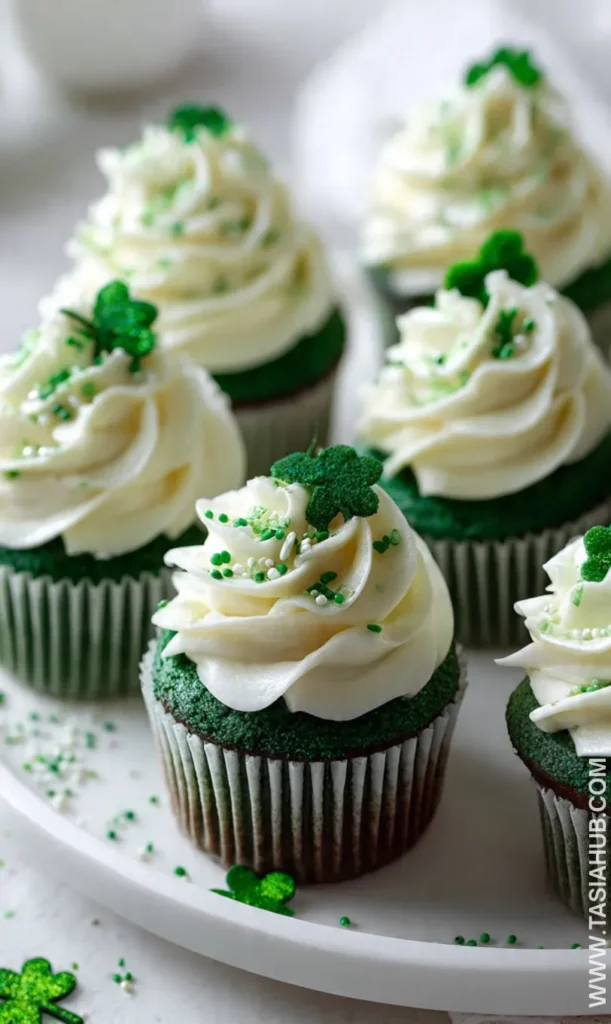
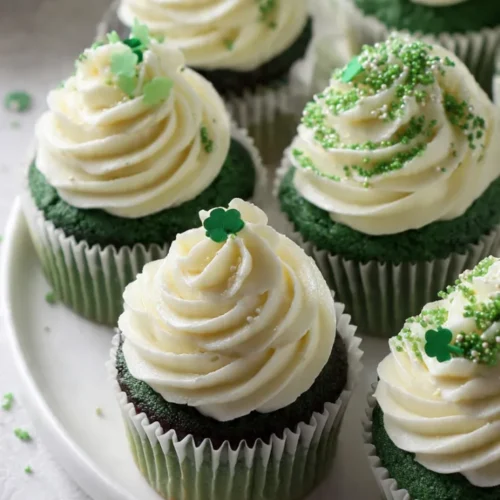
Green Velvet Cupcakes
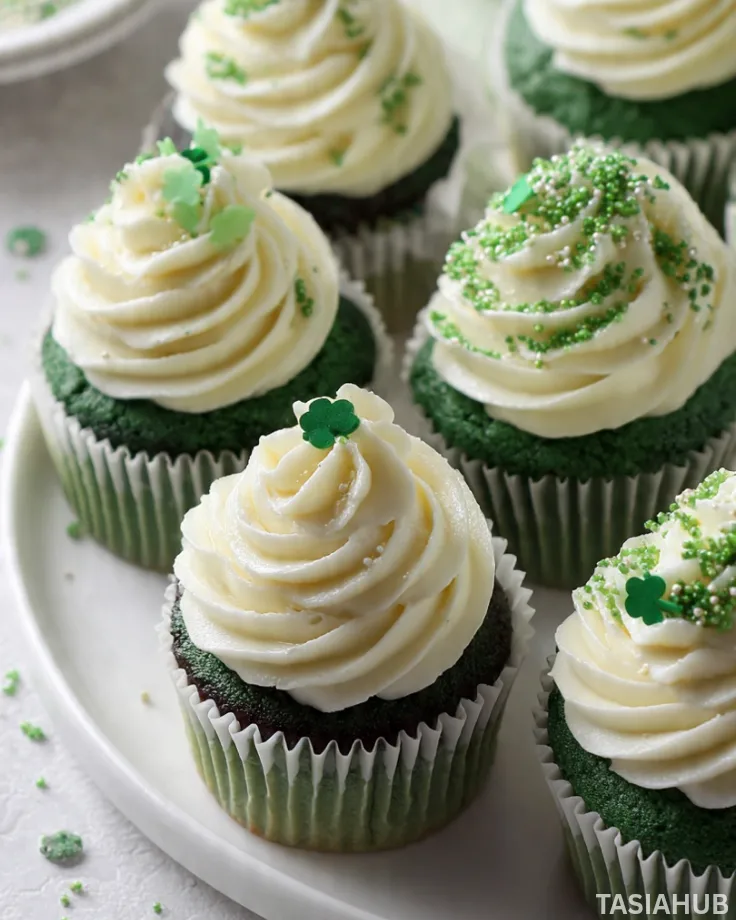
Celebrating St. Patrick’s Day doesn’t have to stop at decorations and festive drinks. One of the easiest ways to bring the holiday spirit to your table is with a dessert that’s as vibrant as it is delicious. Green velvet cupcakes are the perfect combination of fun and indulgence, offering a soft, moist cake with that signature cream cheese frosting that everyone loves. They’re a playful twist on the classic red velvet, swapping in a cheerful green hue that instantly feels festive.
These cupcakes aren’t just visually appealing—they’re a delight to eat. Each bite has a tender crumb that melts in your mouth, paired with the tangy sweetness of cream cheese frosting. They’re ideal for sharing at a St Patrick’s themed dessert table or gifting to friends and family. Whether you’re hosting a small gathering or simply want to enjoy a sweet treat, these cupcakes make an instant impression.
Green velvet cupcakes are also surprisingly easy to make. You don’t need fancy ingredients or complicated techniques—just some basic baking staples and a little food coloring to achieve that perfect green shade. For anyone interested in green dessert ideas, these cupcakes are a fun and approachable way to explore themed baking without feeling overwhelmed.
Beyond their festive look, these cupcakes also lend themselves to creative decorating. From sprinkling edible gold dust to piping shamrock shapes on top, the possibilities are endless. Kids and adults alike will enjoy both making and eating them, making these cupcakes a versatile treat that fits right into any St Patrick’s Day celebration.
Why You’ll Love It
- Festive and fun – These cupcakes instantly bring St Patrick’s Day vibes to your table. The vibrant green color makes them a standout dessert that’s perfect for celebrations or casual treat moments.
- Soft, moist, and flavorful – Each bite is tender and rich without being heavy. The slight tang from the cream cheese frosting balances the sweetness beautifully.
- Kid-friendly and crowd-pleasing – From little ones to adults, everyone will be reaching for seconds. They’re a great way to sneak in some green-themed fun for all ages.
- Easy to customize – You can dress them up with sprinkles, edible glitter, or even mini shamrocks. Perfect for anyone looking for a creative St Patrick’s themed dessert.
- Simple to bake at home – You don’t need to be a pro baker. With straightforward steps, these cupcakes show how easy it is to make green velvet cupcakes with cream cheese frosting from scratch.
Ingredient List
For the Cupcakes:
- 1 ½ cups all-purpose flour
- 1 cup granulated sugar
- ½ teaspoon baking soda
- ¼ teaspoon salt
- ½ cup unsalted butter, softened
- 2 large eggs
- 1 teaspoon vanilla extract
- ½ cup buttermilk
- 1 tablespoon cocoa powder
- 1–2 teaspoons green food coloring
For the Cream Cheese Frosting:
- 8 oz cream cheese, softened
- ½ cup unsalted butter, softened
- 3 cups powdered sugar
- 1 teaspoon vanilla extract
Ingredient Notes
- I always use real unsalted butter—it adds so much flavor and makes the cupcakes extra tender.
- Don’t skip the buttermilk! It keeps the cupcakes moist and gives that slight tang that pairs perfectly with the frosting.
- Green food coloring is key for that festive St Patrick’s Day cupcake look. Start with less, then add more until you hit your favorite shade.
- I love using full-fat cream cheese for the frosting—it makes it rich, creamy, and spreadable.
- Cocoa powder is subtle here, but it deepens the velvet flavor and keeps the color vibrant without tasting like chocolate.
Kitchen Equipment Needed
- Mixing bowls – For combining your dry and wet ingredients; I like using glass bowls so you can see everything clearly.
- Electric mixer or hand whisk – Makes the batter smooth and fluffy; I personally love my hand mixer for quick clean-up.
- Measuring cups and spoons – Essential for accuracy; I always keep a full set on hand for baking.
- Muffin tin – To hold your cupcakes in shape; nonstick ones make removing cupcakes easier.
- Cupcake liners – Keep the cupcakes from sticking and make cleanup a breeze.
- Spatula – For scraping down the bowl; I use a flexible silicone one for zero batter waste.
- Cooling rack – Allows cupcakes to cool evenly; my favorite part of this step is seeing them rise perfectly.
- Piping bag and tip – Optional, but perfect for decorating with cream cheese frosting.
Instructions
Step 1: Prep Your Oven and Pan
- Preheat your oven to 350°F (175°C).
- Line a 12-cup muffin tin with cupcake liners.
- Pro Tip: Lightly spray the liners with nonstick spray if you want extra-easy removal.
Step 2: Mix the Dry Ingredients
- In a medium bowl, whisk together 1 ½ cups flour, 1 teaspoon cocoa powder, ½ teaspoon baking soda, and ¼ teaspoon salt.
- Pro Tip: Sift the flour and cocoa together if you want an ultra-smooth batter without clumps.
Step 3: Cream Butter and Sugar
- In a large bowl, beat ½ cup softened butter with 1 cup granulated sugar until light and fluffy (about 2–3 minutes).
- Add 2 eggs, one at a time, beating well after each addition.
- Mix in 1 teaspoon vanilla extract.
Step 4: Combine Wet and Dry Ingredients
- Gradually add the dry ingredients to the butter mixture, alternating with ½ cup buttermilk. Start and end with the dry ingredients.
- Add 1–2 teaspoons green food coloring, mixing until evenly colored.
- Pro Tip: Don’t overmix here—just mix until the batter is smooth. Overmixing can make the cupcakes dense.
Step 5: Fill the Cupcake Liners
- Spoon the batter into the liners, filling each about 2/3 full.
- Tap the pan gently on the counter to remove any air bubbles.
Step 6: Bake the Cupcakes
- Bake for 18–22 minutes, or until a toothpick inserted in the center comes out clean.
- Remove from the oven and let the cupcakes cool in the pan for 5 minutes.
- Transfer to a cooling rack to cool completely.
Step 7: Make the Cream Cheese Frosting
- Beat 8 oz cream cheese with ½ cup softened butter until smooth.
- Gradually add 3 cups powdered sugar and 1 teaspoon vanilla extract, mixing until creamy.
- Pro Tip: Chill the frosting for 10–15 minutes if it’s too soft to pipe neatly.
Step 8: Frost the Cupcakes
- Once cupcakes are completely cool, use a spatula or piping bag to frost them generously with cream cheese frosting.
- Decorate with sprinkles or mini shamrocks if desired.
Step 9: Serve and Enjoy
- Arrange your cupcakes on a platter and enjoy immediately, or store in an airtight container in the fridge for up to 3 days.
- Pro Tip: Bring chilled cupcakes to room temperature before serving—they taste best when the frosting is soft and creamy.
Tips and Tricks for Success
- Room temperature ingredients – Make sure your butter, eggs, and cream cheese are at room temperature for a smooth, lump-free batter and frosting.
- Measure flour carefully – Too much flour can make cupcakes dry. Spoon it into your measuring cup and level with a knife.
- Don’t overfill liners – Filling more than 2/3 full can cause cupcakes to spill over while baking.
- Check doneness early – Ovens vary, so start testing at 18 minutes with a toothpick to avoid overbaking.
- Cool completely before frosting – Warm cupcakes will melt your cream cheese frosting, creating a mess.
- Add food coloring gradually – It’s easier to build up a vibrant green than fix a shade that’s too dark.
Ingredient Substitutions and Variations
- Buttermilk substitute – Use ½ cup milk + ½ teaspoon vinegar or lemon juice. Let sit 5 minutes before adding.
- Butter swap – Melted coconut oil works for a dairy-free option (slightly changes texture).
- Sugar alternatives – Coconut sugar or a granulated sugar substitute can work, but may slightly affect color and sweetness.
- Green twist – Try matcha powder instead of food coloring for a natural green and subtle earthy flavor.
- Frosting variations – Whipped cream or mascarpone frosting works for a lighter option, though cream cheese frosting is classic.
- Add-ins – Mini chocolate chips or chopped pistachios fold in nicely for extra texture and fun green accents.
Serving Suggestions
- I love serving these green velvet cupcakes alongside a hot cup of coffee or tea—it balances the sweetness perfectly for a cozy afternoon treat.
- Arrange them on a festive St Patrick’s Day dessert table with gold-wrapped chocolates or shamrock cookies for a playful, colorful display.
- They’re great as a fun dessert after dinner; I like pairing them with fresh berries for a little tart contrast.
- Perfect for gifting—wrap a few in a small box with a ribbon for friends, coworkers, or neighbors.
- Serve them chilled during a spring or St Patrick’s themed brunch—it makes the cream cheese frosting extra creamy and refreshing.
Storage and Reheating Instructions
- Room temperature – Keep cupcakes in an airtight container for up to 2 days.
- Refrigeration – Store in the fridge for up to 3 days; bring to room temperature before serving.
- Freezing – Wrap unfrosted cupcakes individually in plastic wrap, freeze up to 2 months, then thaw at room temperature before frosting.
- Reheating – Warm a refrigerated cupcake in the microwave for 10–15 seconds to soften the frosting slightly.
- Frosting tip – If frozen with frosting, let cupcakes thaw completely in the fridge to avoid soggy frosting.
Frequently Asked Questions
How long do green velvet cupcakes last?
Cupcakes stay fresh at room temperature for 2 days and up to 3 days in the fridge. If you want to keep them longer, you can freeze the unfrosted cupcakes for up to 2 months.
Can I make these cupcakes dairy-free?
Yes! Swap butter for coconut oil and use a dairy-free cream cheese alternative for the frosting. The texture will be slightly different, but they’ll still be delicious.
Can I use natural green coloring instead of food dye?
Absolutely! Matcha powder works well for a natural green hue and adds a subtle earthy flavor. Start with 1–2 teaspoons and adjust to your desired color.
Do I have to use cream cheese frosting?
Not at all! Whipped cream or mascarpone frosting can be a lighter alternative. Cream cheese just gives that classic tangy richness that pairs perfectly with the cupcakes.
Can I make these cupcakes ahead of time?
Yes! You can bake them a day in advance and frost just before serving. If freezing, freeze unfrosted cupcakes and thaw before frosting.
What’s the secret to keeping cupcakes moist?
Using room temperature ingredients, not overmixing the batter, and adding buttermilk are key to soft, tender cupcakes.
Did you try this recipe? Let me know in the comments how it turned out—I love seeing your festive creations!
Green Velvet Cupcakes
Equipment
- Mixing Bowls
- Electric Mixer (or Hand Whisk)
- Measuring cups and spoons
- Muffin Tin
- Cupcake liners
- Spatula
- Cooling Rack
- Piping bag and tip
Ingredients
For the Cupcakes:
- 1 ½ cups all-purpose flour
- 1 cup granulated sugar
- ½ teaspoon baking soda
- ¼ teaspoon salt
- ½ cup unsalted butter softened
- 2 large eggs
- 1 teaspoon vanilla extract
- ½ cup buttermilk
- 1 tablespoon cocoa powder
- 1 –2 teaspoons green food coloring
For the Cream Cheese Frosting:
- 8 oz cream cheese softened
- ½ cup unsalted butter softened
- 3 cups powdered sugar
- 1 teaspoon vanilla extract
Instructions
Step 1: Prep Your Oven and Pan
- Preheat your oven to 350°F (175°C).
- Line a 12-cup muffin tin with cupcake liners.
- Pro Tip: Lightly spray the liners with nonstick spray if you want extra-easy removal.
Step 2: Mix the Dry Ingredients
- In a medium bowl, whisk together 1 ½ cups flour, 1 teaspoon cocoa powder, ½ teaspoon baking soda, and ¼ teaspoon salt.
- Pro Tip: Sift the flour and cocoa together if you want an ultra-smooth batter without clumps.
Step 3: Cream Butter and Sugar
- In a large bowl, beat ½ cup softened butter with 1 cup granulated sugar until light and fluffy (about 2–3 minutes).
- Add 2 eggs, one at a time, beating well after each addition.
- Mix in 1 teaspoon vanilla extract.
Step 4: Combine Wet and Dry Ingredients
- Gradually add the dry ingredients to the butter mixture, alternating with ½ cup buttermilk. Start and end with the dry ingredients.
- Add 1–2 teaspoons green food coloring, mixing until evenly colored.
- Pro Tip: Don’t overmix here—just mix until the batter is smooth. Overmixing can make the cupcakes dense.
Step 5: Fill the Cupcake Liners
- Spoon the batter into the liners, filling each about 2/3 full.
- Tap the pan gently on the counter to remove any air bubbles.
Step 6: Bake the Cupcakes
- Bake for 18–22 minutes, or until a toothpick inserted in the center comes out clean.
- Remove from the oven and let the cupcakes cool in the pan for 5 minutes.
- Transfer to a cooling rack to cool completely.
Step 7: Make the Cream Cheese Frosting
- Beat 8 oz cream cheese with ½ cup softened butter until smooth.
- Gradually add 3 cups powdered sugar and 1 teaspoon vanilla extract, mixing until creamy.
- Pro Tip: Chill the frosting for 10–15 minutes if it’s too soft to pipe neatly.
Step 8: Frost the Cupcakes
- Once cupcakes are completely cool, use a spatula or piping bag to frost them generously with cream cheese frosting.
- Decorate with sprinkles or mini shamrocks if desired.
Step 9: Serve and Enjoy
- Arrange your cupcakes on a platter and enjoy immediately, or store in an airtight container in the fridge for up to 3 days.
- Pro Tip: Bring chilled cupcakes to room temperature before serving—they taste best when the frosting is soft and creamy.
Notes
Nutritional Value (Per Cupcake – Approximate):
- Calories: 320–350 kcal
- Carbohydrates: 42g
- Protein: 4g
- Fat: 16g
- Saturated Fat: 9g
- Sugar: 30g
- Fiber: 1g
- Cholesterol: 65mg
- Sodium: 220mg