Green Macarons
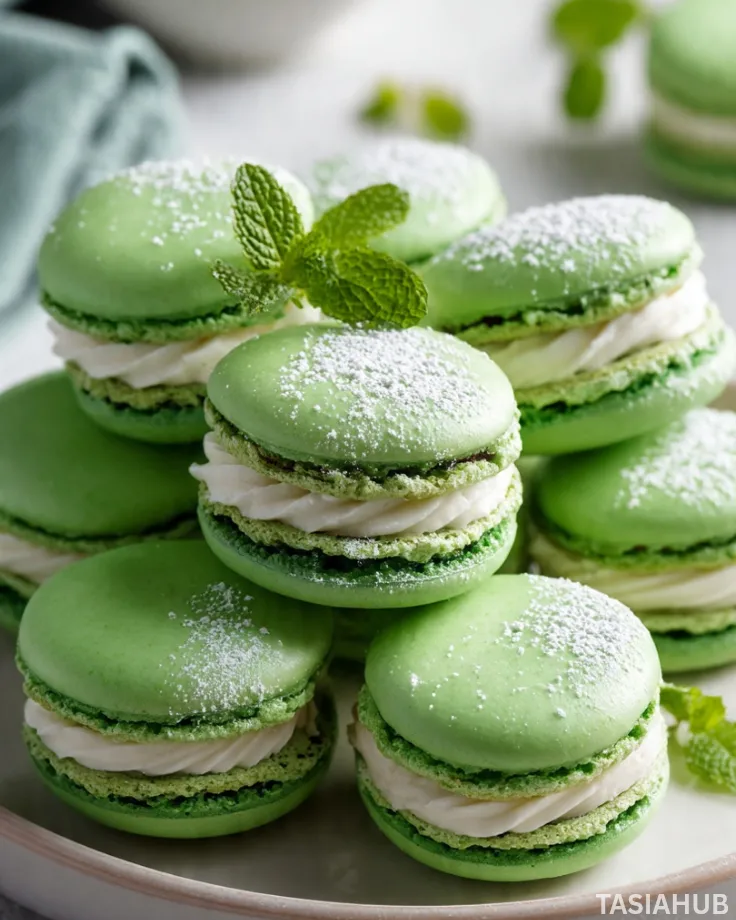
As spring arrives and St. Patrick’s Day approaches, it’s the perfect time to bring a pop of festive color into your kitchen. These green macarons are delicate, airy, and just the right balance of sweetness and elegance. Their soft, crisp shells and creamy filling make them a standout on any dessert table, whether you’re hosting a party or simply treating yourself.
Making macarons can feel intimidating at first, but the process is surprisingly rewarding. The key is patience and precision, especially when whipping the meringue to the perfect peaks and folding the batter gently. Once you master the technique, these little green treats can become a go-to for holiday celebrations or anytime you want a light, eye-catching dessert.
The vibrant green hue of these macarons instantly sets a festive tone, making them ideal for a St Patrick’s day dessert centerpiece. They pair wonderfully with other sweets, like chocolate truffles or lemon bars, but they’re equally stunning served on their own. The delicate color also makes them versatile—you can add a touch of edible gold for an extra celebratory feel, or keep them simple and charming.
Beyond their beauty, green macarons are fun to personalize. You can experiment with different fillings such as mint buttercream, pistachio ganache, or even a hint of lime to complement the subtle sweetness of the shells. These little desserts aren’t just visually striking—they’re a playful and sophisticated way to celebrate a holiday or brighten up an afternoon tea with friends.
Why You’ll Love It
- Perfectly festive without being over-the-top – These green macarons bring a cheerful St Patrick’s Day vibe to your table without relying on heavy decorations or artificial flavors. They’re subtle, elegant, and festive all at once.
- Light, airy, and satisfying – Unlike some desserts that feel too heavy, these macarons are delicate and melt in your mouth, giving you a sweet treat that never feels overwhelming.
- Endless flavor possibilities – From mint buttercream to pistachio or even a hint of lime, you can customize the filling to match your mood, your guests’ tastes, or the season.
- Impress friends and family effortlessly – Even if you’re new to baking, these macarons have a show-stopping look that makes it seem like you spent hours perfecting them.
- A fun baking challenge that’s worth it – Crafting macarons is a satisfying process, and there’s a real sense of accomplishment when you see those perfectly smooth shells and matching vibrant green color come together.
Ingredient List
For the Macaron Shells:
- 1 cup (120g) almond flour, finely ground
- 1 ¾ cups (200g) powdered sugar
- 3 large egg whites, at room temperature
- ¼ cup (50g) granulated sugar
- Green gel food coloring, a few drops
For the Filling:
- ½ cup (115g) unsalted butter, softened
- 1 ½ cups (180g) powdered sugar
- 1 tsp vanilla extract
- 1–2 tsp milk, as needed for consistency
- Optional: ¼ tsp peppermint or lime extract for extra flair
Ingredient Notes
- I always use super fine almond flour—it makes the shells so smooth and prevents cracking.
- Don’t skip the egg whites resting at room temperature! They whip better and give that perfect airy texture.
- A few drops of gel food coloring go a long way—you want that festive green without changing the consistency of the batter.
- For the filling, I love using unsalted butter because it balances the sweetness perfectly; salted butter can overpower the delicate flavor.
- Optional extracts are a fun twist, especially for a St Patrick’s day dessert vibe. Peppermint or lime turns these into a playful green dessert that’s hard to resist.
Kitchen Equipment Needed
- Mixing bowls – For whipping the egg whites and combining dry ingredients; I love using glass bowls because they’re easy to see and clean.
- Electric mixer or stand mixer – Essential for whipping egg whites to stiff peaks quickly and evenly.
- Sifter – To get a smooth almond flour and powdered sugar mixture; it prevents lumpy shells.
- Rubber spatula – Perfect for gently folding the batter without deflating it.
- Piping bag with round tip – For piping uniform macaron shells; I always use a ½-inch round tip for perfect circles.
- Baking sheets – Standard or nonstick, lined with parchment paper to prevent sticking.
- Silicone baking mat (optional but recommended) – Helps macarons bake evenly and makes cleanup easier.
- Oven thermometer – Ensures your oven is at the right temperature for those delicate shells.
Instructions
Step 1: Prep Your Ingredients and Workspace
- Measure out all your ingredients carefully—accuracy is key with macarons.
- Line two baking sheets with parchment paper or silicone mats.
- Separate the egg whites from the yolks (you’ll only need the whites) and let them sit at room temperature for about 30 minutes.
Pro tip: Room temperature egg whites whip better and give more volume.
Step 2: Sift Dry Ingredients
- Sift the almond flour and powdered sugar together into a large bowl.
- Gently mix with a spatula to combine evenly.
Pro tip: Sifting is crucial—it ensures smooth macaron shells and prevents cracking.
Step 3: Whip the Egg Whites
- In a clean, dry bowl, start whipping the egg whites on medium speed until they become foamy.
- Gradually add the granulated sugar, one tablespoon at a time, while continuing to whip.
- Increase speed to high and whip until stiff peaks form.
Pro tip: Stop whipping as soon as stiff peaks form—overwhipping can make the batter dry.
Step 4: Add Color and Fold Dry Ingredients
- Add a few drops of green gel food coloring to the whipped egg whites and mix gently until evenly colored.
- Gradually fold the sifted almond flour mixture into the egg whites using a rubber spatula.
- Fold carefully until the batter flows like lava and forms a ribbon when lifted.
Pro tip: Don’t overfold! The batter should be smooth but still slightly thick.
Step 5: Pipe the Macaron Shells
- Transfer the batter into a piping bag fitted with a round tip.
- Pipe small, even circles (about 1–1.5 inches) onto the prepared baking sheets, leaving space between them.
- Tap the baking sheets gently on the counter to release air bubbles.
Pro tip: If any bubbles remain, lightly pop them with a toothpick to prevent cracking.
Step 6: Rest the Macarons
- Let the piped shells rest at room temperature for 30–60 minutes, until a thin skin forms on the surface.
Pro tip: The skin ensures your macarons develop that signature smooth, shiny top and prevents cracking during baking.
Step 7: Bake
- Preheat the oven to 300°F (150°C).
- Bake one sheet at a time for 15–18 minutes, rotating halfway through for even baking.
- Let the shells cool completely on the baking sheet before removing.
Pro tip: Use an oven thermometer if possible—oven temperatures vary and can affect the delicate shells.
Step 8: Make the Filling
- Beat the softened butter until smooth and creamy.
- Gradually add powdered sugar and mix until fully combined.
- Add vanilla extract and milk, and optional peppermint or lime extract, adjusting for consistency.
Pro tip: The filling should be thick enough to pipe but soft enough to spread—too stiff can tear shells, too runny will ooze out.
Step 9: Assemble the Macarons
- Pair shells of similar size.
- Pipe a small dollop of filling onto the flat side of one shell and gently sandwich with the other.
- Press lightly to spread the filling evenly.
Step 10: Rest Before Serving
- Place assembled macarons in an airtight container.
- Let them rest in the fridge for at least 24 hours for the best flavor and texture—this allows the filling to meld with the shells.
Pro tip: Bringing them to room temperature before serving makes them soft and melt-in-your-mouth perfect.
Tips and Tricks for Success
- Measure carefully – Baking macarons is all about precision; weigh your ingredients if possible.
- Room temperature egg whites – They whip faster and reach stiffer peaks than cold ones.
- Sift dry ingredients – Prevents lumps and ensures smooth, crack-free shells.
- Fold gently – Overmixing can make the batter too runny; under-mixing can make it stiff.
- Rest the piped shells – Letting them form a skin is essential for that glossy top and smooth texture.
- Use an oven thermometer – Even a few degrees too hot or cold can affect how the shells rise and set.
- Cool completely before filling – Warm shells can make the filling melt and ruin the shape.
- 24-hour rest – For the best flavor and texture, let assembled macarons sit in the fridge before enjoying.
Ingredient Substitutions and Variations
- Almond flour – You can try hazelnut flour for a nutty twist, but keep it finely ground for smooth shells.
- Buttercream filling – Swap for cream cheese frosting or ganache for different flavors and textures.
- Green coloring – Use matcha powder instead of food coloring for a natural, earthy green dessert.
- Flavor extracts – Vanilla is classic, but peppermint, lime, or almond extract adds a festive flair.
- Milk in filling – Substitute with cream or plant-based milk if needed; adjust consistency carefully.
- Add texture – Fold in tiny chocolate chips, crushed nuts, or sprinkles to make the macarons more playful.
Serving Suggestions
- I love serving these green macarons alongside a cup of hot mint tea—it really brings out the subtle sweetness and festive green color.
- Pair them with chocolate truffles on a St Patrick’s Day dessert platter for a luxurious, indulgent spread.
- Serve them with a scoop of vanilla or pistachio ice cream for a playful dessert twist that guests always love.
- These macarons make a perfect treat for afternoon tea with friends—stack them on a pretty plate and watch them disappear!
- Add a few gold-dusted macarons to a dessert table for a whimsical, celebratory touch—they look stunning and taste even better.
Storage and Reheating Instructions
- Refrigerate – Store in an airtight container for up to 5 days; let them come to room temperature before serving.
- Freeze – Assemble macarons can be frozen for up to 1 month; thaw in the fridge overnight before enjoying.
- Keep shells separate – If you want to bake ahead, store shells and filling separately; assemble just before serving.
- Avoid direct sunlight – Keeps the vibrant green color from fading and the shells from becoming sticky.
- Do not microwave – Heat can make the delicate shells chewy; stick to room temperature or chilled serving.
Frequently Asked Questions
How do I prevent my macarons from cracking?
Make sure to sift your dry ingredients, fold the batter gently, and let the piped shells rest until a skin forms before baking. This helps the tops stay smooth and crack-free.
Can I use powdered food coloring instead of gel?
Yes, but gel coloring works best because it won’t change the batter consistency. If you use powdered coloring, add it sparingly and adjust the batter carefully.
What if my macarons turn out hollow inside?
Hollow shells usually happen when the batter is overmixed or baked at too high a temperature. Rest the batter just until it forms a skin and use an oven thermometer for accuracy.
How should I store leftover macarons?
Keep them in an airtight container in the fridge for up to 5 days, or freeze them assembled for up to 1 month. Always bring them to room temperature before serving.
Can I make these without almond flour?
You can try substituting with other finely ground nuts like hazelnuts, but the texture and flavor may change slightly. Almond flour gives the classic light, airy macaron shell.
Can I flavor the filling differently?
Absolutely! Vanilla, mint, lime, pistachio, or even chocolate ganache all work beautifully. Experiment to match your taste or the theme of your dessert spread.
Did you try this recipe? Let me know in the comments how your green macarons turned out—I’d love to hear your tips, twists, or favorite ways to serve this festive St Patrick’s day dessert!
Green Macarons
Equipment
- Mixing Bowls
- Electric mixer or stand mixer
- Sifter
- Rubber spatula
- Piping bag with round tip
- Baking sheets
- Silicone baking mat (optional but recommended)
- Oven thermometer
Ingredients
For the Macaron Shells:
- 1 cup 120g almond flour, finely ground
- 1 ¾ cups 200g powdered sugar
- 3 large egg whites at room temperature
- ¼ cup 50g granulated sugar
- Green gel food coloring a few drops
For the Filling:
- ½ cup 115g unsalted butter, softened
- 1 ½ cups 180g powdered sugar
- 1 tsp vanilla extract
- 1 –2 tsp milk as needed for consistency
- Optional: ¼ tsp peppermint or lime extract for extra flair
Instructions
Step 1: Prep Your Ingredients and Workspace
- Measure out all your ingredients carefully—accuracy is key with macarons.
- Line two baking sheets with parchment paper or silicone mats.
- Separate the egg whites from the yolks (you’ll only need the whites) and let them sit at room temperature for about 30 minutes.
- Pro tip: Room temperature egg whites whip better and give more volume.
Step 2: Sift Dry Ingredients
- Sift the almond flour and powdered sugar together into a large bowl.
- Gently mix with a spatula to combine evenly.
- Pro tip: Sifting is crucial—it ensures smooth macaron shells and prevents cracking.
Step 3: Whip the Egg Whites
- In a clean, dry bowl, start whipping the egg whites on medium speed until they become foamy.
- Gradually add the granulated sugar, one tablespoon at a time, while continuing to whip.
- Increase speed to high and whip until stiff peaks form.
- Pro tip: Stop whipping as soon as stiff peaks form—overwhipping can make the batter dry.
Step 4: Add Color and Fold Dry Ingredients
- Add a few drops of green gel food coloring to the whipped egg whites and mix gently until evenly colored.
- Gradually fold the sifted almond flour mixture into the egg whites using a rubber spatula.
- Fold carefully until the batter flows like lava and forms a ribbon when lifted.
- Pro tip: Don’t overfold! The batter should be smooth but still slightly thick.
Step 5: Pipe the Macaron Shells
- Transfer the batter into a piping bag fitted with a round tip.
- Pipe small, even circles (about 1–1.5 inches) onto the prepared baking sheets, leaving space between them.
- Tap the baking sheets gently on the counter to release air bubbles.
- Pro tip: If any bubbles remain, lightly pop them with a toothpick to prevent cracking.
Step 6: Rest the Macarons
- Let the piped shells rest at room temperature for 30–60 minutes, until a thin skin forms on the surface.
- Pro tip: The skin ensures your macarons develop that signature smooth, shiny top and prevents cracking during baking.
Step 7: Bake
- Preheat the oven to 300°F (150°C).
- Bake one sheet at a time for 15–18 minutes, rotating halfway through for even baking.
- Let the shells cool completely on the baking sheet before removing.
- Pro tip: Use an oven thermometer if possible—oven temperatures vary and can affect the delicate shells.
Step 8: Make the Filling
- Beat the softened butter until smooth and creamy.
- Gradually add powdered sugar and mix until fully combined.
- Add vanilla extract and milk, and optional peppermint or lime extract, adjusting for consistency.
- Pro tip: The filling should be thick enough to pipe but soft enough to spread—too stiff can tear shells, too runny will ooze out.
Step 9: Assemble the Macarons
- Pair shells of similar size.
- Pipe a small dollop of filling onto the flat side of one shell and gently sandwich with the other.
- Press lightly to spread the filling evenly.
Step 10: Rest Before Serving
- Place assembled macarons in an airtight container.
- Let them rest in the fridge for at least 24 hours for the best flavor and texture—this allows the filling to meld with the shells.
- Pro tip: Bringing them to room temperature before serving makes them soft and melt-in-your-mouth perfect.
Notes
Nutritional Value (per macaron, approximate):
- Calories: 95–110 kcal
- Carbohydrates: 12–14g
- Sugars: 10–12g
- Fat: 5–6g
- Saturated Fat: 3–4g
- Protein: 2g
- Fiber: <1g
- Sodium: 15–20mg