Fresh Fruit Tart
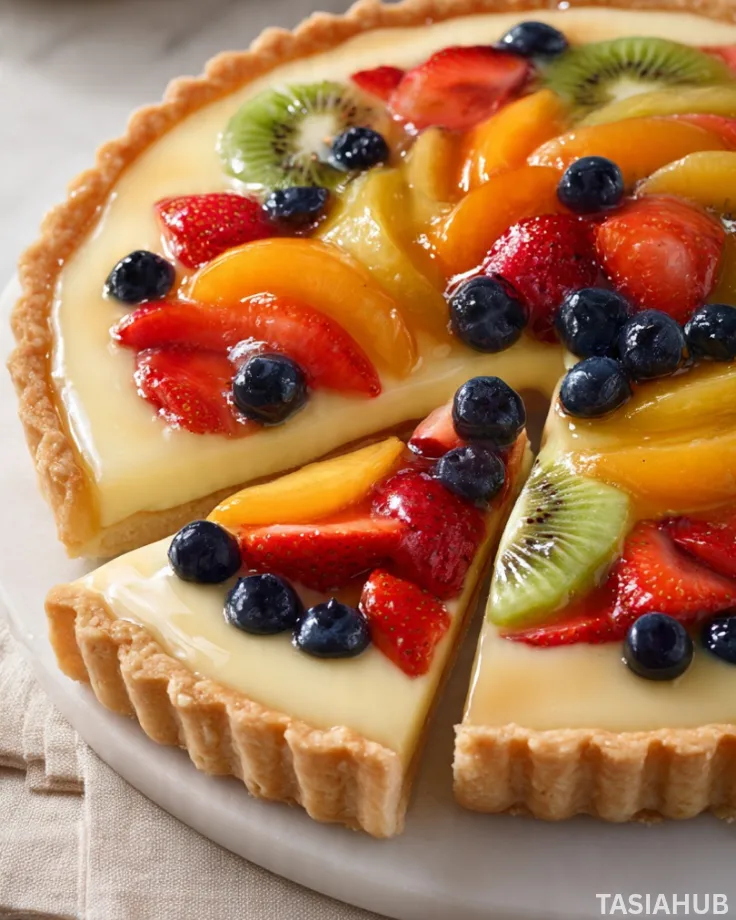
A fresh fruit tart is one of those desserts that manages to be both elegant and approachable. Its vibrant colors and glossy finish make it a centerpiece at any gathering, yet it’s surprisingly easy to make at home. The combination of a buttery crust, creamy filling, and juicy, fresh fruit is a timeless crowd-pleaser that rarely fails to impress.
For those who enjoy baking, this tart recipe offers a delightful balance of textures. The crisp pastry shell contrasts beautifully with the smooth custard or cream, while the assortment of seasonal fruit adds freshness and a burst of natural sweetness. It’s a dessert that feels indulgent without being overly heavy, making it perfect for spring or summer celebrations—or any time you want a lighter sweet treat.
One of the best things about this classic fruit tart is its versatility. You can experiment with different fruits, flavors, and even toppings, like a light glaze to give it that professional shine. It’s a great way to highlight what’s in season, from strawberries and blueberries to kiwi and peaches. The possibilities are endless, but the result is always stunning.
This tart recipe is also surprisingly approachable for bakers of all levels. Even if you’ve never made a pastry shell from scratch or prepared a custard before, the steps are straightforward and easy to follow. With a little patience and attention to detail, you can create a dessert that looks like it belongs in a bakery display case, yet tastes even better because it’s homemade.
Why You’ll Love It
- Burst of Fresh Flavors: Every bite combines the natural sweetness and tang of fresh fruit with the creamy, smooth filling—making your taste buds dance with each forkful.
- Showstopper Presentation: With its colorful fruit arrangement and glossy finish, this tart looks like it belongs in a fancy patisserie, even if it’s homemade.
- Customizable for Every Season: From strawberries in spring to peaches in summer, you can swap fruits based on what’s fresh and in season, keeping the tart exciting all year round.
- Perfect Balance of Textures: The crisp, buttery crust pairs beautifully with the silky custard and juicy fruit, creating a dessert that’s both satisfying and light.
- Impress Without Stress: While it looks elegant, this tart recipe is approachable, letting you wow guests or family with minimal stress in the kitchen.
Ingredient List
For the Tart Crust:
- 1 ¼ cups all-purpose flour
- ¼ cup granulated sugar
- ½ cup unsalted butter, cold and cubed
- 1 large egg yolk
- 2–3 tablespoons cold water
For the Pastry Cream:
- 2 cups whole milk
- ½ cup granulated sugar
- 4 large egg yolks
- 3 tablespoons cornstarch
- 2 tablespoons unsalted butter
- 1 teaspoon pure vanilla extract
For the Fruit Topping:
- 1 cup strawberries, sliced
- ½ cup blueberries
- ½ cup kiwi, sliced
- ½ cup peaches, thinly sliced
- 2 tablespoons apricot jam (for glaze)
Ingredient Notes
- I always use unsalted butter for the crust—it gives the best buttery flavor and lets you control the salt perfectly.
- Fresh fruit is key! Make sure your strawberries, blueberries, kiwi, and peaches are ripe—they’ll shine on the tart.
- Don’t skip the egg yolk in the crust—it’s what makes it tender yet sturdy enough to hold all that delicious filling.
- I like using apricot jam for the glaze; it adds a subtle sweetness and makes the fruit look glossy and irresistible.
- For the pastry cream, whole milk gives it that rich, creamy texture you can’t get with lower-fat milk.
Kitchen Equipment Needed
- 9-inch tart pan with removable bottom – Makes it easy to remove the tart without breaking it. I love my non-stick pan for a smooth release.
- Mixing bowls – For combining ingredients; I keep a set of glass bowls handy for easy measuring and mixing.
- Whisk – For smoothing the pastry cream and mixing the crust; a balloon whisk works best.
- Rolling pin – To roll out the tart dough evenly; I prefer a wooden one for control.
- Saucepan – For heating milk and making the pastry cream; medium size works perfectly.
- Spatula – For folding butter into the crust and spreading pastry cream; silicone is my favorite.
- Fine mesh sieve – To strain the pastry cream for extra smoothness; worth it for that silky texture.
- Pastry brush – For glazing the fruit with apricot jam; I like a small, soft-bristled brush.
- Measuring cups and spoons – Essential for precise baking; I keep a sturdy stainless steel set.
Instructions
Step 1: Make the Tart Crust
- Combine dry ingredients: In a mixing bowl, whisk together the flour and sugar.
- Cut in the butter: Add cold, cubed butter and use a pastry cutter or your fingers to blend until the mixture resembles coarse crumbs. Pro tip: Keep the butter cold—it helps create a crisp, flaky crust.
- Add egg yolk and water: Mix in the egg yolk, then add cold water 1 tablespoon at a time until the dough just comes together. Don’t overwork it!
- Chill the dough: Form the dough into a disk, wrap it in plastic, and refrigerate for at least 30 minutes.
Step 2: Blind Bake the Crust
- Preheat oven: Set to 375°F (190°C).
- Roll out the dough: On a lightly floured surface, roll dough to fit your 9-inch tart pan.
- Line and weigh: Press dough into the pan, trim edges, and line with parchment paper. Fill with pie weights or dried beans.
- Bake: Bake 15 minutes, remove weights and parchment, then bake another 10–12 minutes until golden. Let cool completely.
Step 3: Make the Pastry Cream
- Heat milk: In a saucepan, heat milk over medium until just simmering.
- Mix egg yolks and sugar: In a separate bowl, whisk together yolks, sugar, and cornstarch until smooth.
- Temper the eggs: Slowly pour a small amount of hot milk into the yolk mixture, whisking constantly. Gradually add the rest of the milk. Pro tip: Whisk continuously to prevent lumps.
- Cook the mixture: Return to the saucepan and cook over medium heat until thickened, about 2–3 minutes.
- Add butter and vanilla: Remove from heat, stir in butter and vanilla until smooth.
- Cool: Pour into a bowl, cover with plastic wrap directly on the surface to prevent a skin from forming, and refrigerate until cold.
Step 4: Assemble the Tart
- Fill the crust: Spoon chilled pastry cream into the cooled tart shell and spread evenly.
- Arrange fruit: Place sliced strawberries, blueberries, kiwi, and peaches on top in a visually pleasing pattern.
Step 5: Glaze the Fruit
- Heat jam: Warm apricot jam in a small saucepan or microwave until liquid.
- Brush over fruit: Using a pastry brush, lightly coat the fruit to give it a shiny, professional finish. Pro tip: Don’t soak the fruit—just a thin glaze to enhance shine and flavor.
Step 6: Chill and Serve
- Refrigerate: Chill the assembled tart for at least 1 hour before serving to set the pastry cream.
- Slice and enjoy: Use a sharp knife for clean slices, wiping between cuts if needed.
Tips and Tricks for Success
- Keep butter cold for the crust – This ensures a crisp, flaky tart shell every time.
- Don’t overmix the dough – Overworking it can make the crust tough instead of tender.
- Chill the crust before baking – Helps prevent shrinking and keeps the edges sharp.
- Whisk pastry cream constantly – Stops lumps and keeps it silky smooth.
- Arrange fruit just before serving – Keeps the fruit fresh and prevents it from getting soggy.
- Use a light glaze – A thin layer of apricot jam gives shine without overpowering the fruit flavor.
Ingredient Substitutions and Variations
- Tart crust: Swap all-purpose flour with almond flour for a nutty twist; adjust butter slightly for texture.
- Pastry cream: Substitute half-and-half or milk alternatives (like oat milk) for a lighter or dairy-free version.
- Fruit topping: Seasonal fruits work beautifully—think raspberries, blackberries, mango, or pineapple.
- Glaze: Honey or a simple powdered sugar glaze works if you don’t have apricot jam on hand.
- Extra flavor: Add lemon or orange zest to the pastry cream for a bright, citrusy note.
Serving Suggestions
- I love serving this fresh fruit tart with a dollop of lightly whipped cream on the side—it adds a creamy touch without overpowering the fruit.
- Pair it with a cup of hot herbal tea or coffee for a relaxed afternoon treat.
- Serve slices at brunch alongside a fresh green salad or cheese plate—it’s a colorful and refreshing complement.
- Top each slice with a few fresh mint leaves for a pop of color and added freshness.
- For a fun dessert twist, drizzle a little chocolate or caramel sauce over the top just before serving—it’s a small indulgence that makes it feel extra special.
Storage and Reheating Instructions
- Refrigerate: Keep the tart in an airtight container in the fridge for up to 3 days.
- Avoid freezing the fruit: The fresh fruit can become watery when thawed, so only freeze the tart shell or pastry cream if needed.
- Serve chilled: This tart tastes best cold, straight from the fridge, to keep the cream firm and fruit fresh.
- Make-ahead tip: You can prepare the crust and pastry cream a day ahead, then assemble and add fruit just before serving for maximum freshness.
- Slicing tip: Use a sharp knife and wipe it between cuts to keep slices clean and presentable.
Frequently Asked Questions
Can I use frozen fruit for this tart?
Yes, but I recommend thawing and draining it first. Fresh fruit gives the best texture and flavor, but frozen can work in a pinch.
How long can I store the tart?
Keep it in the refrigerator for up to 3 days. Beyond that, the fruit may start releasing moisture and the crust could get soggy.
Can I make the tart shell ahead of time?
Absolutely! You can bake the shell a day in advance and store it in an airtight container at room temperature. Fill with pastry cream and fruit just before serving.
Can I use a different type of glaze?
Yes! You can swap apricot jam for honey, clear jelly, or even a light powdered sugar glaze if you prefer.
My pastry cream has lumps—what do I do?
Strain it through a fine mesh sieve while it’s still warm. Whisking continuously while cooking also prevents lumps from forming.
Can I make this tart dairy-free?
Yes, substitute the butter in the crust with plant-based butter and use oat, almond, or soy milk for the pastry cream. The tart will still be delicious!
Did you try this fresh fruit tart? Let me know in the comments how it turned out—I love seeing your colorful creations!
Fresh Fruit Tart
Equipment
- 9-inch tart pan with removable bottom
- Mixing Bowls
- Whisk
- Rolling Pin
- Saucepan
- Spatula
- Fine Mesh Sieve
- Pastry Brush
- Measuring cups and spoons
Ingredients
For the Tart Crust:
- 1 ¼ cups all-purpose flour
- ¼ cup granulated sugar
- ½ cup unsalted butter cold and cubed
- 1 large egg yolk
- 2 –3 tablespoons cold water
For the Pastry Cream:
- 2 cups whole milk
- ½ cup granulated sugar
- 4 large egg yolks
- 3 tablespoons cornstarch
- 2 tablespoons unsalted butter
- 1 teaspoon pure vanilla extract
For the Fruit Topping:
- 1 cup strawberries sliced
- ½ cup blueberries
- ½ cup kiwi sliced
- ½ cup peaches thinly sliced
- 2 tablespoons apricot jam for glaze
Instructions
Step 1: Make the Tart Crust
- Combine dry ingredients: In a mixing bowl, whisk together the flour and sugar.
- Cut in the butter: Add cold, cubed butter and use a pastry cutter or your fingers to blend until the mixture resembles coarse crumbs. Pro tip: Keep the butter cold—it helps create a crisp, flaky crust.
- Add egg yolk and water: Mix in the egg yolk, then add cold water 1 tablespoon at a time until the dough just comes together. Don’t overwork it!
- Chill the dough: Form the dough into a disk, wrap it in plastic, and refrigerate for at least 30 minutes.
Step 2: Blind Bake the Crust
- Preheat oven: Set to 375°F (190°C).
- Roll out the dough: On a lightly floured surface, roll dough to fit your 9-inch tart pan.
- Line and weigh: Press dough into the pan, trim edges, and line with parchment paper. Fill with pie weights or dried beans.
- Bake: Bake 15 minutes, remove weights and parchment, then bake another 10–12 minutes until golden. Let cool completely.
Step 3: Make the Pastry Cream
- Heat milk: In a saucepan, heat milk over medium until just simmering.
- Mix egg yolks and sugar: In a separate bowl, whisk together yolks, sugar, and cornstarch until smooth.
- Temper the eggs: Slowly pour a small amount of hot milk into the yolk mixture, whisking constantly. Gradually add the rest of the milk. Pro tip: Whisk continuously to prevent lumps.
- Cook the mixture: Return to the saucepan and cook over medium heat until thickened, about 2–3 minutes.
- Add butter and vanilla: Remove from heat, stir in butter and vanilla until smooth.
- Cool: Pour into a bowl, cover with plastic wrap directly on the surface to prevent a skin from forming, and refrigerate until cold.
Step 4: Assemble the Tart
- Fill the crust: Spoon chilled pastry cream into the cooled tart shell and spread evenly.
- Arrange fruit: Place sliced strawberries, blueberries, kiwi, and peaches on top in a visually pleasing pattern.
Step 5: Glaze the Fruit
- Heat jam: Warm apricot jam in a small saucepan or microwave until liquid.
- Brush over fruit: Using a pastry brush, lightly coat the fruit to give it a shiny, professional finish. Pro tip: Don’t soak the fruit—just a thin glaze to enhance shine and flavor.
Step 6: Chill and Serve
- Refrigerate: Chill the assembled tart for at least 1 hour before serving to set the pastry cream.
- Slice and enjoy: Use a sharp knife for clean slices, wiping between cuts if needed.
Notes
- Calories: 320 kcal
- Carbohydrates: 42 g
- Sugars: 22 g
- Fat: 15 g
- Saturated Fat: 8 g
- Protein: 5 g
- Fiber: 2 g
- Sodium: 85 mg