Easter Egg Cake Pops
Springtime celebrations aren’t complete without a little bit of sweet creativity, and Easter egg cake pops are the perfect way to bring color, flavor, and fun to your table. These bite-sized treats aren’t just adorable—they’re a playful twist on classic cake that everyone will enjoy. Whether you’re hosting a brunch, prepping treats for an Easter basket, or just want a cheerful dessert to share, these pops are sure to delight both kids and adults.
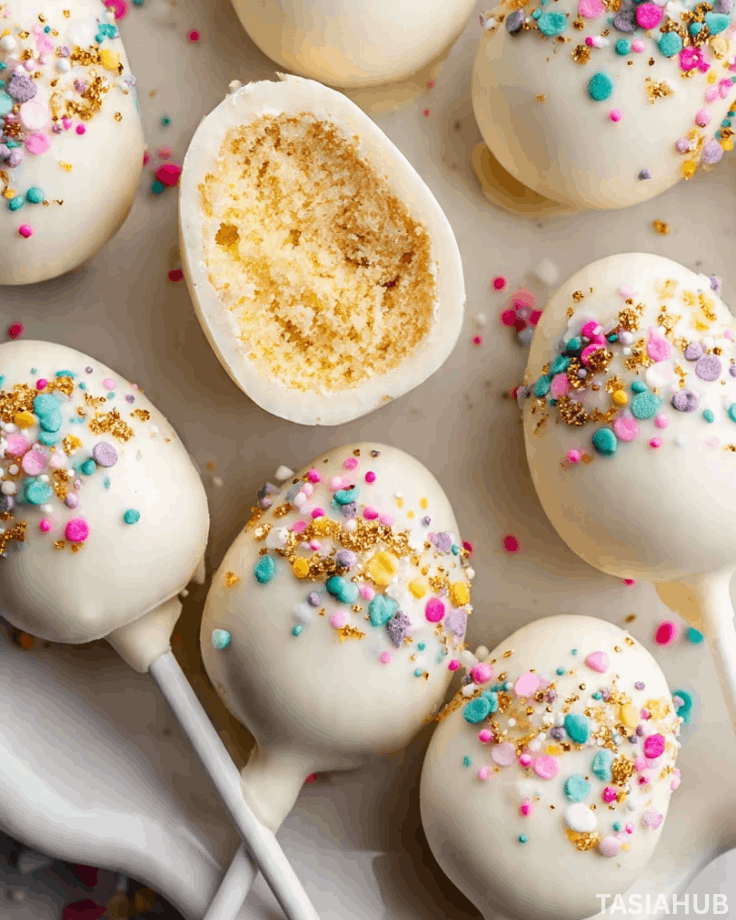
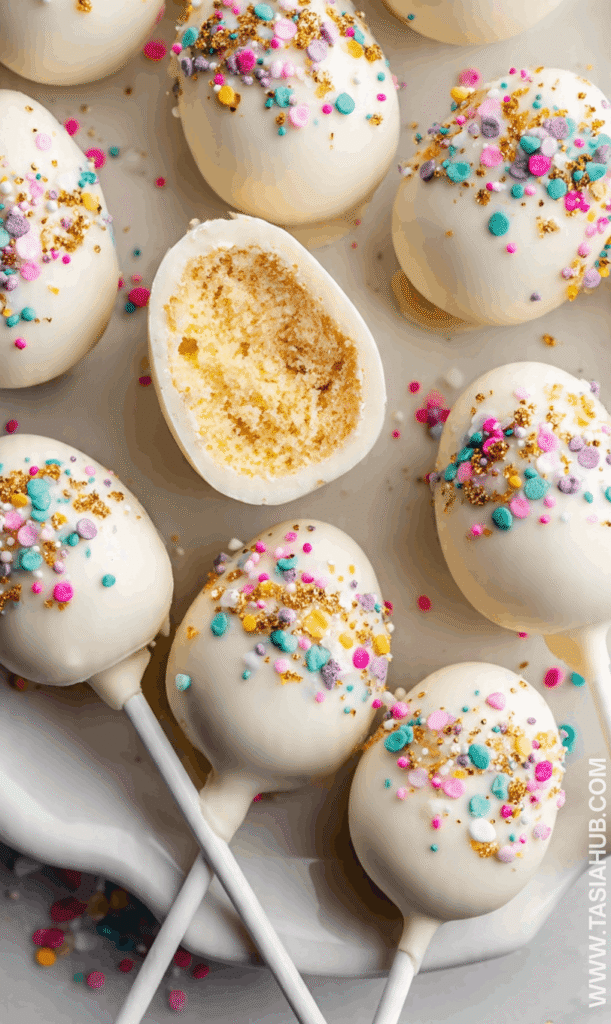
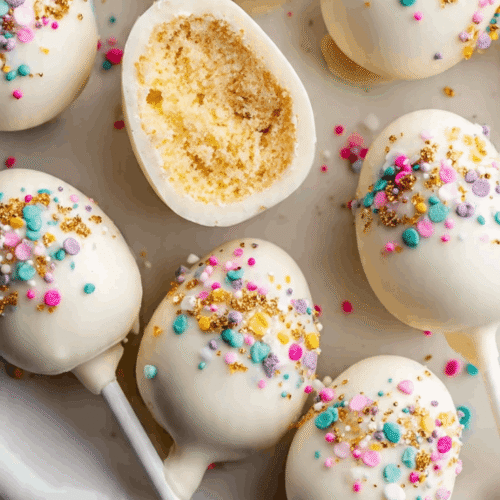
Making Easter cake pops is a surprisingly easy process, and the results feel extra special. You can mix and match colors, shapes, and toppings to create pops that are as vibrant as spring itself. The best part? You can use your favorite cake flavor, so each bite is packed with familiar comfort and sweetness. Adding decorative touches like sprinkles, edible glitter, or pastel-colored chocolate coating transforms simple cake into festive Easter fun.
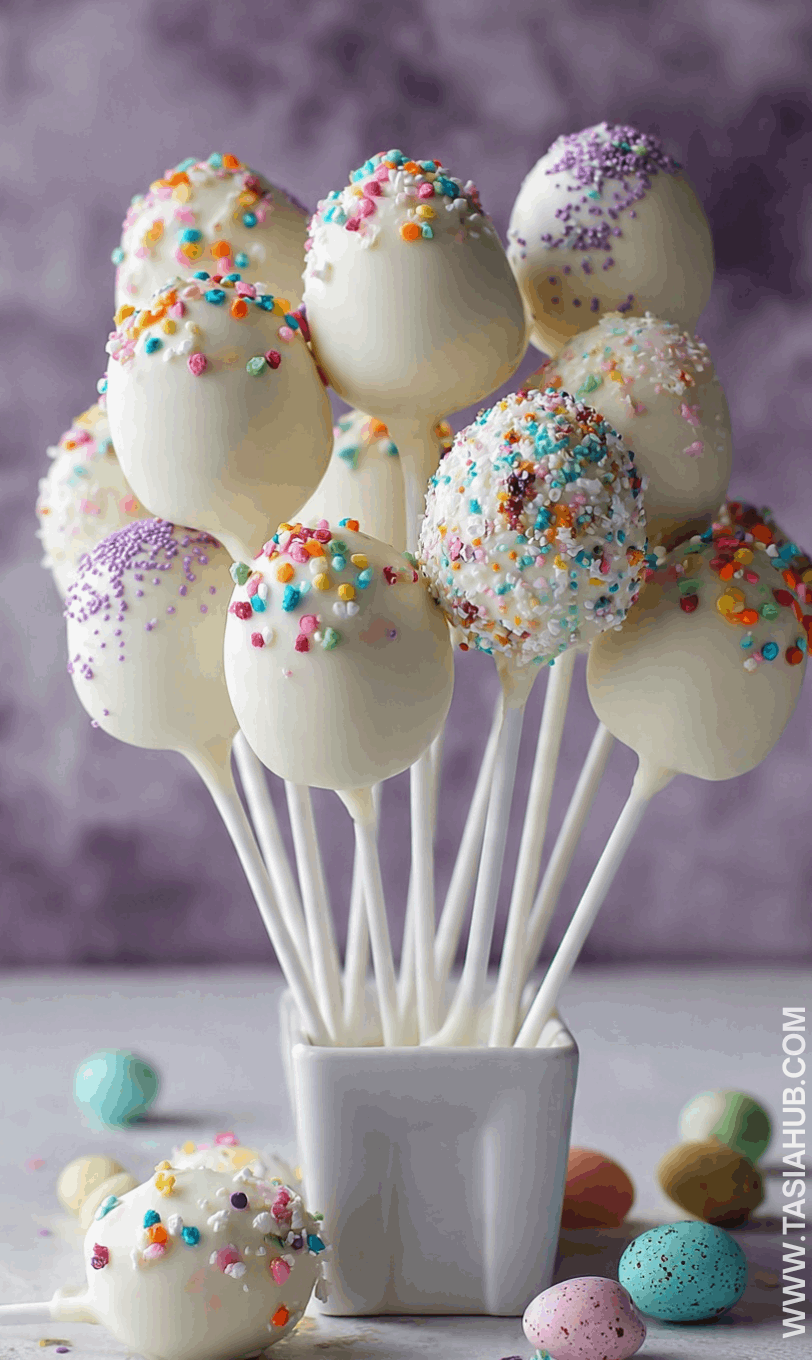
These fun cake pops are also wonderfully versatile. They work beautifully as part of a dessert table centerpiece, as individual treats in gift bags, or even as a sweet activity to enjoy making with family. Decorating them is half the joy, and seeing the final pops lined up in cheerful pastel shades is pure satisfaction. Plus, because they’re bite-sized, they’re easy to serve and perfect for sharing with friends, family, or coworkers.
Whether you’re a seasoned baker or just starting out, Easter egg cake pops are a creative way to celebrate the season. Their playful shapes, delightful flavors, and colorful designs make them a standout Easter dessert that can brighten any celebration. In the following steps, you’ll see just how simple it is to turn a basic cake into these charming little pops that everyone will love.
Why You’ll Love It
- Bite-sized delight: These cake pops are the perfect little treats—easy to grab, easy to eat, and full of flavor in every bite. No forks, no plates, just pure fun.
- Creative decorating fun: From pastel drizzles to sprinkles and edible glitter, decorating Easter cake pops is a playful way to let your creativity shine. You can make each one unique!
- Perfect for sharing: Their size makes them ideal for gifting or handing out at parties. Everyone can enjoy a pop without feeling overwhelmed by a big slice of cake.
- Customizable flavors: Whether you love classic vanilla, rich chocolate, or fruity options, these fun cake pops let you tailor the flavor to your taste—or even mix a few different ones for variety.
- Festive and eye-catching: Their colorful, cheerful appearance makes them a standout Easter dessert on any table. They’re not just tasty—they’re a visual treat that sparks smiles instantly.
Ingredients
For the Cake Pops
- 2 cups vanilla cake crumbs (about 1 small cake, crumbled)
- 1/2 cup cream cheese frosting (room temperature)
- 1 tsp vanilla extract
For the Coating
- 2 cups white chocolate chips or candy melts
- 1-2 tsp vegetable oil (to thin chocolate if needed)
- Assorted sprinkles, edible glitter, or colored sugar
For Assembly
- 20-24 lollipop sticks
- Mini Easter egg decorations (optional, for extra cuteness)
Ingredient Notes
- I always use cream cheese frosting instead of buttercream—it makes the pops smooth and perfectly moist.
- Don’t skip the vanilla extract! It really elevates the flavor of the cake base.
- For the chocolate coating, I like Ghirardelli white chocolate chips—they melt beautifully and taste rich, without being too sweet.
- Sprinkles and decorations are where the fun comes in—mix pastels and glitter for that perfect Easter vibe!
- Make sure your cake crumbs are fine—it helps the pops hold together and makes shaping them a breeze.
Kitchen Equipment Needed
- Mixing bowls – For combining cake crumbs and frosting; I like using glass bowls so I can see everything clearly.
- Spatula – Perfect for folding in frosting and scraping down the sides; a silicone one works best.
- Baking sheet – To place pops on while chilling; I line mine with parchment paper for easy cleanup.
- Lollipop sticks – To hold the cake pops; sturdy ones prevent wobbling while dipping.
- Microwave-safe bowl – For melting chocolate; I love using a heatproof glass bowl.
- Spoon or fork – For drizzling chocolate or sprinkling decorations.
- Refrigerator – To chill the pops before dipping; it helps them hold their shape.
Instructions
1. Prepare the Cake Base
- Crumble the cake into fine pieces in a large mixing bowl. Make sure there are no big chunks—it helps the pops hold together better.
- Add frosting and vanilla extract to the crumbs. Start with half the frosting, then gradually add more as needed.
- Mix until combined using a spatula or your hands. The mixture should be sticky but moldable.
Pro Tip: If the mixture feels too dry, add a tiny bit more frosting—just enough so it sticks together without being gooey.
2. Shape the Cake Pops
- Scoop a small amount of cake mixture (about 2 tablespoons) and roll it into an oval egg shape.
- Place each shaped pop on a parchment-lined baking sheet. Leave a little space between each one.
- Insert the lollipop stick halfway into each pop. Twist slightly to secure.
Pro Tip: Chill the pops in the fridge for 30 minutes before dipping. This prevents them from falling apart in the chocolate.
3. Melt the Chocolate Coating
- Place white chocolate chips or candy melts in a microwave-safe bowl.
- Heat in 20–30 second intervals, stirring in between until smooth and fully melted.
- Add 1–2 tsp vegetable oil if the chocolate is too thick for dipping.
Pro Tip: Whisk continuously while melting to prevent lumps or burning.
4. Dip and Decorate the Pops
- Hold a cake pop by the stick and dip it into the melted chocolate until fully coated.
- Gently tap off excess chocolate so it doesn’t pool at the bottom.
- Decorate immediately with sprinkles, edible glitter, or small Easter-themed decorations.
Pro Tip: Work quickly—once the chocolate starts to set, sprinkles won’t stick properly.
5. Chill and Set
- Place the decorated pops upright in a styrofoam block or a cup to keep them standing.
- Refrigerate for at least 20–30 minutes until the chocolate hardens completely.
- Serve and enjoy! These pops are best within a day or two but can be stored in an airtight container in the fridge.
Tips and Tricks for Success
- Chill your pops before dipping – This keeps them firm and prevents them from falling apart in the chocolate.
- Use fine cake crumbs – Big chunks can make the pops uneven and harder to coat.
- Thin the chocolate if needed – A teaspoon of vegetable oil makes dipping smoother and easier.
- Work in batches – Dip a few pops at a time to avoid the chocolate hardening too quickly.
- Decorate immediately – Sprinkles and edible glitter stick best while the chocolate is still wet.
- Store carefully – Keep the pops upright in a container or cup to prevent smudging or sticking together.
Ingredient Substitutions and Variations
- Cake flavor: Swap vanilla for chocolate, carrot, or red velvet cake to mix up the flavors.
- Frosting: Use buttercream or cream cheese frosting, depending on your taste preference.
- Chocolate coating: Dark or milk chocolate can replace white chocolate for a richer pop.
- Decorations: Try crushed cookies, coconut flakes, or pastel drizzle instead of sprinkles.
- Shape variations: Make round pops instead of eggs, or even small bunny shapes for extra fun.
Serving Suggestions
- I love arranging these Easter cake pops in a decorative basket—perfect for a centerpiece that’s also a treat!
- Serve alongside a platter of fresh fruit; the bright colors of berries and melon complement the pastel pops beautifully.
- Pair with a warm cup of coffee or tea—perfect for an afternoon Easter dessert break.
- Include a few in Easter baskets for kids or adults—it’s a sweet surprise that’s easy to grab and enjoy.
- For a party, line them up on a cake stand or display board; guests love picking their favorite designs!
Storage and Reheating Instructions
- Refrigerate: Store cake pops in an airtight container in the fridge for up to 3–4 days.
- Room temperature: If your kitchen is cool, pops can stay out for a few hours—perfect for serving at a gathering.
- Avoid microwaving: Chocolate coating can melt and become messy, so enjoy them cold or at room temp.
- Freeze for later: Wrap individually in plastic wrap and freeze for up to a month. Thaw in the fridge before serving.
- Keep upright: Store pops standing up to prevent decorations from smudging or chocolate from cracking.
Frequently Asked Questions
Can I make these cake pops ahead of time?
Absolutely! You can shape and chill the pops a day ahead, then dip and decorate them on the day you want to serve. Just keep them refrigerated until ready.
Can I use boxed cake mix?
Yes! Boxed cake mix works perfectly. Just bake, crumble, and follow the recipe as usual. It’s a great shortcut without sacrificing flavor.
What if my cake pops fall off the sticks?
Chill them for at least 30 minutes before dipping, and make sure the chocolate isn’t too thick. A gentle twist when inserting the stick helps secure them too.
Can I use chocolate instead of white chocolate?
Definitely! Milk, dark, or even colored candy melts work. Just adjust decorations to match the chocolate color for the prettiest pops.
How should I store leftover cake pops?
Keep them upright in an airtight container in the fridge for up to 4 days, or individually wrap and freeze for longer storage.
Can kids help decorate?
Absolutely! Decorating is half the fun. Just supervise dipping to prevent burns and let them get creative with sprinkles and designs.
Did you try this recipe? Let me know in the comments how your Easter egg cake pops turned out—I’d love to see your colorful creations!
Easter Egg Cake Pops
Equipment
- Mixing Bowls
- Spatula
- Baking Sheet
- Lollipop sticks
- Microwave-safe bowl
- Spoon or fork
- Refrigerator
Ingredients
For the Cake Pops
- 2 cups vanilla cake crumbs about 1 small cake, crumbled
- 1/2 cup cream cheese frosting room temperature
- 1 tsp vanilla extract
For the Coating
- 2 cups white chocolate chips or candy melts
- 1-2 tsp vegetable oil to thin chocolate if needed
- Assorted sprinkles edible glitter, or colored sugar
For Assembly
- 20-24 lollipop sticks
- Mini Easter egg decorations optional, for extra cuteness
Instructions
Prepare the Cake Base
- Crumble the cake into fine pieces in a large mixing bowl. Make sure there are no big chunks—it helps the pops hold together better.
- Add frosting and vanilla extract to the crumbs. Start with half the frosting, then gradually add more as needed.
- Mix until combined using a spatula or your hands. The mixture should be sticky but moldable.
- Pro Tip: If the mixture feels too dry, add a tiny bit more frosting—just enough so it sticks together without being gooey.
Shape the Cake Pops
- Scoop a small amount of cake mixture (about 2 tablespoons) and roll it into an oval egg shape.
- Place each shaped pop on a parchment-lined baking sheet. Leave a little space between each one.
- Insert the lollipop stick halfway into each pop. Twist slightly to secure.
- Pro Tip: Chill the pops in the fridge for 30 minutes before dipping. This prevents them from falling apart in the chocolate.
Melt the Chocolate Coating
- Place white chocolate chips or candy melts in a microwave-safe bowl.
- Heat in 20–30 second intervals, stirring in between until smooth and fully melted.
- Add 1–2 tsp vegetable oil if the chocolate is too thick for dipping.
- Pro Tip: Whisk continuously while melting to prevent lumps or burning.
Dip and Decorate the Pops
- Hold a cake pop by the stick and dip it into the melted chocolate until fully coated.
- Gently tap off excess chocolate so it doesn’t pool at the bottom.
- Decorate immediately with sprinkles, edible glitter, or small Easter-themed decorations.
- Pro Tip: Work quickly—once the chocolate starts to set, sprinkles won’t stick properly.
Chill and Set
- Place the decorated pops upright in a styrofoam block or a cup to keep them standing.
- Refrigerate for at least 20–30 minutes until the chocolate hardens completely.
- Serve and enjoy! These pops are best within a day or two but can be stored in an airtight container in the fridge.
Notes
- Calories: 180–200 kcal
- Carbohydrates: 25 g
- Sugar: 18 g
- Fat: 9 g
- Saturated Fat: 5 g
- Protein: 2 g
- Fiber: <1 g
- Sodium: 90 mg