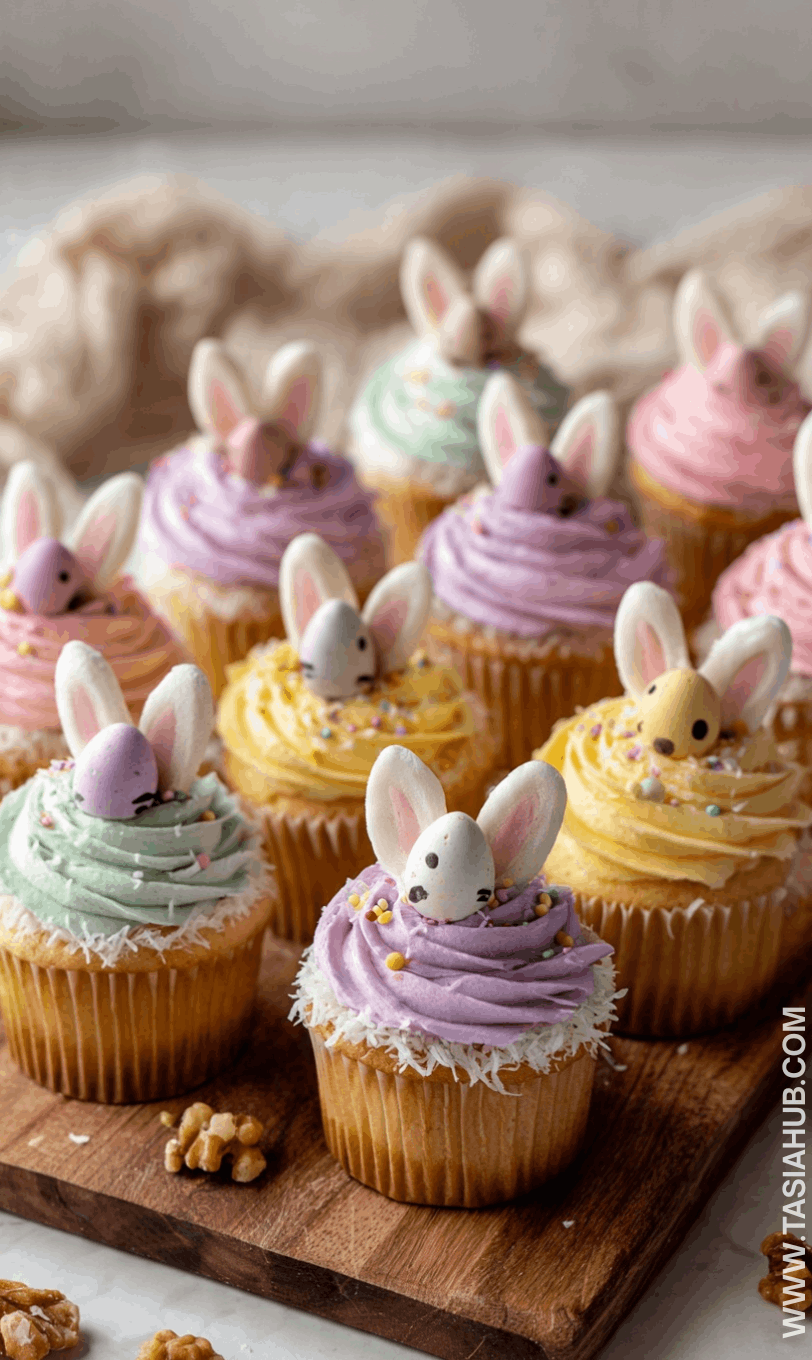
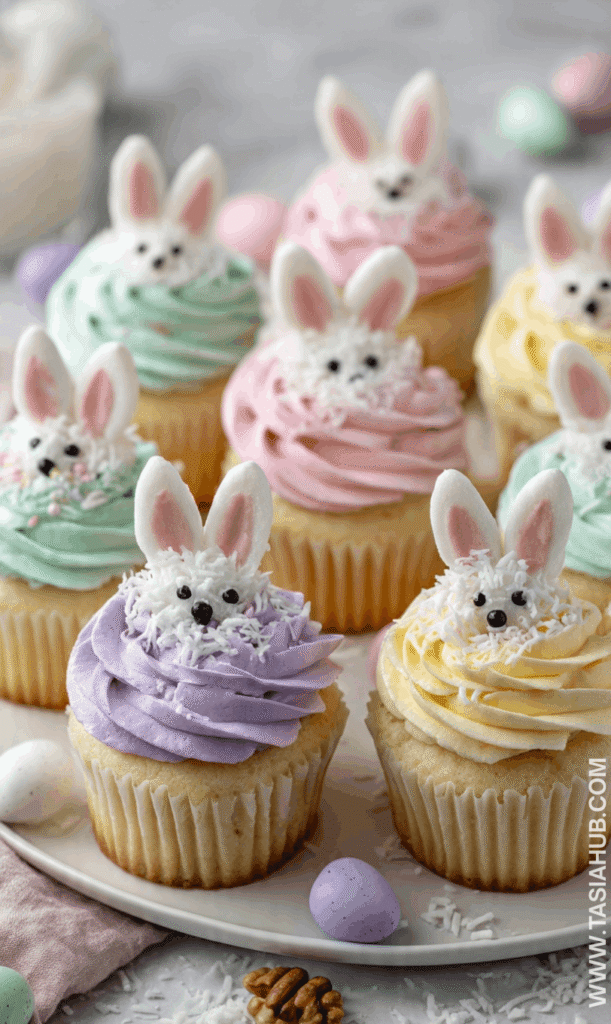
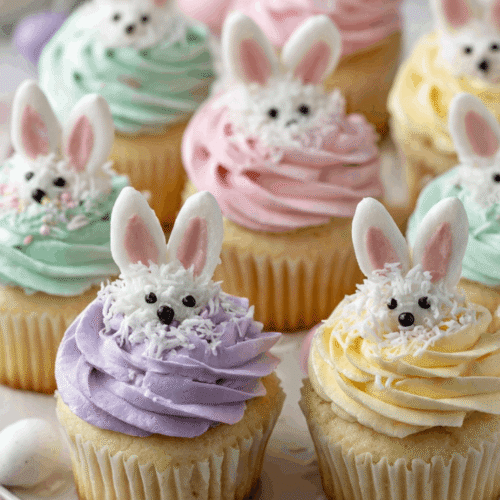
Easter Bunny Cupcakes
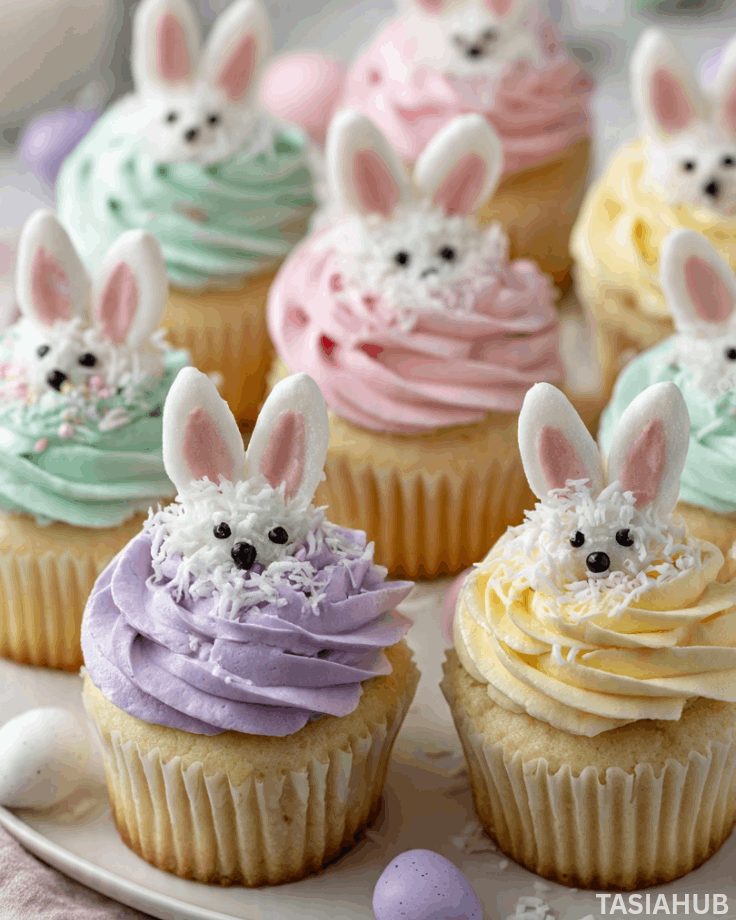
Springtime brings fresh flowers, longer days, and the perfect opportunity to celebrate with sweet treats that everyone will love. Easter is the ideal time to get creative in the kitchen, and these Easter Bunny Cupcakes are a festive way to make your holiday table both adorable and delicious. With soft, fluffy cupcakes topped with creamy frosting and cute bunny decorations, they’re sure to delight kids and adults alike.
These cupcakes aren’t just pretty—they’re also packed with flavor. Each bite has a tender crumb, a touch of vanilla, and just enough sweetness to satisfy any dessert craving without being overwhelming. They’re perfect for a brunch spread, an Easter afternoon gathering, or even just a fun treat to enjoy with family after an egg hunt.
I love how versatile these cupcakes are. You can stick to a classic vanilla frosting, add pastel sprinkles, or even experiment with small chocolate eggs and coconut “bunny tails” for extra charm. Decorating them is part of the fun—it’s a great activity for kids, and you can let everyone get creative with their own designs.
Making these cupcakes is also surprisingly simple. Even if you’re new to baking, you can whip up a batch in under an hour and still have time to enjoy Easter festivities. They’re a standout Easter day dessert that will have your table looking festive and your guests asking for seconds.
Why You’ll Love It
- Adorable presentation – These cupcakes instantly bring a smile with their little bunny ears, coconut tails, and pastel accents. They’re as fun to look at as they are to eat!
- Perfect for Easter gatherings – Whether it’s a brunch with family or an egg hunt party, these cupcakes make a festive centerpiece that’s sure to impress both kids and adults.
- Simple and beginner-friendly – You don’t need fancy tools or years of baking experience. The recipe is straightforward, and decorating can be as simple or creative as you like.
- Customizable flavors – While classic vanilla is always a hit, you can easily swap in chocolate, lemon, or carrot cake bases for a twist that matches your holiday menu.
- Kid-friendly activity – Decorating these cupcakes can double as a fun craft for children, letting them get hands-on while creating their own Easter masterpieces.
Ingredient List
For the Cupcakes
- 1½ cups all-purpose flour
- 1½ tsp baking powder
- ¼ tsp salt
- ½ cup unsalted butter, softened
- 1 cup granulated sugar
- 2 large eggs
- 2 tsp vanilla extract
- ½ cup whole milk
For the Frosting
- 1 cup unsalted butter, softened
- 3–4 cups powdered sugar
- 2 tsp vanilla extract
- 2–3 tbsp milk or heavy cream
- Food coloring (optional, pastel shades are perfect)
For Decorating
- Mini chocolate eggs
- Shredded coconut (for bunny tails)
- Pink and white fondant or marshmallows (for ears)
- Sprinkles (optional)
Ingredient Notes
- I always use real vanilla extract—it adds so much depth and warmth to the cupcakes.
- Don’t skip the butter in the frosting! It makes it creamy and dreamy, not chalky.
- Shredded coconut is a must for bunny tails—it’s not just cute, it gives a fun texture too.
- If you want the frosting to hold up well, chill it for 10–15 minutes before decorating—it makes piping much easier.
- Mini chocolate eggs are my favorite finishing touch—they’re small, festive, and make these cupcakes feel extra special.
Kitchen Equipment Needed
- Mixing bowls – For combining your wet and dry ingredients. I love using a set of colorful glass bowls; they make baking more fun.
- Electric mixer or hand whisk – For creamy, lump-free frosting and smooth cupcake batter. My hand mixer gets the job done perfectly.
- Cupcake pan – To bake the cupcakes evenly. I always use a standard 12-cup nonstick pan.
- Cupcake liners – Keeps cupcakes from sticking and adds a cute touch. I’m partial to pastel paper liners for Easter.
- Spatula – For folding ingredients and scraping the bowl clean. A silicone spatula is my go-to.
- Piping bag and tips – For frosting the cupcakes neatly. Even a simple round tip works beautifully!
- Cooling rack – So cupcakes cool evenly and frosting doesn’t melt. Mine has saved many a cupcake disaster!
Instructions
Step 1: Preheat and Prep
- Preheat your oven to 350°F (175°C).
- Line a 12-cup cupcake pan with cupcake liners. This prevents sticking and makes cleanup a breeze.
- Pro tip: I like to lightly spray the liners with nonstick spray to make sure the cupcakes release perfectly.
Step 2: Mix Dry Ingredients
- In a medium bowl, whisk together 1½ cups flour, 1½ tsp baking powder, and ¼ tsp salt.
- Set aside while you work on the wet ingredients.
- Pro tip: Whisking helps to aerate the flour, giving you fluffier cupcakes.
Step 3: Cream Butter and Sugar
- In a large mixing bowl, beat ½ cup softened butter and 1 cup sugar together until light and fluffy.
- Add 2 large eggs, one at a time, beating well after each addition.
- Mix in 2 tsp vanilla extract.
- Pro tip: Scrape the sides of the bowl occasionally so everything blends evenly.
Step 4: Combine Wet and Dry Ingredients
- Gradually add the dry ingredients to the butter mixture, alternating with ½ cup milk. Start and end with the dry ingredients.
- Mix gently until just combined; don’t overmix or cupcakes can become dense.
Step 5: Fill the Cupcake Liners
- Use a spoon or ice cream scoop to fill each liner about ⅔ full.
- This ensures even baking and room for frosting on top.
Step 6: Bake the Cupcakes
- Bake for 18–20 minutes or until a toothpick inserted in the center comes out clean.
- Remove from the oven and let them cool in the pan for 5 minutes. Then transfer to a cooling rack to cool completely.
- Pro tip: Cooling completely before frosting is key—warm cupcakes will melt the frosting.
Step 7: Make the Frosting
- In a large bowl, beat 1 cup softened butter until creamy.
- Gradually add 3–4 cups powdered sugar, 2 tsp vanilla extract, and 2–3 tbsp milk or cream. Beat until fluffy.
- Tint with food coloring if desired.
Step 8: Decorate the Cupcakes
- Fill a piping bag with frosting and pipe onto cooled cupcakes.
- Add shredded coconut for bunny tails, mini chocolate eggs, and fondant or marshmallow ears.
- Sprinkle with pastel sprinkles for extra charm.
- Pro tip: Chill the frosting 10–15 minutes if it feels too soft—this makes piping easier and cleaner.
Tips and Tricks for Success
- Measure ingredients carefully – Baking is precise, so using a kitchen scale or proper measuring cups ensures perfect cupcakes every time.
- Room temperature butter and eggs – They mix more smoothly, giving your batter a light, fluffy texture.
- Don’t overmix – Once the flour is added, mix just until combined to avoid dense cupcakes.
- Cool completely before frosting – Warm cupcakes will melt the frosting and ruin your decorations.
- Chill frosting if needed – If your frosting feels too soft, pop it in the fridge for 10–15 minutes before piping.
- Decorate creatively – Don’t stress about perfection! Little imperfections make each cupcake unique and charming.
Ingredient Substitutions and Variations
- Flour – Swap all-purpose flour for gluten-free flour if needed; results are slightly denser but still delicious.
- Butter – Can be replaced with plant-based butter for a dairy-free option.
- Milk – Any milk works, including almond, oat, or soy milk.
- Vanilla extract – Try almond or coconut extract for a fun twist.
- Cupcake base – Substitute part of the flour with cocoa powder for chocolate cupcakes, or add ½ cup grated carrot for a carrot cake version.
- Frosting – Cream cheese frosting pairs wonderfully with carrot or spice cupcakes.
- Decorations – Use crushed cookies, sprinkles, or even edible flowers for a different look.
Serving Suggestions
- I love serving these Easter Bunny Cupcakes alongside a hot cup of tea or coffee—it’s the perfect mid-morning treat!
- Pair them with fresh fruit, like strawberries or blueberries, for a pop of color and a refreshing balance to the sweetness.
- Arrange them on a festive Easter platter with mini chocolate eggs scattered around—it makes a charming centerpiece for any holiday table.
- Serve them after an Easter brunch with a scoop of vanilla ice cream for an extra indulgent dessert experience.
- Let the kids decorate their own cupcakes at the table—it’s fun, interactive, and doubles as a playful Easter activity.
Storage and Reheating Instructions
- Room temperature – Store cupcakes in an airtight container for up to 2 days; frosting may soften slightly but still tastes great.
- Refrigeration – Keep cupcakes in the fridge for up to 5 days, especially if using cream cheese frosting. Let them sit at room temperature for 15–20 minutes before serving.
- Freezing – Freeze unfrosted cupcakes for up to 3 months. Frost after thawing for best results.
- Reheating – Warm cupcakes in the microwave for 10–15 seconds to bring back that just-baked softness. Avoid heating frosted cupcakes to prevent melting.
- Travel tip – Use a cupcake carrier or a snug container lined with parchment to keep decorations intact when transporting.
Frequently Asked Questions
Can I make these cupcakes ahead of time?
Absolutely! You can bake them a day or two in advance and store them in an airtight container. Just add the frosting and decorations the day you plan to serve them for the freshest look.
Can I use a different frosting?
Yes! Buttercream is classic, but cream cheese frosting or whipped ganache work beautifully too. Pick your favorite for a personalized twist.
How do I prevent cupcakes from sticking to the liners?
Make sure your cupcake liners are high-quality and, if you like, lightly spray them with nonstick cooking spray. This ensures cupcakes release cleanly every time.
Can I make these gluten-free or dairy-free?
Definitely! Substitute all-purpose flour with gluten-free flour and use plant-based butter and milk for a dairy-free version. The cupcakes will still taste delicious.
How do I make the frosting easier to pipe?
If your frosting feels too soft, chill it in the fridge for 10–15 minutes. This firms it up and makes piping smoother and more precise.
Can kids help decorate?
Yes! Decorating is a fun, hands-on activity for children. Just have sprinkles, coconut, and mini eggs ready for them to create their own little masterpieces.
Did you try this recipe? Let me know in the comments how it turned out! I’d love to see your festive Easter Bunny Cupcakes come to life.
Easter Bunny Cupcakes
Equipment
- Mixing Bowls
- Electric Mixer (or Hand Whisk)
- Cupcake pan
- Cupcake liners
- Spatula
- Piping bag and tips
- Cooling Rack
Ingredients
For the Cupcakes
- 1½ cups all-purpose flour
- 1½ tsp baking powder
- ¼ tsp salt
- ½ cup unsalted butter softened
- 1 cup granulated sugar
- 2 large eggs
- 2 tsp vanilla extract
- ½ cup whole milk
For the Frosting
- 1 cup unsalted butter softened
- 3 –4 cups powdered sugar
- 2 tsp vanilla extract
- 2 –3 tbsp milk or heavy cream
- Food coloring optional, pastel shades are perfect
For Decorating
- Mini chocolate eggs
- Shredded coconut for bunny tails
- Pink and white fondant or marshmallows for ears
- Sprinkles optional
Instructions
Step 1: Preheat and Prep
- Preheat your oven to 350°F (175°C).
- Line a 12-cup cupcake pan with cupcake liners. This prevents sticking and makes cleanup a breeze.
- Pro tip: I like to lightly spray the liners with nonstick spray to make sure the cupcakes release perfectly.
Step 2: Mix Dry Ingredients
- In a medium bowl, whisk together 1½ cups flour, 1½ tsp baking powder, and ¼ tsp salt.
- Set aside while you work on the wet ingredients.
- Pro tip: Whisking helps to aerate the flour, giving you fluffier cupcakes.
Step 3: Cream Butter and Sugar
- In a large mixing bowl, beat ½ cup softened butter and 1 cup sugar together until light and fluffy.
- Add 2 large eggs, one at a time, beating well after each addition.
- Mix in 2 tsp vanilla extract.
- Pro tip: Scrape the sides of the bowl occasionally so everything blends evenly.
Step 4: Combine Wet and Dry Ingredients
- Gradually add the dry ingredients to the butter mixture, alternating with ½ cup milk. Start and end with the dry ingredients.
- Mix gently until just combined; don’t overmix or cupcakes can become dense.
Step 5: Fill the Cupcake Liners
- Use a spoon or ice cream scoop to fill each liner about ⅔ full.
- This ensures even baking and room for frosting on top.
Step 6: Bake the Cupcakes
- Bake for 18–20 minutes or until a toothpick inserted in the center comes out clean.
- Remove from the oven and let them cool in the pan for 5 minutes. Then transfer to a cooling rack to cool completely.
- Pro tip: Cooling completely before frosting is key—warm cupcakes will melt the frosting.
Step 7: Make the Frosting
- In a large bowl, beat 1 cup softened butter until creamy.
- Gradually add 3–4 cups powdered sugar, 2 tsp vanilla extract, and 2–3 tbsp milk or cream. Beat until fluffy.
- Tint with food coloring if desired.
Step 8: Decorate the Cupcakes
- Fill a piping bag with frosting and pipe onto cooled cupcakes.
- Add shredded coconut for bunny tails, mini chocolate eggs, and fondant or marshmallow ears.
- Sprinkle with pastel sprinkles for extra charm.
- Pro tip: Chill the frosting 10–15 minutes if it feels too soft—this makes piping easier and cleaner.
Notes
- Calories: 320 kcal
- Carbohydrates: 42 g
- Protein: 3 g
- Fat: 16 g
- Saturated Fat: 9 g
- Sugar: 30 g
- Fiber: 1 g
- Sodium: 160 mg