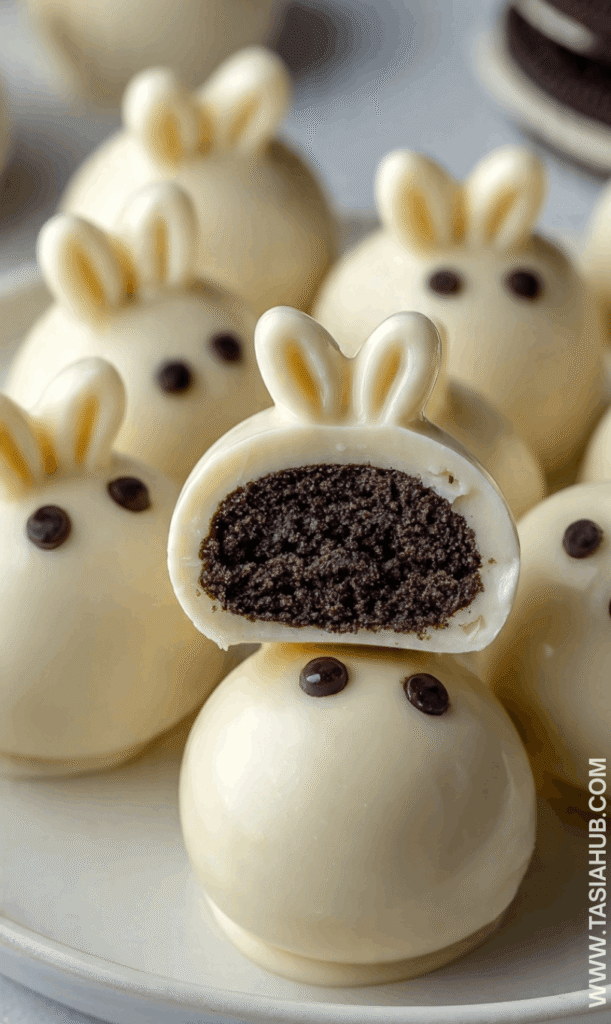
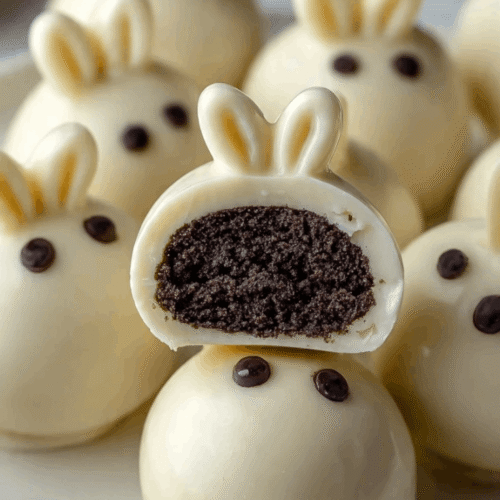
Bunny Oreo Balls
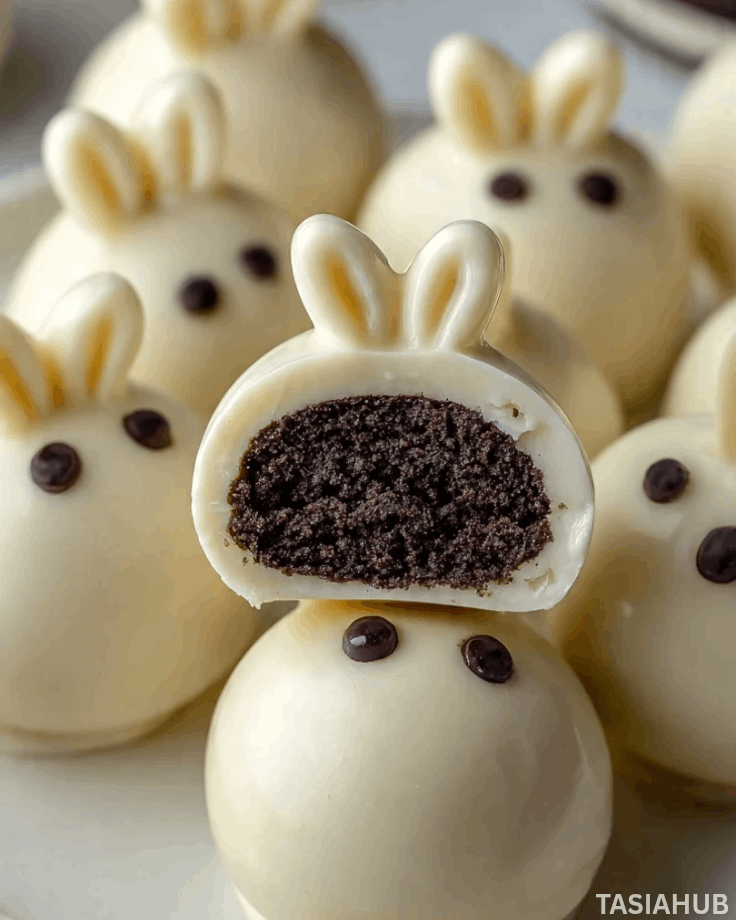
Easter is the perfect time to get a little creative in the kitchen, and these Bunny Oreo Balls are just the treat to do it. Soft, sweet, and melt-in-your-mouth delicious, they’re a playful twist on a classic favorite that everyone already loves. Bite-sized and festive, they make a wonderful addition to any Easter dessert spread—whether you’re hosting a brunch, packing a sweet basket, or just indulging your own cravings.
What makes these Easter Oreo balls so irresistible is how simple they are to make without sacrificing flavor. With just a handful of ingredients, you can transform regular chocolate sandwich cookies into adorable bunny-shaped bites covered in creamy chocolate. Kids will have fun helping to shape the bunnies, and adults will love how effortlessly cute they turn out.
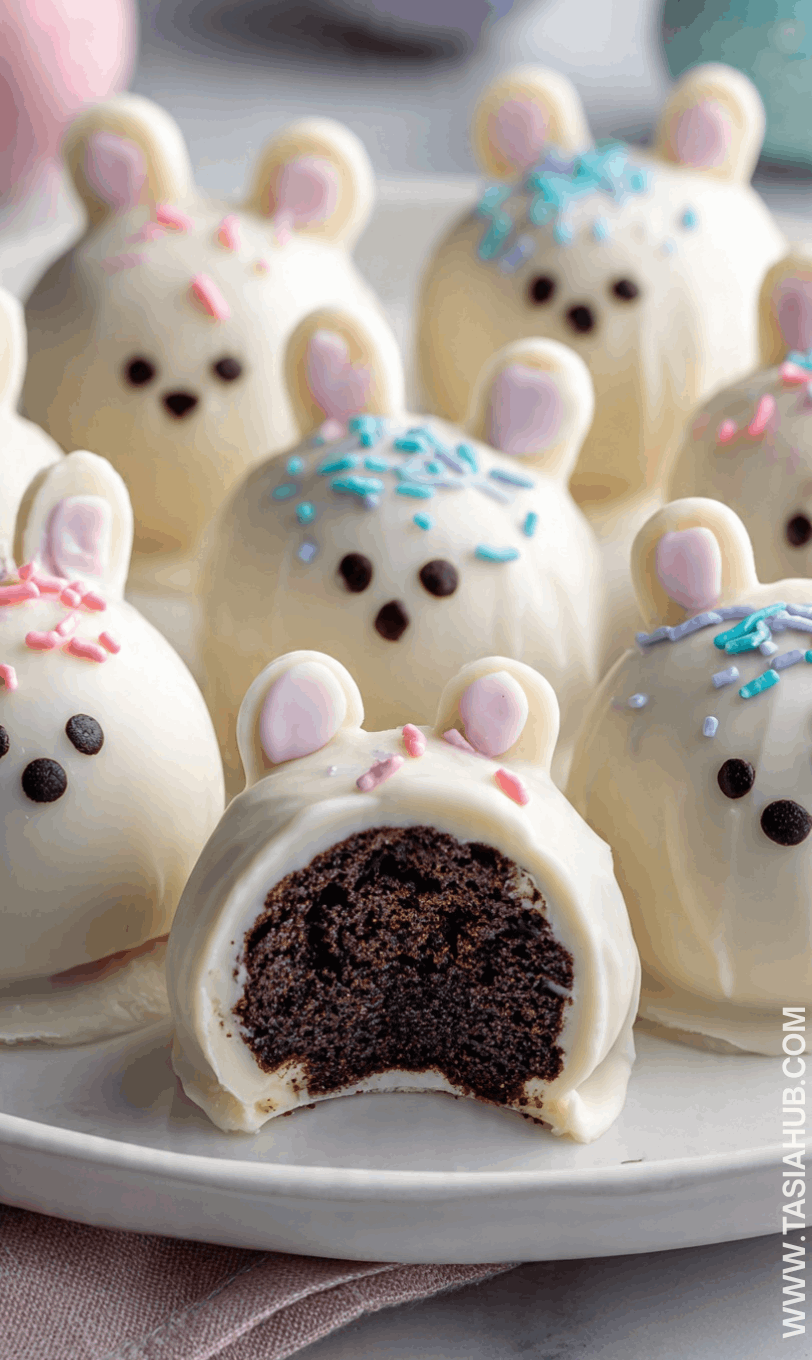
The beauty of these treats is in their versatility. You can keep them simple with a smooth white chocolate coating or go all out with pastel sprinkles, edible eyes, and tiny pink noses. They’re perfect for gifting too—imagine a little box of these cute bunnies tucked into a basket for a friend, neighbor, or teacher.
Beyond their appearance, these Easter Oreo balls are delightfully rich and indulgent. Every bite offers that classic Oreo crunch paired with creamy frosting and a sweet coating that melts in your mouth. They’re the kind of dessert that disappears fast, so you might want to double the batch if you’re planning to share!
Why You’ll Love It
- Adorable and festive: These bunny-shaped treats instantly bring the Easter spirit to your table, making your dessert spread extra fun and memorable. Kids (and adults!) will love spotting all the little bunnies.
- Super simple to make: No complicated techniques or fancy equipment required. If you can crush cookies, mix, and dip, you can make these Easter Oreo balls in under an hour.
- Perfectly bite-sized: Each ball is just the right size for snacking or sharing, making them ideal for parties, Easter baskets, or even a sweet surprise for coworkers.
- Customizable decorations: From pastel sprinkles to tiny edible eyes and noses, you can make each bunny unique. It’s a fun way to get creative and add your own personal touch.
- Crowd-pleasing flavor: Who doesn’t love the combination of creamy chocolate, Oreo cookies, and frosting? These Easter Oreo balls hit all the right sweet spots without being overly rich.
Ingredient List
For the Oreo Balls
- 24 chocolate sandwich cookies (about 1 package)
- 8 oz cream cheese, softened
For the Coating & Decorations
- 12 oz white chocolate or candy melts
- Pink candy melts or colored icing (for noses)
- Mini chocolate chips or edible eyes
- Optional: pastel sprinkles for extra flair
Ingredient Notes
- I always use full-fat cream cheese—it makes the Oreo balls super creamy and easy to shape.
- Don’t skip the cookies! Crushing them finely is key for that perfect texture.
- White chocolate works best for coating; it’s smooth and sets nicely for decorations.
- Using mini chocolate chips or edible eyes instantly brings the bunnies to life.
- For a pop of color, pastel sprinkles make these Easter Oreo balls extra festive—and fun to gift!
Kitchen Equipment Needed
- Mixing bowl: To combine the crushed cookies and cream cheese smoothly. I love using a medium glass bowl—it makes mixing easier.
- Food processor or zip-top bag + rolling pin: For crushing the cookies finely. I usually go with a food processor for speed.
- Baking sheet: To place the shaped Oreo balls before coating. Nonstick is best to prevent sticking.
- Parchment paper: Keeps the balls from sticking and makes cleanup a breeze.
- Microwave-safe bowl or double boiler: For melting the chocolate or candy melts. I personally prefer a microwave-safe bowl for quick melting.
- Spoon or small cookie scoop: Helps portion out the balls evenly. A cookie scoop makes them perfectly uniform every time.
- Toothpick or fork: For dipping the balls into chocolate neatly.
Instructions
Step 1: Crush the Cookies
- Place the chocolate sandwich cookies in a food processor and pulse until finely crushed.
- Pro tip: If you don’t have a food processor, put the cookies in a zip-top bag and crush them with a rolling pin until they’re almost powder.
- Pour the crushed cookies into a mixing bowl.
Step 2: Mix in the Cream Cheese
- Add the softened cream cheese to the crushed cookies.
- Use a spatula or your hands to combine until the mixture forms a smooth, sticky dough.
- Pro tip: Make sure the cream cheese is fully softened; cold cream cheese makes mixing harder and can leave lumps.
Step 3: Shape the Bunnies
- Scoop out small portions of the dough and roll into balls about 1 inch in diameter.
- For the bunny ears: gently pinch a small section on the top of each ball and shape into two little ears.
- Pro tip: Keep your hands slightly damp to prevent the dough from sticking.
Step 4: Chill the Bunnies
- Place the shaped bunnies on a baking sheet lined with parchment paper.
- Refrigerate for at least 30 minutes to firm up before dipping.
- Pro tip: Chilling helps the balls hold their shape during coating and prevents them from breaking apart.
Step 5: Melt the Chocolate
- In a microwave-safe bowl or double boiler, melt the white chocolate or candy melts until smooth.
- Pro tip: If using a microwave, heat in 20–30 second intervals and stir in between to prevent burning or clumping.
Step 6: Dip and Decorate
- Using a toothpick or fork, dip each bunny ball into the melted chocolate until fully coated.
- Place back on the parchment-lined baking sheet.
- Add decorations: use mini chocolate chips or edible eyes for the eyes, pink candy melts or icing for the nose, and optional pastel sprinkles.
- Pro tip: Work quickly before the chocolate sets to make adjustments to ears or decorations.
Step 7: Let Them Set
- Allow the coated bunnies to set completely at room temperature, or refrigerate for 10–15 minutes for faster setting.
- Once firm, your Easter Oreo balls are ready to serve or package for gifting!
Tips and Tricks for Success
- Use softened cream cheese: It makes mixing much easier and ensures a smooth, creamy texture.
- Chill before dipping: Refrigerating the bunnies for at least 30 minutes helps them hold their shape while coating.
- Work in batches: Dip a few bunnies at a time to prevent the chocolate from hardening too quickly.
- Keep hands slightly damp: Prevents the dough from sticking while shaping the bunnies.
- Use parchment paper: Makes cleanup easy and stops the coated bunnies from sticking.
- Decorate quickly: Add eyes, noses, or sprinkles before the chocolate sets for the best results.
Ingredient Substitutions and Variations
- Cookies: Swap chocolate sandwich cookies for golden Oreos for a lighter, vanilla twist.
- Chocolate coating: Use milk chocolate or dark chocolate instead of white chocolate for a different flavor profile.
- Cream cheese alternative: For a dairy-free version, try vegan cream cheese—it works just as well.
- Decorations: Use colored sugar, sprinkles, or edible glitter for extra festive flair.
- Flavor twists: Add a teaspoon of vanilla or almond extract to the cream cheese mixture for an extra layer of flavor.
Serving Suggestions
- I love placing a few Bunny Oreo balls on a pastel-colored dessert platter for an Easter brunch—it instantly brightens up the table.
- They’re perfect tucked into little cellophane bags or mini boxes as gifts for neighbors, teachers, or friends.
- Serve alongside a scoop of vanilla ice cream for a fun, indulgent dessert combo.
- Add a few to a kids’ Easter basket—they make a sweet surprise that’s way better than store-bought candy.
- Pair with a cup of hot chocolate or a warm latte for an afternoon treat—you’ll want to sneak a few yourself!
Storage and Reheating Instructions
- Store in an airtight container in the refrigerator for up to 1 week.
- For longer storage, freeze the coated Oreo balls for up to 2 months—just thaw in the fridge before serving.
- Avoid leaving them out at room temperature for too long, as the chocolate coating may soften.
- No reheating needed—these are best enjoyed cold or at room temperature.
- If the chocolate gets a little soft, pop them in the fridge for 5–10 minutes to firm up again.
Frequently Asked Questions
Can I use a different type of cookie?
Absolutely! Golden Oreos or even chocolate chip cookies can be used. Just make sure to crush them finely so the mixture holds together.
Do I have to use cream cheese?
Yes—cream cheese is key for the smooth, sticky texture that makes shaping the bunnies easy. You can try a dairy-free cream cheese for a vegan version.
Can I make these ahead of time?
Definitely! You can shape and chill the bunnies a day in advance, then dip them in chocolate when you’re ready to serve.
How do I store leftover Oreo balls?
Keep them in an airtight container in the fridge for up to a week, or freeze them for longer storage.
Can I decorate them differently?
For sure! Pastel sprinkles, edible glitter, or different colored candy melts all work. Get creative with the ears and faces—it’s part of the fun!
Why are my bunnies cracking when I dip them?
This usually happens if the balls aren’t chilled enough or the chocolate is too thick. Make sure they’re firm and work in small batches.
Did you try this recipe? Let me know in the comments how it turned out! I love seeing your Easter Oreo balls come to life.
Bunny Oreo Balls
Equipment
- Mixing Bowl
- Food processor or zip-top bag + rolling pin
- Baking Sheet
- Parchment paper
- Microwave-safe bowl or double boiler
- Spoon or small cookie scoop
- Toothpick or fork
Ingredients
For the Oreo Balls
- 24 chocolate sandwich cookies about 1 package
- 8 oz cream cheese softened
For the Coating & Decorations
- 12 oz white chocolate or candy melts
- Pink candy melts or colored icing for noses
- Mini chocolate chips or edible eyes
- Optional: pastel sprinkles for extra flair
Instructions
Step 1: Crush the Cookies
- Place the chocolate sandwich cookies in a food processor and pulse until finely crushed.
- Pro tip: If you don’t have a food processor, put the cookies in a zip-top bag and crush them with a rolling pin until they’re almost powder.
- Pour the crushed cookies into a mixing bowl.
Step 2: Mix in the Cream Cheese
- Add the softened cream cheese to the crushed cookies.
- Use a spatula or your hands to combine until the mixture forms a smooth, sticky dough.
- Pro tip: Make sure the cream cheese is fully softened; cold cream cheese makes mixing harder and can leave lumps.
Step 3: Shape the Bunnies
- Scoop out small portions of the dough and roll into balls about 1 inch in diameter.
- For the bunny ears: gently pinch a small section on the top of each ball and shape into two little ears.
- Pro tip: Keep your hands slightly damp to prevent the dough from sticking.
Step 4: Chill the Bunnies
- Place the shaped bunnies on a baking sheet lined with parchment paper.
- Refrigerate for at least 30 minutes to firm up before dipping.
- Pro tip: Chilling helps the balls hold their shape during coating and prevents them from breaking apart.
Step 5: Melt the Chocolate
- In a microwave-safe bowl or double boiler, melt the white chocolate or candy melts until smooth.
- Pro tip: If using a microwave, heat in 20–30 second intervals and stir in between to prevent burning or clumping.
Step 6: Dip and Decorate
- Using a toothpick or fork, dip each bunny ball into the melted chocolate until fully coated.
- Place back on the parchment-lined baking sheet.
- Add decorations: use mini chocolate chips or edible eyes for the eyes, pink candy melts or icing for the nose, and optional pastel sprinkles.
- Pro tip: Work quickly before the chocolate sets to make adjustments to ears or decorations.
Step 7: Let Them Set
- Allow the coated bunnies to set completely at room temperature, or refrigerate for 10–15 minutes for faster setting.
- Once firm, your Easter Oreo balls are ready to serve or package for gifting!
Notes
Nutritional Value
(Approximate values per serving — 1 Bunny Oreo Ball)- Calories: 120–140 kcal
- Carbohydrates: 14–16 g
- Sugar: 10–12 g
- Fat: 7–9 g
- Saturated Fat: 4–5 g
- Protein: 1–2 g
- Fiber: 0–1 g
- Sodium: 70–90 mg